Probiotic 101 and How To Make Rejuvelac

In this post I will show you how to make rejuvelac easily using quinoa. I came across rejuvelac while looking for ways to make vegan cheese. I gave it a go and have since successfully made a few batches. As it turns out, rejuvelac is not only easy to make but is also rich in probiotics. 

By the way, if you want to make vegan cheeses, I highly recommend the Artisan Vegan Cheese by Miyoko Schinner which, I must say, is ah-mayyy-zing! I’ve made several non-dairy nut-based cheeses using her recipes already. Anyway, I digress…let’s get back to our topic here: rejuvelac and tiny little microorganisms which call our body, home.

Warning – I’m going to geek out a little talking about science-y stuff here because bacteria is a topic that is very close to my heart. I love them because small as they are, they play a significant role in our very existence.

So, on that note…

Did you know most of our immune system lies in the gut?

If yes, well done! You must have paid attention in Science class.

If no, well, you’ve learned something new today and you can brag about your new-found knowledge tomorrow to your friends or colleagues.

Here’s another fun fact. A healthy human body is home to around 100 trillion bacteria.

That’s a hell lot of bacteria! That’s 100 microbes for every 1 gene in our bodies! We have more bacteria in us than we do genes.

Fascinating isn’t it?

Each of us has our own unique ecological community of microorganisms called microbiome that literally share our body space, living in our gut, mouth, skin, etc. Some of them are good, some of them are bad, and some just sit and watch the fight between the two. They can even make us fat.

A  recent study showed that when a scientist took gut bacteria from human twins — one lean and one obese — and transferred them into lean mice, the mice with bacteria from fat twins grew fat; those that received bacteria from lean twins stayed lean. This just goes to show how  important our gut bacteria are to our metabolism and our digestive system.


How To Make Your Own Probiotic

Probiotics are good bacteria which serve to prevent the overgrowth of potentially harmful microorganisms. Although study on probiotics is limited, we have tons of anectodal evidence that they are beneficial to our immune system and our digestive health.

And yes there’re still more research that need to be done to better understand how probiotic helps to promote health but I don’t see what you can’t self-experiment – most (great) scientists do it. I do it. Configure your body to promote healthy bacterial colonies and see how you feel.

You can get probiotic supplements from most health stores, but  they can be quite expensive; and why buy when you can make your own probiotics at home, by making rejuvalac.

Rejuvelac

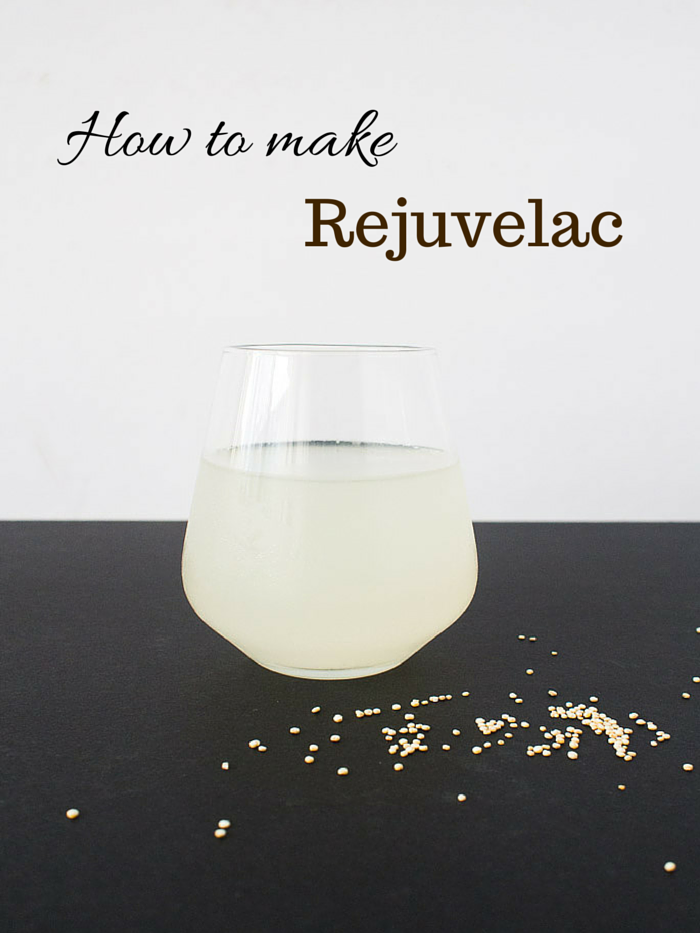
Rejuvelac is an enzyme-rich, probiotic living drink made by fermenting sprouted grains such as rye, barley, millet, buckwheat, rice, quinoa, or other grains. It contains lots of vitamins B, K and E, proteins and enzymes that aid digestion, and the growth of good bacteria such as Lactobacillus bifidus and Aspergillus oryzae.

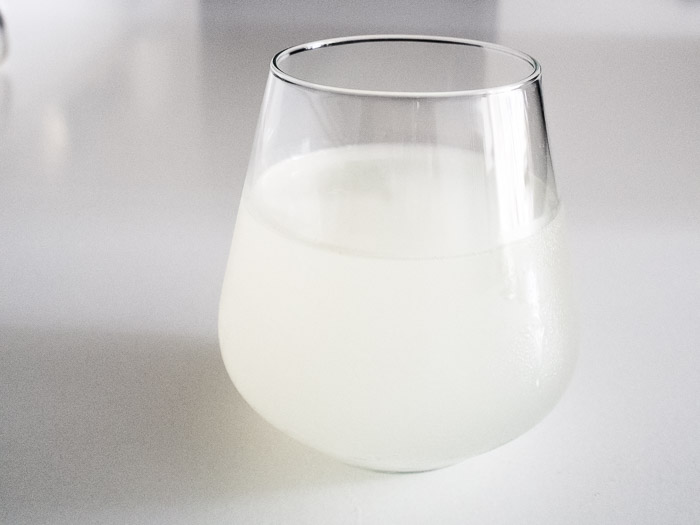
It tastes slightly tangy and earthy with a subtle hint of lemony sour. It is slightly fizzy and refreshing to drink. Again, it is very easy to make and quite inexpensive. You basically soak the grains, rinse daily until they sprout (i.e., produce a cute little tail at one end), add water, wait a few days while it ferments,  strain and voilà, you just made rejuvelac.

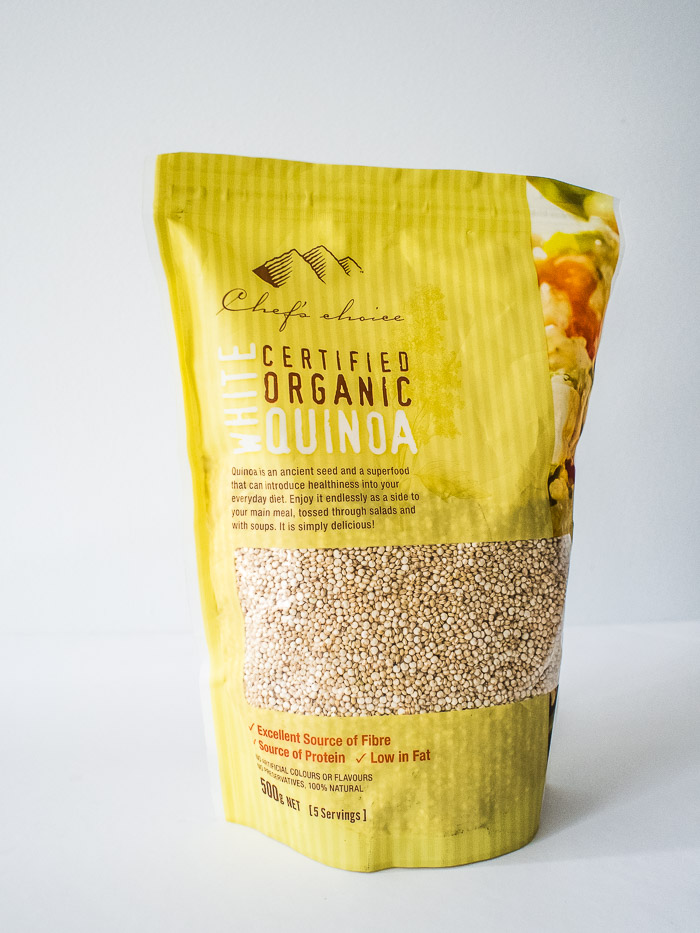
I highly recommend using organic quinoa as they are quick and easy to sprout, but feel free to use other whole grain if you wish, bearing in mind that it may take longer to sprout other grains. Avoid grains that are already sprouted, and irradiated grain (this usually done on rice) which prevents sprouting. If you’re a first-timer, go with quinoa. Get the freshest and the best quality quinoa you can afford to give yourself the best possible chance of success.

Rejuvelac

Here’s a simple recipe which you can experiment with.

How to make Rejuvelac

Rejuvelac (makes total of 4 cups)

Ingredients

  • 1/2 cup organic quinoa
  • Water, preferably filtered but I tried with Sydney’s tap water and it worked
  • Mason glass jars big enough to accomodate 2 cups of liquid, I used ex-pasta sauce glass jars

Method

Step 1. Sprout the quinoa

  1. Rinse and drain 1/2 cup of quinoa.
  2. Fill up the jar with water. Cover with cheesecloth secured with a rubber band.
  3. Soak overnight. My quinoa sprouted the next morning so if yours do the same, just drain the water and proceed to Step 2. Otherwise, continue below.
  4. Drain the water, leaving the quinoa moist, but not covered in water.
  5. Rinse and drain quinoa a couple of times a day until they sprout (maybe once in the morning and once in the evening).
  6. Note: It only took 24 hours before my quinoa started to sprout.

Step 2. Ferment sprouted quinoa to make rejuvelac

  1. Fill the jar containing the sprouted quinoa with 2 cups water. Cover with cheesecloth secured with a rubber band.
  2. Place in a cool dark place.
  3. Taste each day until it develops an earthy, tangy, fermented taste – usually 2 to 3 days depending on the temperatures.
  4. Once ready, pour the liquid into a glass and serve.

Step 3. Drink and make a second batch

  1. Serve rejuvelac with some fresh lemon juice. You can store it in the fridge in an airtight container for about 7 days.
  2. To make a second batch. Add another 2 cups fresh water to the soft seeds so they are just covered, and after a further 1-2 days pour off your second batch.
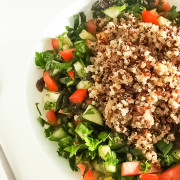
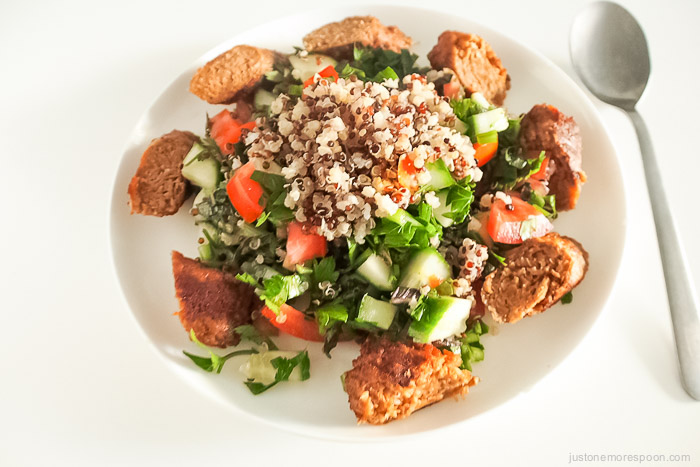
  3. Discard the quinoa seeds or add them to your salad.

Tips

  1. If you see some white bubbly scum on the surface of your rejuvelac during fermentation, just scrape it off.
  2. Always check the smell. It should smell fermented but not off. If it smells bad or if there is the slightest sign of mold, throw the whole lot away.
  3. I like to drink it chilled with some lemon juice.

So I hope you would try making your own rejuvelac. And if you do give it a go, let me know what you think.

Keren x

Healthy Vegan Anzac Biscuits (Sugar-free and Gluten-free)

OLYMPUS DIGITAL CAMERA

If you’ve been looking for an easy, healthy and tasty recipe for Anzac biscuits, then let me introduce you to my gluten-free, and refined sugar-free version.

Anzac biscuits are traditionally made with rolled oats, sugar, golden syrup, butter, white flour and coconut. These healthy vegan Anzac biscuits, on the other hand, are made using coconut oil, nut butter and maple syrup and I must admit it’s pretty hard to stop at one.

OLYMPUS DIGITAL CAMERA


Why you will love these

These cookies are loaded with oats. Oats are low in calories (one cup gives you only 130 calories). They provide high levels of fibre and have a high satiety index which makes you feel full for longer.[1] Studies have also shown that oats can help lower your cholesterol levels,[2] reduce the risk of type 2 diabetes[3] and increase your appetite-control hormone,[4] which helps you lose weight.

I used a mixture of coconut oil and peanut butter, but if you want, you can replace these with macadamia oil, olive oil and your favourite nut butter such as almond or cashew butter.


Healthy Nutty Anzac Biscuits
Recipe Type: Baked Goods
Cuisine: Gluten free, sugar free, vegan
Author: Keren
Prep time:
Cook time:
Total time:
Serves: 20 cookies
A delicious healthy treat for the family
Ingredients
  • 2 cups gluten-free rolled oats
  • 1/2 cup desiccated coconut or coconut flakes
  • 1/2 cup flaked or chopped almonds
  • 3-4 tablespoons maple syrup or rice malt syrup
  • 2 tablespoons peanut butter
  • 2 tablespoons coconut oil (melted)
  • 2-3 tablespoon of hot water
  • 1 teaspoon vanilla extract
  • 1 teaspoon bicarbonate of soda (baking soda)
  • a pinch of salt
Instructions
  1. Add all the dry ingredients (oats, coconut, almonds and salt) into a bowl or a food processor (I use the Tefal Cuisine Companion).
  2. Add the wet ingredients (oil, peanut butter, maple syrup, water and vanilla extract) into the dry ingredients.
  3. Turn on the food processor – I use Cuisine Companion (dough attachment P7) and mix for about 15 seconds or until the mixture sticks together.
  4. Take a spoonful of mixture and form into a small ball. Place onto a baking sheet lined with baking paper. Repeat with the remaining mixture.
  5. Flatten the balls using the back of the spoon with enough room around them so they don’t crowd into each other.
  6. Bake in a low 150 C (300 F) preheated oven for 20 -30 minutes or until golden brown. Cool completely before eating.
  7. Store in an airtight container for about a week.
Notes
If you don’t have a food processor or cuisine companion you can just throw everything in a bowl and use your hands to mix everything together. It will take about 10 minutes to mix everything through but the result will be so worth it.


References:

[1] European Journal of Clinical Nutrition, September 1995; 49(9): 675-90

[2] American Journal of Clinical Nutrition, August 2002; 76(2):351-8

[3] Experimental and Clinical Endocrinology & Diabetes, February 2008; 116(2):132-4

[4] Nutrition Research, October 2009; 29(10):705-9

Vegan Gluten Free Pumpkin Pancakes

I love pumpkin, and I love pancakes. So when I had some pumpkin leftovers from making pumpkin soup, I thought of making pancakes with them. And since I’m trying to bake more gluten-free stuff in general, I thought I’d try to make the pancakes gluten free too. And it worked. I crafted the recipe based on by Vegan 8 Life Changing Pancake recipe which by the way, is on my ‘must try’ list.

OLYMPUS DIGITAL CAMERA

I used almond flour, tapioca and potato starch mix for my gluten-free flour mix and the combination seems to work quite well. You can just use potato starch if you don’t have tapioca starch but I won’t recommend using just tapioca starch on its own as it will make your pancakes a tad tough.

OLYMPUS DIGITAL CAMERA

OLYMPUS DIGITAL CAMERA

These pancakes are a bit dense and not as fluffy as wheat pancakes but I kinda like the denser texture. You might be tempted to use a bit more pumpkin puree here (I did) but try not to overdo it as it will make your batter too wet and you won’t get properly cooked pancakes (1 – 2 tablespoon extra should be ok). I also added a heap of spices in my batter because I like spiced pumpkin (who doesn’t). And don’t forget the salt: it brings out the flavour of all the different ingredients and makes them taste just that much better.

700 x 933

VEGAN GLUTEN FREE PUMPKIN PANCAKES
Recipe Type: Breakfast
Cuisine: Vegan, gluten free
Author: Little Green Habits
Prep time:
Cook time:
Total time:
Serves: 15
These are tasty, gluten–free, tender vegan pumpkin pancakes which are healthy, simple and easy to make. Perfect for chilly winter mornings.
Ingredients
  • 1 cup almond flour
  • ¾ cup non-dairy milk + 1 tbsp of lemon juice
  • 1/3 cup packed pumpkin puree
  • ¼ cup tapioca starch
  • ¼ cup potato starch
  • 4 tablespoon maple syrup
  • 1 tablespoon vanilla extract
  • 1 tablespoon coconut oil (melted)
  • 2 teaspoon baking powder
  • ½ teaspoon bicarbonate soda
  • 1 teaspoon allspice/pimento
  • ½ teaspoon cinnamon
  • ½ teaspoon salt
Instructions
  1. Combine 3/4 cup milk and lemon juice and let rest for 5 minutes to curdle. Then add melted coconut oil, maple syrup, pumpkin, vanilla extract and whisk to combine.
  2. Add flour, tapioca and potato starch, baking soda, baking powder, salt and all spices into Cuisine Companion equipped with the mixing blade. Mix using P9 for 5 second.
  3. Add the wet ingredients and mix using P7 for 10 second.
  4. If you don’t have a Cuisine Companion, sift flour, tapioca and potato starch, baking soda, baking powder, salt and all spices together into a large bowl. Pour the wet ingredients into the dry and stir well until smooth.
  5. Let the batter sit for 15-20 minutes before cooking the pancakes. This gives time for the baking powder and starch to soak up the liquid, which in turn produces a fluffy, well cooked pancake.
  6. Heat up a non-stick pan over low heat. Your pan needs to heat up for ten minutes, so there is even cooking with each pancake.
  7. I used a 4.5 inch round cookie cutter to produce perfectly round and evenly cooked pancakes. If you do this, place the cookie cutter on the hot pan and then spray the whole of the inside with non-stick spray. You must use non-stick spray, or the pancakes will stick to the pan. Once ready, add about 1/4 cup of batter to the pan and quickly smooth out the top with the back of a spoon. Let it cook for 3-4 minutes, or until the top is looking dry and the edges are dry and firm. Flip over and cook another 2 minutes. Let the pancake to cool down a little before serving to improve the texture.
  8. Serve with maple syrup, additional pureed pumpkin or whatever else you desire. The pancakes reheat well the next day in the microwave.

Cuisine Companion Launch and How to Make Whole Wheat Oat Dinner Rolls

What’s the first thing you do when you have a cooking robot? Get it to knead you some bread, of course.

Screen Shot 2015-03-19 at 1.46.41 am

A few weeks ago I went to a VIP event as one of the founding members of the Tefal Cuisine Companion Cuisine Club (Hello Bizzylizcook and Vegetaraian :o) . At the VIP event I got to play with this wonder machine and made a delicious vegan risotto and apple crumble effortlessly.

Cuisine Companion

It’s such a versatile machine. It chops, whips, mix, kneads, cooks, steams, blends, stirs, emulsifies, whisks, sears, crushes, mills and heats food. In the beginning I was afraid that it might be a bit complicated to use but it turns out to be quite easy and straightforward with an intuitive user interface and six automatic functions.

That first weekend I decided to test-drive my demonstration model, making one of my favourite breads, Maple Oat Bread. I use a combination of whole-wheat flour and oats which help lower the gluten content of the bread and increases its nutritional value. Though I’m trying to eat less bread, I’ve never been a fan of complete deprivation, so rather than stop eating it altogether I’d rather try making it healthier and better for me (and maybe eat a bit less of it). So when I discovered you can turn oats into flour and make bread with it, you could imagine my excitement.

Screen Shot 2015-03-19 at 1.45.53 am

Why I love it:

This bread is quite easy to make so you can certainly make it by hand if you want. However, the Cuisine Companion makes it even easier as you don’t have to knead it. The machine does all the work, including maintaining an optimum proofing temperature. Once I had put all the ingredients in, the only thing I had to do was to wait and then shape the dough into bread rolls. Too easy.

What’s good about it:

In my book, oat is superfood. Here’s 5 reasons why you need to make oat bread, not that you need any.

5 Reasons Why You Need To Make Oat Bread

  1. Oats are high in fibre and are a good source of antioxidants, vitamins and minerals
  2. Oats help you control your appetite [1]
  3. Oats help regulate blood pressure [2]
  4. Oats are rated no. 1 for breakfast, in satiety index [3]
  5. Oats may improve insulin sensitivity [4]

Screen Shot 2015-03-19 at 1.45.53 am

Whole Wheat Oat Dinner Rolls

Ingredients

  • 300ml warm water
  • 1 packet of dry yeast
  • 1 tbsp maple syrup (you can add up to 3 tbsp if you like it sweeter)
  • 1 cup of whole-wheat flour
  • 1 cup of rolled oats, plus a few tablespoons, divided

Methods

  1. Place the yeast and 300ml of warm water in the bowl fitted with the kneading/crushing blade. Launch the P1 pastry program. After 30 seconds, open the lid and add the flour, oat and salt. Note that this program will knead the dough for 2 minutes and then it will stop for 30 minutes while maintaining the temperature at 30C.
  2. After 40 mins, remove the dough using a spatula and knead for 5 mins or so by hand until it forms a loose ball.
  3. Place the remaining oats on a small bowl. Pick up the dough ball and gently roll it over the oats.
  4. Leave on a tray lined with baking paper. Leave to rest for 1 hr 30 mins.
  5. Preheat the oven to 200°C.
  6. Place a bowl of water on the lower rack in the oven (this will help achieve a nice crust). Bake for 25 mins. Lower the oven to 180°C and cook for an extra 15 to 20 minutes.

Disclosure: I received a complementary Cuisine Companion from Tefal both to play with and for editorial purposes.

You can find out more about the Tefal Cuisine Companion at https://www.cuisinecompanion.com.au/. It is now available at select Harvey Norman stores across Australia.

References:

[1] Nutrition Research, October 2009; 29(10):705-9

[2] Journal of Family Practice, April 2002; 51(4):369

[3] European Journal of Clinical Nutrition, September 1995; 49(9): 675-90

[4] European Journal of Clinical Nutrition, June 2007; 61(6):786-95

Vegan Soba Mee Goreng With Teriyaki Tempeh

There’s no denying I love a good stir fry. It’s easy, speedy, and it transforms any left overs you have in the fridge. One night, it occured to me that I haven’t had fried noodles for a while and I had this sudden craving for the sweet mee goreng I used to have as a child when I was growing up.

So I created this noodle recipe inspired by that memory. I wanted to create something as delicious but I wanted something better, healthier and more nutritious. Most stir-fry noodles are dripping in oil which makes me cringe sometimes.

This recipe only uses two tablespoons of oil for four servings. It’s a cross between soba noodle salad and mee goreng and it’s full of the colours and flavours I love from the stir fry noodles in my childhood.

Vegan Soba Mee Goreng With Teriyaki Tempeh
Recipe Type: Lunch
Cuisine: Vegan
Author: Keren
Prep time:
Cook time:
Total time:
Serves: 4
A comforting but healthy fried noodles that is slightly sweet, slightly salty, fragrant, substantial and every bit delicious.
Ingredients
  • 1 bunch baby broccoli, roughly chopped
  • 1 large onion, thinly sliced
  • 5 garlic cloves
  • 2 tbsp coconut oil
  • 1 tbsp sesame oil
  • 3 tbsp soy sauce
  • 1 tbsp sweet soya sauce
  • 250g tempeh*, cut into cubes
  • 2 bundles of buckwheat noodles
  • 8 okras, sliced
  • 2 carrots, sliced
  • 1 tbsp sesame seeds
  • Ground pepper
  • 1/3 cup tbsp teriyaki sauce
Instructions
  1. Melt 1 tbsp oil in a wok on high heat, fry marinaded tempeh for 1 minute, flip and cook until golden brown, set aside.
  2. Cook buckwheat noodles according to packet instruction.
  3. Melt 1 tbsp oil, add sliced onion and sauté until soft. Add garlic and fry for about 1 minute. Add chopped broccoli, stir for 30 seconds.
  4. Add 1/3 cup of water into the wok and stir for 10 seconds.
  5. Add sliced carrots and okras.
  6. Add soy sauce, sweet soya sauce, and sesame oil. Toss all ingredients to combine.
  7. Season with ground pepper.
  8. Garnish with sesame seeds and serve.
Notes
Tempeh is a delicious health food made from fermented soy bean. It’s rich in protein and is a perfect substitute for meat.

Vegan Soba


Roasted pumpkin and lentil salad with shiso leaves

I’ve only started using purple leaves or shiso leaves (also known as perilla leaves) a few months ago when I discovered this interesting looking plant amongst all the familiar herbs in the vegetables section. It has a very fragrant smell and it has this striking purple colour on one side of the leaf and a deep green colour on the other side. If you’re familiar with Japanese or Korean food, you may have come across this item without realising it (which I did). It is very popular in Korean cuisine in particular and is usually served pickled.

pumpkin-salad-3

It tastes somewhat like coriander (has a fragant note to it) but not as strong. At first, I didn’t know what to use it with so I experimented a fair bit. It seems to work on a lot of things. At the very least, it never ruined anything to which I added the shiso leaves. It adds an interesting flavour to Chinese stir-fries and it gives any salad I make a nice herbaceous twist.

It turns out that shiso leaves are rich in dietary fibre, essential minerals such as calcium, iron and potassium, and vitamins A, C and riboflavin, and the leaf components are undergoing research for potential anti-inflammatory properties. Needless to say, there are many reasons to try this delicious herb.

pumpkin-salad-1

One night recently I was rushed for time and had to make something quickly for dinner. So I made pumpkin and lentil salad with shiso leaves (among a few other things) and I was really surprised with how well it turned out. There’s not much preparation involved with this. Just roast the pumpkin (you can even leave the skin on if you can’t be bothered peeling it), cook the lentils, chop the shiso leaves, and combine everything in the bowl with olive oil and some seasonings. It is a great salad to have when you need something quick but more substantial than just salad greens.

Roasted pumpkin and lentil salad with shiso leaves
Recipe Type: Salad
Cuisine: Glutenfree, sugarfree, vegan and paleo
Author: Keren
Prep time:
Cook time:
Total time:
Serves: 4
A delicious and comforting salad that equally light and satisfying. It’s low in fat, high in fibers, vitamins and minerals and full of fresh flavours and aroma.
Ingredients
  • Half of butternut pumpkin, peeled and cut into big chunks
  • 4 sprigs of shiro leaves (about 10 medium size leaves)
  • 1 cup of green lentils, rinse well
  • 1/2 tsp salt
  • 3 tablespoons of olive oil
  • 1/3 cup of roasted pinenuts (optional but highly recommended)
  • Sea salt
  • Cracked pepper
Instructions
  1. Place pumpkin onto a nonstick roasting pan. Drizzle with about 1 tablespoon olive oil and generously sprinkle with sea salt. Toss to mix. Bake in a preheated oven at 180 C for 25 minutes or until cooked (if you can pierce it using a fork, it’s done).
  2. Meanwhile, transfer the lentil into a pan and cover with water, add 1/2 tsp of salt. Bring to a boil on medium heat. Turn down the heat and let simmer for 10 minutes until the lentils are tender but not mushy. Drain and rinse in cold water
  3. When the pumpkin is cooked, remove from the oven and let stand for 5-10 minutes until cool enough to handle. Chop into cubes.
  4. Pick shiso leaves from the sprigs. To chop the leaves,stack them on top of each other, roll them into a cigar and then slice thinly.
  5. Transfer all ingredients into a bowl, drizzle with the remaining olive oil and season with salt and pepper.
  6. Devour!
Notes
To roast pine nuts:[br]You can roast them in the oven for 15 minutes at 170C but the quickest way is on the stove. Heat a dry non-stick pan (no oil, no nothing) over medium heat for a couple minutes and add the pinenuts. Allow the pinenuts to toast for 30 – 45 seconds and then toss them in the pan. Repeat this process every 30 seconds until you start seeing them just turning brown, then remove and let them cool.[br][br]Be careful not to burn them.  They can go from nicely browned to burnt very quickly, so keep an eye on them.

pumpkin-salad-8

Simple Acai Berry Smoothie

Here’s another ‘superfood’ with which you should get acquainted. Açaí (ahh-sigh-ee) is a berry harvested from palm trees found in Brazil and Peru in Central and South America. It has become really popular due to its varied health benefits, as it is high in antioxidants, minerals, healthy fats, and vitamins.


Açaí berries come in several forms such as dehydrated in capsules, in frozen pulp, or as freeze-dried powder. I have only used the freeze-dried powders but I’m keen to try the frozen pulp form as it has a stronger taste, texture, and higher nutritional content. Though the freeze-dried form is very convenient to have laying around as you can add it to juice, smoothies, porridges, desserts, and pretty much anything which takes berries, to instantly boost the nutritional content of your meal.

Read more

Avocado and Tomato on (sprouted bread) Toast

I can be quite elaborate in the kitchen. Not on weekdays, because I’m usually busy with work but weekends – I can spend hours in the kitchen, making a 3 course meal for dinner, testing new recipes, experimenting with different ideas, ingredients, etc. I’m a bit obsessive with trying new things. I’m not sure if it’s because I’m adventurous or if I suffer from slight ADHD. Probably both. Sometimes I feel like a failure when I can’t think off anything ‘new’ or exciting to try and make.

Avocado on toast 1

But lately I’ve been doing a lot of self reflection and just trying to be in the moment. To focus on what’s really important, knowing very well that I can’t do everything. Being a bit of type A personality this is very hard to accept but I’m slowly coming to terms with it. Now, instead of worrying what to have for breakfast, I focus more on making sure I make the most of my weekend with Buzz whom I only get see on the weekends and my furbaby Missa. As a result, I’m much more relax and less moody now, though Buzz might disagree with me on the ‘moody’ part. But really, it’s been pretty awesome. We now have more time in the morning because I don’t spend hours in the kitchen perfecting my healthyvegan-gluten-free-sugar-free-paleo-(fill the blank) waffle recipe. Now, most Saturday and Sunday morning we would go out for a run around the park or the beach one day and then workout at the gym the other day. When we get home I would make avocado and tomato on toasted sprouted or sourdough bread for our post workout meal/ breakfast. It’s our new weekend routine and we look forward to it every week.

Avocado and tomato on toast

Image credit – BessotedGrace.com

I now realised that not every meal needs to be gourmet or complicated to be enjoyed, relished and shared. A healthy and delicious meal can be as simple one, two, three. So yeah, I’m pretty proud of this breakthrough and happy to be sharing it with you.

Avocado and Tomato on (sprouted bread) Toast 

Ingredients

  • 1 ripe avocado
  • 2 vine-ripen tomatoes
  • 3 slices of sprouted bread
  • 2 tsp of virgin olive oil
  • sea salt and pepper

Method

  1. Cut avocado in half, remove the core and score the flesh in one direction. Make sure you go deep enough until you touch the skin without going through it.
  2. Slice the tomatoes thinly using a sharp knife.
  3. Toast you bread and stand to cool for a few minutes.
  4. Assemble to toast. Scoop the avocado flesh and place the slices onto the toasted bread.
  5. Add sliced tomatoes and season with freshly cracked pepper and some sea salt.
  6. Drizzle with some olive oil and serve.

Optional flavour and nutritional booster

  1. Garnish with fresh mint or parsley for added freshness
  2. Sprinkle with chia seeds or flax seed for superfood boost
  3. Spread a bit of vegemite on the toasted bread before assembling for an interesting flavour twist and extra vitamins

Vegan Mango Ice Cream

Welcome to summer! It’s hot, it’s humid, and you know want some tropical ice-cream. Well, how about a delicious vegan mango ice cream recipe that won’t break your new year’s resolution? This recipe uses no refined sugar, no egg, and no dairy but it tastes just like normal ice cream.

vegan mango ice cream

The reason I made this vegan mango ice cream was simply for economical reason. When I saw how expensive dairy-free ice creams are at the shop I was motivated to make my own. Yes it does take some time to make your own ice cream but the result is totally worth it.

Making ice cream is a 2 step process with a lot of cooling time in between so it’s best to make it the day before you want to eat the ice cream, unless you don’t mind eating mango cream… which is actually pretty nice and tasty too. The recipe calls for 1 tablespoon of vodka which keeps the ice cream from freezing completely, giving it a smooth texture and making it easier to scoop. Don’t worry, you won’t be able to taste the vodka.

Read more

Quinoa Tabbouleh Salad

Lately, Buzz and I have been going to my local library on Saturdays. It’s the perfect place to do some work on Saturdays, especially since the weather has heated up for summer and I don’t have air conditioning at home. On these days we go to the local café (Victoria Park Cafe) for lunch and we end up getting falafel rolls each time, every time, without fail. I surprised myself with the fact that I could actually have the same food… again, and again, and again. I used to be more adventurous and would refuse to order the same thing from a restaurant as it seems like ‘wasted calories’ but it seems that as I am getting older, I’m less fussed about these things.

But one thing hasn’t changed. The foods I eat when I’m eating out still inspire me, and I still like re-creating them at home.

When we order our falafel wrap, we always ask for ‘extra tabbouleh’ (also called tabouleh or tabbouli). We both love our tabbouleh! One day, the café owner was so generous that he gave us much more ‘extras’ than anticipated and couldn’t finish our wrap. Guess there’s only so much falafels and tabbouleh one can eat in a single sitting. By the way, for those who are unfamiliar with tabbouleh, it is a traditional (and very popular) lebanese salad served as part of a mezze plate or use to fill a wrap.

Like our giant falafel wraps.

One day, back at home, I felt like some tabbouleh and decided to make my own customised version. I used quinoa to increase its protein content and I ended up accidentally making it gluten-free and wheat-free. And since there’re no falafels in the house, I added beans to the salad to make it more substantial and satisfying.

Not sure if you can get addicted to salad but it was hard to put the fork down once I started eating this.

Quinoa Tabbouleh Salad

Ingredients:

  • ½ cup of quinoa
  • 2 large tomatoes, finely diced
  • 1 large cucumber, finely diced
  • 4 cups of finely chopped flat leaf parsley
  • 1/2 can of red kidney beans, rinsed and drained
  • 1 tablespoon of lemon juice
  • 2 tablespoon of extra virgin olive oil
  • Sea salt and freshly cracked pepper to season

Method:

  1. Cook quinoa in 1 cup of vegetable stock until tender but not too soft. Check out this post for the complete instruction on how to cook quinoa. Set aside to cool.
  2. Transfer parsley, quinoa, tomatoes, cucumber and red kidney beans into a big bowl.
  3. Drizzle with the extra virgin olive oil. Toss gently.
  4. Season with  freshly ground sea salt and cracked pepper and serve

Though we love our falafel roll, we like to eat our quinoa tabbouleh salad with some Linda McCartney Vegetarian Sausages :)

So, have you had tabbouleh before? Do you like it?