Penne with ‘Meaty’ Vegan Ragu with Gino’s Gourmet Groceries
I love my pasta. I love how something so simple as boiled dried dough, made out of flour and water, can bring such comfort and delight.

Before I became a vegan, one of my favourite pasta sauces to make was ‘ragu’, a meat-based Italian sauce, which is rich, thick, delicious and full of flavours. It was, in more ways than one, awesome.

When I eat food, it invokes all sorts of feelings and emotions inside of me. Not all the time, of course, because sometimes eating is just the mere act of ‘re-fuelling’ oneself. The meal can take many forms, but all share the same mundane, unremarkable purpose, to stop that feeling of hunger in its tracks.
But other times, more often than not, I eat to feel things (as opposed to stop feeling things, like the sensation of hunger). I eat to make myself feel joyful, gratified, indulged, pacified, inspired, delighted, happy, and alive.

I wanted to re-create that feeling I used to get whenever I had a good ragu back in the old meat-eating days, only this time with a vegan ragu. And so I went to my kitchen laboratory and started experimenting I chose mushroom and tempe as my plant-based proteins of choice and, boy, did they rise up to the challenge. I also added some shredded kale leaves to give the dish another layer of texture and flavour, and to boost its nutritional content, and because I just love kale in general.

The result is a thick and rich ragu that tastes so ‘meaty’ and delicious that you’ll forget it contains no meat at all. I hope you will give it a go!
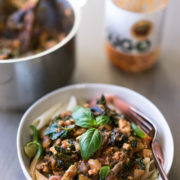
Penne with ‘Meaty’ Vegan Ragu

A deliciously rich, protein-packed vegan ragu that’s nourishing, satisfying and oh so comforting.
- 250 g tempeh (diced to about 1cm cubes)
- Leaves from three stalks of kale (chopped or shredded (optional))
- 1/3 cup basil leaves
- 3 large brown mushrooms (chopped)
- 1 large red onion
- 4 garlic cloves (chopped)
- 2 tablespoons olive oil
- 700 g jar of pasta sauce*
- 250 g gluten free penne pasta*
- Heat the oil in a pan over medium-high heat. Cook red onion for 2 minutes, stirring constantly, until softened slightly.
- Add the minced garlic and diced tempeh and cook for 3-4 minutes, stirring occasionally until browned.
- Add the chopped mushroom, cook, stirring occasionally.
- Add the pasta sauce, bring to boil, then add the chopped kale into the pot and stir until kale is cooked, about 1 minute.
- Stir in fresh basil. Remove from heat and set aside.
- Cook the pasta in a large saucepan of salted boiling water according to the packet instruction until al dente. Drain, reserving 1 cup of the cooking liquid.
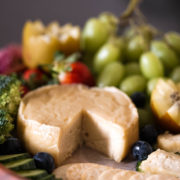
- Mix sauce with pasta, adding the reserved cooking liquid to coat pasta with sauce. Serve with Vegan Parmesan.
*I use Spiral Foods: Organic Garlic & Basil Sugo; and Casalare: Gluten Free Vegie Penne Pasta, both from Gino’s Groceries.
This recipe is sponsored by Gino’s Gourmet Groceries, an online store that partners with the best independent producers who share their values of doing things the right way. They supply real, honest food, with no artificial ingredients and no nasties, at a fair price. I must say that the pasta sauce and the gluten-free vegan penne I got from them were some of the best I’ve ever tasted.
And because the team at Gino’s Gourmet Groceries are awesome, they’re giving you, my lovely readers, a 25% discount on our next purchase with them. Just use the code “PASSIONATELY25” during checkout.
P.S. If you make this, I’d love to hear from you. Leave a comment below or find me on Instagram and share your creation. Don’t forget to tag me @passionatelykeren so I won’t miss your post.
Keren x