Posts

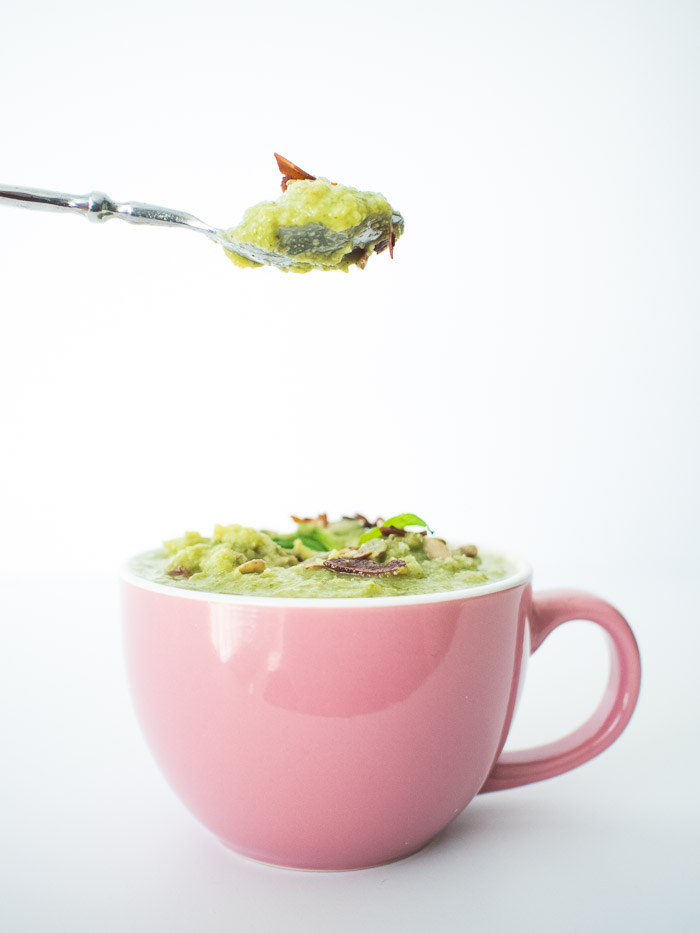
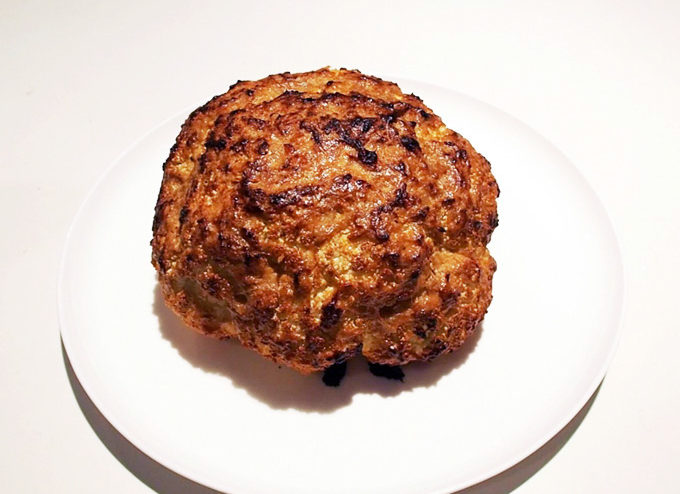
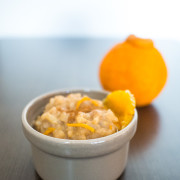
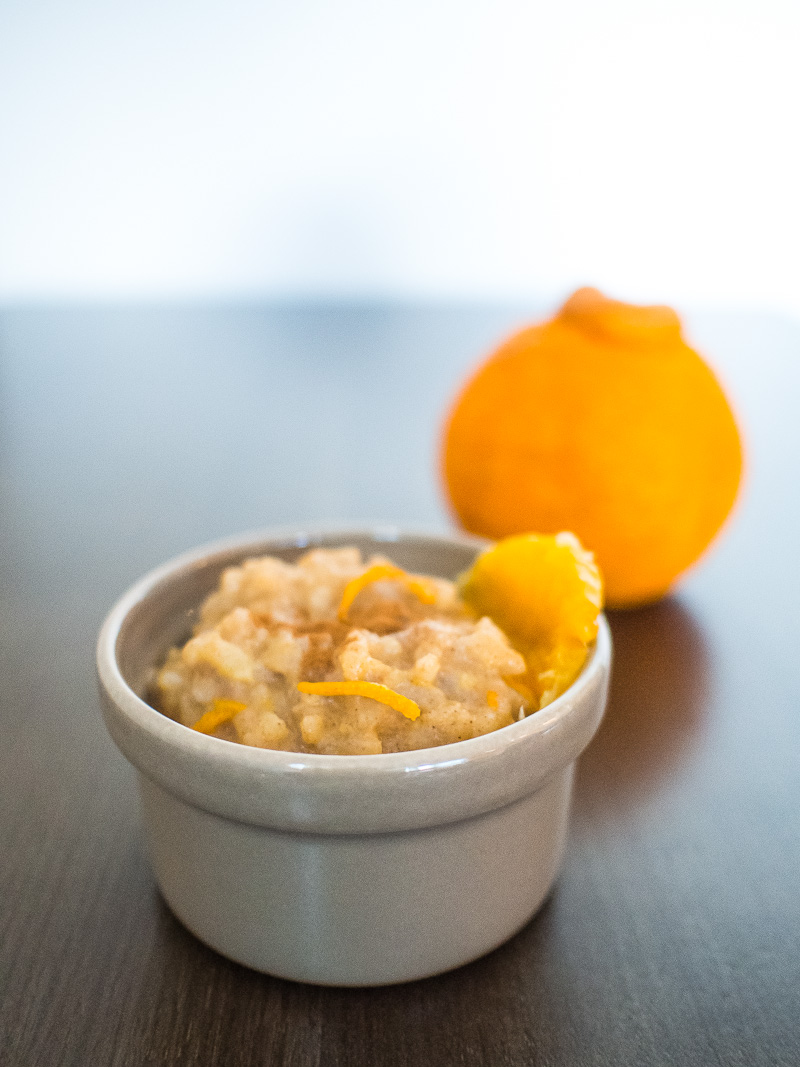
Sumo Citrus Spiced Rice Pudding (vegan and sugar-free)

Sumo Citrus Rice Pudding-2

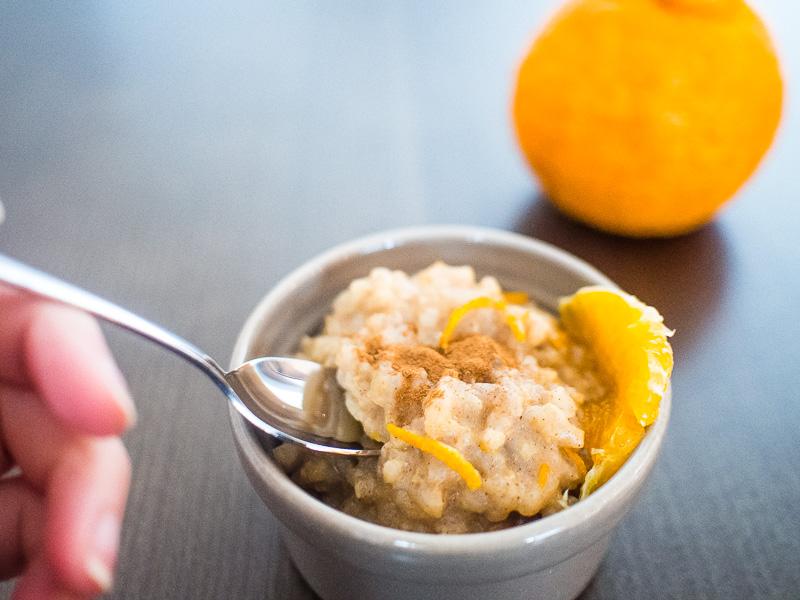
This weekend I whipped up a super easy, super delicious and nutritious recipe and entered it into a competition. It’s my healthy, refined sugar-free and dairy-free take on the normal rice pudding. It is very simple and easy to make. Just need to cook your rice in a pan, make your smoothie and then stir your smoothie into the rice. Let it simmer until thick and creamy and voila! You have your rice pudding. Serve with a sprinkle of ground cinnamon and tell your partner it was such a hard work. It may score you a shoulder massage or two :P.

Why I love it:

What I love about most about this rice pudding is the fact that it’s rich and creamy but also light and refreshing at the same time. It has a gentle citrus tang and it smells like Christmas morning.

Made using walnut citrus smoothie it contains lot’s of omega-3 from walnut (great for the brain) and the goodness of one whole orange which is rich in fibre and Vitamin C and is a good source of minerals such as Thiamin, Folate and Potassium.

Sumo Citrus Rice Pudding-3

Make this. I promise you will love it.


Sumo Citrus Spiced Rice Pudding
Recipe Type: Dessert
Author: Keren
Prep time:
Cook time:
Total time:
Serves: 4
Creamy, nutty and fragrant rice pudding that is mildly sweet, citrusy and every bit delicious. It’s a rich and decadent dessert, easy to make, dairyfree and refined-sugar free.
Ingredients
  • 1 large Sumo Citrus
  • 1 cup arborio rice
  • a pinch of salt
  • 2 cups of filtered water
  • Walnut Sumo Citrus Smoothie
  • Sumo Citrus flesh
  • 2 cups of filtered water
  • ½ cup of walnut
  • ½ cup rice malt syrup
  • ½ tsp allspice powder
  • 2 tsp vanilla extract
  • 1 tsp ground cinnamon
Instructions
  1. Grate the zest of Sumo Citrus. Set aside. Remove the flesh for smoothie and reserve 2 strips of peel.
  2. Make Walnut Sumo Citrus Smoothie: In a blender, add all the smoothie ingredients. Blend for 1-2 minutes until smooth. Set aside.
  3. Combine 2 strips orange peel, 2 cups water, a pinch of salt in a heavy-based saucepan and bring to a boil.
  4. Add the rice and return to a boil, then reduce the heat to simmer and cook, stirring occasionally, until the liquid is absorbed, about 10-15 minutes.
  5. While the rice is cooking, slowly add the smoothie. Simmer over medium-low heat, stirring, until the liquid is mostly absorbed, about 15-20 minutes.
  6. Remove the peel and stir in zest. Serve immediately with a sprinkle of ground cinnamon.

If you want to help me win the competition, you can vote up my recipe and get me in the top 5. Let me know if you voted in the comment section so I can personally thank you. Thank you!

Vote For Little Green Habits!

Did you make this recipe?

Please let me know how it turned out for you! Leave a comment below and/or share a picture on Instagram with the hashtag #littlegreenhabits.

Love and greens, 

Keren x

Easy Homemade Cashew Milk Recipe

If you’ve never had cashew milk, you need to do yourself a favour and find some, or make some.

Why I love it:

It is absolutely delicious, creamy and refreshing and is great on its own, as a smoothie base or served alongside your favourite cookies. What makes cashew milk different from other nut milks is that it requires no straining after blending. That means you don’t need a nut bag, and you don’t need to figure out what to do with the pulp. Less messing about and less waste. All you have to do is pour it into a glass and enjoy. I love adding some vanilla extract, cinnamon or other spices such as ground ginger, nutmeg or cardamom to give delicious flavour to my cashew milk.

Cashew milk is also full of nutrients and minerals, including magnesium, phosphorus, iron, potassium and zinc as well as protein and healthy fats.

Notes and Tips:

I soak my cashews before I blend them. Soaking helps with the blending process and also helps release some beneficial enzymes.

Add vanilla extract, cinnamon or other spices such as ground ginger, nutmeg or cardamom.


Homemade Cashew Milk
Recipe Type: Breakfast
Author: Keren
Prep time:
Total time:
Serves: 5
Simple, no strain nut milk that is creamy, delicious, and nutritious.
Ingredients
  • 1 cup raw cashews
  • 4 cups water
  • 2 tablespoons maple syrup or rice malt syrup
  • 2 teaspoons vanilla extract
  • Dash of sea salt
  • Pinch of cinnamon (optional)
Instructions
  1. Soak the cashews in water for at least 4 hours. Alternatively you can soak them overnight in the refrigerator.
  2. Drain the cashews and rinse until the water runs clear.
  3. Add the cashews and two cups water to a blender.
  4. Start on a low setting and increase the speed until the cashews are totally pulverised. This could take 2 minutes in a high-powered blender or longer in a regular blender.
  5. Blend in 2 cups more water,* and your sweetener of choice, vanilla extract, sea salt or cinnamon (optional). If your blender can’t totally break down the cashews, strain the milk through a fine mesh strainer or cheese cloth.
  6. Store the milk in a covered container in the refrigerator. It should keep for 3 to 4 days.

Did you make this recipe?

Please let me know how it turned out for you! Leave a comment below and/or share a picture on Instagram with the hashtag #littlegreenhabits.

Love and greens, 

Keren x

How To Make Kale Chips

Sitting on my top list of healthy treats is this crunchy, salty and moorish snack – Kale chips. Kale chips are so big right now, but man, they’re so expensive to buy. It can cost anywhere from $5-$10 a packet and yet, they are so easy to make…once you get the hang of it.

Kale chips (3 of 4)

It never ceases to amaze me how many different variety of vegetables are out there. Even though I make a conscious effort to always try new vegetables, I always find stuff I never tried before (not knowingly anyway).

First of all, in case you’ve been living under a rock in the past few years and never tasted Kale at all, what is Kale?

Kale chips (1 of 1)-2


Kale is a type of leafy green vegetable (also comes with purple leaves)

  • It’s a superfood
  • It has more iron than beef and more calcium than milk per calorie
  • It is high in fibre, vitamin K, vitamin C, calcium, iron, and beta carotene
  • It has anti-inflammatory and anti-cancer properties

To environmentalists, Kale is the new ‘beef” as it is highly sustainable and can grow in most climates. If we all eat Kale in place of meat, we would significantly reduce our carbon footprint and global warming caused by meat production for human consumption.

OK, forget about nutrition, environment or animal welfare – let’s talk taste.

Well, when eaten raw, kale can actually tastes quite strong and too earthy to a lot of people. When baked however, it tastes kind of like feathery thin potato chips. It is super crunchy and can be quite addictive if I may say so myself. It’s almost tastes too good to be healthy for you.

Although it takes a bit of preparation (rinsing, de-steming, drying), making Kale chips is very rewarding. I’ve suffered through many batches of burned or soggy kale chips over the years but I’ve learned some valuable lessons along the way and I’d love to pass my few tips along to you.

How to make perfect Kale Chips every time

  1. Play with your baking time. It may take less or more time to cook depending on the size of your leaves or the heat distribution of your oven. Every oven is different — mine is a fan force electric oven which tends to be hotter that most gas ovens. One piece of advice – Go low and go slow.

Before baking

Kale chips (1 of 1)


After baking… see how they shrink in size?

Kale chips (1 of 4)

  1. Make sure the leaves are dry prior to baking otherwise they might go soggy and;
  2. Try to have all the pieces approximately the same size for even cooking.
  3. That’s it! Let’s do it!


Kale chips (4 of 4) 


How To Make Kale Chips
Recipe Type: Snacks
Cuisine: Glutenfree, sugarfree, soyfree
Author: littlegreenhabits
Prep time:
Cook time:
Total time:
Serves: 2-3
Kale Chips
Ingredients
  • 1 bunch of Kale – washed
  • Olive oil
  • Sea salt and favourite dry herbs (i.e., cayenne, paprika) for seasoning
Instructions
  1. Wash and dry kale thoroughly. Use a salad spinner to drain most of the water and then dab dry using paper or kitchen towel. If the leaves are wet they will go soggy so make sure they’re dry.
  2. Remove the leaves from the thick stems and tear into bite size pieces.
  3. Toss in olive oil and seasoning (I used olive oil spray in cans).
  4. Place leaves on a baking tray lined with baking paper or foil.
  5. Bake in 150C oven for 15-20 minutes until crispy but not burnt – slightly brown on the outer edges but still mostly green. Turn the baking tray around halfway through for even cooking.
  6. Munch On!

Easy Broccoli Soup

This soup is perfect for a post weekend detox. One bowl, a handful of ingredients and voila, a hearty and delicious bowl of soup that is super nutritious and delicious. And guess what, it’s oil-free too.

Easy Broccoli Soup - 4

Easy Broccoli Soup - 1Cuisine Companion

Easy Broccoli Soup


Easy Broccoli Soup

Ingredients

  • 1 large broccoli (about 650g), roughly chopped.
  • 1 liter vegetable stock
  • 4 cloves of garlic, chopped
  • Freshly ground sea salt and pepper to taste
  • Pepitas, Vegan Parmesan and Kinda Bacon flakes (optional but they’ll make your soup tastier by an exponential factor)

Equipment: Tefal Cuisine Companion (see note)

Method

  1. Put all ingredients in the bowl (use the chopping blade)
  2. If using the Tefal Cuisine Companion, press automatic program soup (P1 100C 30 min).
  3. Do some shopping while the machine does its thing.
  4. Serve.

Note: You can also make this on the stove by putting all ingredients in a big pot. Cook on medium heat for 30 minutes or until the broccoli is tender and then blend the mixture using a hand blender.

Thick and scrumptious… just like a good soup should be.

Easy Broccoli Soup - 1

Roasted pumpkin and lentil salad with shiso leaves

I’ve only started using purple leaves or shiso leaves (also known as perilla leaves) a few months ago when I discovered this interesting looking plant amongst all the familiar herbs in the vegetables section. It has a very fragrant smell and it has this striking purple colour on one side of the leaf and a deep green colour on the other side. If you’re familiar with Japanese or Korean food, you may have come across this item without realising it (which I did). It is very popular in Korean cuisine in particular and is usually served pickled.

pumpkin-salad-3

It tastes somewhat like coriander (has a fragant note to it) but not as strong. At first, I didn’t know what to use it with so I experimented a fair bit. It seems to work on a lot of things. At the very least, it never ruined anything to which I added the shiso leaves. It adds an interesting flavour to Chinese stir-fries and it gives any salad I make a nice herbaceous twist.

It turns out that shiso leaves are rich in dietary fibre, essential minerals such as calcium, iron and potassium, and vitamins A, C and riboflavin, and the leaf components are undergoing research for potential anti-inflammatory properties. Needless to say, there are many reasons to try this delicious herb.

pumpkin-salad-1

One night recently I was rushed for time and had to make something quickly for dinner. So I made pumpkin and lentil salad with shiso leaves (among a few other things) and I was really surprised with how well it turned out. There’s not much preparation involved with this. Just roast the pumpkin (you can even leave the skin on if you can’t be bothered peeling it), cook the lentils, chop the shiso leaves, and combine everything in the bowl with olive oil and some seasonings. It is a great salad to have when you need something quick but more substantial than just salad greens.

Roasted pumpkin and lentil salad with shiso leaves
Recipe Type: Salad
Cuisine: Glutenfree, sugarfree, vegan and paleo
Author: Keren
Prep time:
Cook time:
Total time:
Serves: 4
A delicious and comforting salad that equally light and satisfying. It’s low in fat, high in fibers, vitamins and minerals and full of fresh flavours and aroma.
Ingredients
  • Half of butternut pumpkin, peeled and cut into big chunks
  • 4 sprigs of shiro leaves (about 10 medium size leaves)
  • 1 cup of green lentils, rinse well
  • 1/2 tsp salt
  • 3 tablespoons of olive oil
  • 1/3 cup of roasted pinenuts (optional but highly recommended)
  • Sea salt
  • Cracked pepper
Instructions
  1. Place pumpkin onto a nonstick roasting pan. Drizzle with about 1 tablespoon olive oil and generously sprinkle with sea salt. Toss to mix. Bake in a preheated oven at 180 C for 25 minutes or until cooked (if you can pierce it using a fork, it’s done).
  2. Meanwhile, transfer the lentil into a pan and cover with water, add 1/2 tsp of salt. Bring to a boil on medium heat. Turn down the heat and let simmer for 10 minutes until the lentils are tender but not mushy. Drain and rinse in cold water
  3. When the pumpkin is cooked, remove from the oven and let stand for 5-10 minutes until cool enough to handle. Chop into cubes.
  4. Pick shiso leaves from the sprigs. To chop the leaves,stack them on top of each other, roll them into a cigar and then slice thinly.
  5. Transfer all ingredients into a bowl, drizzle with the remaining olive oil and season with salt and pepper.
  6. Devour!
Notes
To roast pine nuts:[br]You can roast them in the oven for 15 minutes at 170C but the quickest way is on the stove. Heat a dry non-stick pan (no oil, no nothing) over medium heat for a couple minutes and add the pinenuts. Allow the pinenuts to toast for 30 – 45 seconds and then toss them in the pan. Repeat this process every 30 seconds until you start seeing them just turning brown, then remove and let them cool.[br][br]Be careful not to burn them.  They can go from nicely browned to burnt very quickly, so keep an eye on them.

pumpkin-salad-8

Simple Acai Berry Smoothie

Here’s another ‘superfood’ with which you should get acquainted. Açaí (ahh-sigh-ee) is a berry harvested from palm trees found in Brazil and Peru in Central and South America. It has become really popular due to its varied health benefits, as it is high in antioxidants, minerals, healthy fats, and vitamins.


Açaí berries come in several forms such as dehydrated in capsules, in frozen pulp, or as freeze-dried powder. I have only used the freeze-dried powders but I’m keen to try the frozen pulp form as it has a stronger taste, texture, and higher nutritional content. Though the freeze-dried form is very convenient to have laying around as you can add it to juice, smoothies, porridges, desserts, and pretty much anything which takes berries, to instantly boost the nutritional content of your meal.

Read more

Avocado and Tomato on (sprouted bread) Toast

I can be quite elaborate in the kitchen. Not on weekdays, because I’m usually busy with work but weekends – I can spend hours in the kitchen, making a 3 course meal for dinner, testing new recipes, experimenting with different ideas, ingredients, etc. I’m a bit obsessive with trying new things. I’m not sure if it’s because I’m adventurous or if I suffer from slight ADHD. Probably both. Sometimes I feel like a failure when I can’t think off anything ‘new’ or exciting to try and make.

Avocado on toast 1

But lately I’ve been doing a lot of self reflection and just trying to be in the moment. To focus on what’s really important, knowing very well that I can’t do everything. Being a bit of type A personality this is very hard to accept but I’m slowly coming to terms with it. Now, instead of worrying what to have for breakfast, I focus more on making sure I make the most of my weekend with Buzz whom I only get see on the weekends and my furbaby Missa. As a result, I’m much more relax and less moody now, though Buzz might disagree with me on the ‘moody’ part. But really, it’s been pretty awesome. We now have more time in the morning because I don’t spend hours in the kitchen perfecting my healthyvegan-gluten-free-sugar-free-paleo-(fill the blank) waffle recipe. Now, most Saturday and Sunday morning we would go out for a run around the park or the beach one day and then workout at the gym the other day. When we get home I would make avocado and tomato on toasted sprouted or sourdough bread for our post workout meal/ breakfast. It’s our new weekend routine and we look forward to it every week.

Avocado and tomato on toast

Image credit – BessotedGrace.com

I now realised that not every meal needs to be gourmet or complicated to be enjoyed, relished and shared. A healthy and delicious meal can be as simple one, two, three. So yeah, I’m pretty proud of this breakthrough and happy to be sharing it with you.

Avocado and Tomato on (sprouted bread) Toast 

Ingredients

  • 1 ripe avocado
  • 2 vine-ripen tomatoes
  • 3 slices of sprouted bread
  • 2 tsp of virgin olive oil
  • sea salt and pepper

Method

  1. Cut avocado in half, remove the core and score the flesh in one direction. Make sure you go deep enough until you touch the skin without going through it.
  2. Slice the tomatoes thinly using a sharp knife.
  3. Toast you bread and stand to cool for a few minutes.
  4. Assemble to toast. Scoop the avocado flesh and place the slices onto the toasted bread.
  5. Add sliced tomatoes and season with freshly cracked pepper and some sea salt.
  6. Drizzle with some olive oil and serve.

Optional flavour and nutritional booster

  1. Garnish with fresh mint or parsley for added freshness
  2. Sprinkle with chia seeds or flax seed for superfood boost
  3. Spread a bit of vegemite on the toasted bread before assembling for an interesting flavour twist and extra vitamins

Quinoa Tabbouleh Salad

Lately, Buzz and I have been going to my local library on Saturdays. It’s the perfect place to do some work on Saturdays, especially since the weather has heated up for summer and I don’t have air conditioning at home. On these days we go to the local café (Victoria Park Cafe) for lunch and we end up getting falafel rolls each time, every time, without fail. I surprised myself with the fact that I could actually have the same food… again, and again, and again. I used to be more adventurous and would refuse to order the same thing from a restaurant as it seems like ‘wasted calories’ but it seems that as I am getting older, I’m less fussed about these things.

But one thing hasn’t changed. The foods I eat when I’m eating out still inspire me, and I still like re-creating them at home.

When we order our falafel wrap, we always ask for ‘extra tabbouleh’ (also called tabouleh or tabbouli). We both love our tabbouleh! One day, the café owner was so generous that he gave us much more ‘extras’ than anticipated and couldn’t finish our wrap. Guess there’s only so much falafels and tabbouleh one can eat in a single sitting. By the way, for those who are unfamiliar with tabbouleh, it is a traditional (and very popular) lebanese salad served as part of a mezze plate or use to fill a wrap.

Like our giant falafel wraps.

One day, back at home, I felt like some tabbouleh and decided to make my own customised version. I used quinoa to increase its protein content and I ended up accidentally making it gluten-free and wheat-free. And since there’re no falafels in the house, I added beans to the salad to make it more substantial and satisfying.

Not sure if you can get addicted to salad but it was hard to put the fork down once I started eating this.

Quinoa Tabbouleh Salad

Ingredients:

  • ½ cup of quinoa
  • 2 large tomatoes, finely diced
  • 1 large cucumber, finely diced
  • 4 cups of finely chopped flat leaf parsley
  • 1/2 can of red kidney beans, rinsed and drained
  • 1 tablespoon of lemon juice
  • 2 tablespoon of extra virgin olive oil
  • Sea salt and freshly cracked pepper to season

Method:

  1. Cook quinoa in 1 cup of vegetable stock until tender but not too soft. Check out this post for the complete instruction on how to cook quinoa. Set aside to cool.
  2. Transfer parsley, quinoa, tomatoes, cucumber and red kidney beans into a big bowl.
  3. Drizzle with the extra virgin olive oil. Toss gently.
  4. Season with  freshly ground sea salt and cracked pepper and serve

Though we love our falafel roll, we like to eat our quinoa tabbouleh salad with some Linda McCartney Vegetarian Sausages :)

So, have you had tabbouleh before? Do you like it?

Vegan Halloween Edition- Roasted Brain

vegan-brain-1

Halloween. The second highest grossing commercial holiday after Christmas. What should I say, some people are for it, others are against it. As for me, my last Halloween dress up party was years ago so no spooky costume for me this year. I’m not really into gory stuff so the whole spooky halloween theme doesn’t really appeal to me.  I do however, love pumpkin and themed food so I love the creativity aspect of this event. I remember my last proper Hallooween brunch at Mr.G which was pretty weird and spooky with animal blood, hearts, ants, and other strange stuff. Reading the post again I can’t believe how much I’ve changed, being vegan and all. Eating animal body parts is now history for me. But as is the case with anything, it’s just good to reflect on the past, to see how far we’ve come.

So this year I’m doing a much much kinder Halloween :) Still somewhat spooky but definitely not as scary and weird.

Alright, let’s get into this recipe. It looks like brain, it’s vegan, gluten-free, paleo and it’s easy to prepare. It’s also healthy, tasty and certainly Instagram-worthy. If it doesn’t look impressive on camera, then what’s the point, right?

And right now you’re probably wondering how to create a vegan brain, eh? Well, it’s easy! It’s already out there.

Read more

Fennel Orange Strawberry Salad (vegan, paleo and gluten-free)

Wow! Where did the time go? I left the country for three and a half weeks and I came back to this Awesome. Weather. Spring has sprung!

One of the things I love about spring is the diverse range of fruits and vegetables available in this season: the berries, the citrus fruits, peas, cauliflowers, broccoli, asparagus, all the things I love to eat! Strawberries are cheap as chips and, oh my goodness, fennel is here! And I love fennel.

Strawberry and Orange Fennel Salad-3

Let’s be honest here, fennel and I weren’t friends until a couple years ago when I discovered that it’s actually a vegetable and not a weird-looking giant onion. It actually tastes really nice: it’s slightly sweet with anise-like flavour. You may need to get used to its flavour at first but if it is combined with the right ingredients, you can render its taste mild and delicate. I love eating it raw as it has the most irresistible crispy crunch similar to that of celery. It stays crunchy for a long time after it’s sliced or cut, making it a perfect ingredient for salads, and in fact, I think fennel salad tastes even better the next day.


Read more