First taste of Coles Nature’s Kitchen Range

I remember the days when finding vegan foods at cafes was almost as difficult as finding a decent date and the only way to have a veganised version of your old favourite foods is to make it yourself.  As much as I like cooking and experimenting in my kitchen, there are days when I don’t have the time to cook anything more than tofu and two veg for dinner.

I’m having more and more of those days now, being a new mum of a fussy 3 months old. Some days I don’t even get a chance to sleep, let alone cook.  Which is why I’m super excited when Coles announced the launch of its plant-based products range called Nature’s Kitchen. That’s right, Coles has come up with its range of plant-based products, 20 of them to be exact. Veggie patties, pasta, curry, sausages, you name it.

Being locally produced and Coles a native brand, the prices are quite competitive and sometimes more affordable than similar products which are mostly imported from the US. There are so many to choose from but here are the ones I especially loved:

  • Nature’s Kitchen Chicken Style Tenders
  • Nature’s Kitchen Smokey Grill Meat-Free Burgers
  • Nature’s Kitchen Original Meat-Free Sausage
  • Nature’s Kitchen Vegetable Tikka Masala (Pilau Rice)  and
  • Nature’s Kitchen Lentil Spaghetti Bolognese

The range is divided into two categories, one is ready-to-eat meals which you can just heat up in the microwaves and the second is premade munchies like sausages and veggie patties which you have to cook on the stove or in the oven.

Coles Natures Kitchen

I used these as my ‘emergency meals’ – for the odd times when I don’t have time to cook or ingredients to cook with. My husband and I had the Vegetable Tikka Masala and Lentil Spaghetti Bolognese one Sunday for lunch after we just got home from shopping for baby clothes (I was planning to cook until the baby started fussing and screaming for my attention).  There was no way I would be able to make anything decent before we both pass out from starvation. I popped these two in the microwave for a few minutes each and lunch was sorted.

Natures Kitchen spaghetti bolognese

At first glance, both of the ready-to-eat meals look a bit on the small side but once you’ve tucked in, they are actually quite substantial. Flavour-full and filling. I added some steamed vegetables (broccoli this time) as I often do to meals to boost their nutritional content and it was perfect! They tasted fresh, not too greasy and not too ‘healthy’, if you know what I mean. I actually like them both as they are quite delicious but given that I’m more of a ‘rice’ person, the Vegetable Tikka Masala (Pilau Rice) was my favourite of the two. My husband likes the pasta more so he’s happy to have the Lentil Spaghetti Bolognese all to himself.

Natures Kitchen Vegetable Tikka Masala

A few days later I found myself in a similar situation – it was 7pm and I haven’t had a chance to cook. The little one was screaming her head off while dear husband was trying to settle her. And so, I popped the Chicken Tenders in my air fryer and the Smokey Grill Meat-Free Burgers on the pan and made a decent dinner for two out of them.

Coles Natures Kitchen Meat-free Tenders

Meat-free Tenders served with vegan aioli

The tenders remind me of chicken nuggets! It has great texture and slight chewiness and a crunchy ‘skin’.

Coles Natures Kitchen Meat-free Tenders

Coles Natures Kitchen - Smokey Grill Meat-Free Burgers

The Smokey Grill Meat-Free Burgers is really good! I think this is my new favourite vegan burger patties, second to my home-made vegan burger. It has great BBQ flavour, seriously smokey, slightly sweet, chewy, and it doesn’t fall apart on the stove like I’ve found with most veggie patties.

Coles Natures Kitchen - Smokey Grill Meat-Free Burgers

And just a few of days ago, I made a big breakfast of scrambled tofu and sausages with the Original Meat-Free Sausages.

Coles Natures Kitchen - Original Meat-Free Sausages

How good do they look?! Very realistic looking sausages, has a good bite to it, mildly spiced and yum! I wouldn’t be surprised if people can’t pick up the fact that it’s vegan. I think this is going to be a game changer for a lot of people and one of Nature’s Kitchen popular products.

Coles Natures Kitchen - Original Meat-Free Sausages

Overall, I’m quite pleased with the Nature’s Kitchen products I’ve tasted so far and looking forward to trying the rest of their range. Well done Coles for making these delicious product range and making plant-based food more accessible to everyone. Times is definitely changing and there’s never a better time to eat vegan than now!

If you haven’t had a chance to try Coles Nature’s Kitchen range of products, check them out at your nearest store now and let me know what you think!

Disclaimer: This post is made in collaboration with Coles. All views and opinions shared are (and will always be) my own.

7 ways to shop healthy on a budget

Being on maternity leave, I need to watch my spending closely, including my grocery bill. I no longer splurge on expensive teas and gourmet jams but aside from that, I’m still able to shop healthy, after all, you are as healthy as what you put in your shopping trolley. Truth is, whether you’re a full-time student strapped for cash or a pensioner looking to save money, grocery shopping on a budget is a great skill to have. Unfortunately, while junk foods are notorious for being cheap, healthy food often gets a bad rap when it comes to affordability.

But it doesn’t have to be that way. It’s definitely possible to shop healthy and make healthy and delicious food on a budget even if you run short of time. Of course, this will take a bit of forward planning but if follow these steps, you will set yourself up for success.


1. Plan your meals

Planning your meals is a key part of staying on budget. Spend an hour a week planning your meals for the following week and then write up a shopping list. Ensure you check your kitchen to see what foods you currently have – don’t let a bag of rice or piece of garlic go to waste. Try to incorporate ingredients you already have in your pantry in your meal plan. Only buy what you will definitely use, so you won’t end up throwing things away.

2. Steer clear of snacks

Once you’re in the grocery store, make sure you stick to your shopping list! Don’t let yourself give in to the temptation of biscuits and potato chips (pro tip: don’t go shopping on an empty stomach). Not only that snacks tend to be quite expensive for what they are, and even the so called ‘healthy snacks’ tend to be borderline junk food. Snacking can easily become an unhealthy habit and is an easy way to spend a lot of money without getting any solid nutrition.

3. Eat at home

Cooking at home is far cheaper than eating out (take it from someone who knows!). You can typically feed a family of four at home for the same price as you can get a takeout meal for one or two. If cooking is a hassle for you, make a double batch every time you cook or make your meals in bulk on a Sunday and freeze them so that you can simply pop portions in the microwave for dinner throughout the week. Eating at home also comes with the benefit of knowing exactly what’s in your meal. 

4. Buy generic brands

I’m a big fan of buying home brand or generic brands for pantry staples. They offer a cheaper alternative to national brands and are often just as good. All food manufacturers are required to uphold strict food safety standards which means that you can be assured that the products you buy are of good quality, regardless of the brand.

5. Buy on sale

This one is thanks to a colleague of mine who always check the weekly catalogues to see what’s on specials, before she does her groceries. Stock up on your favourite products when they go on sale, especially things that has extended shelf life, like sugar, detergent, canned food tend to last for months or years. Canned beans, for example, can last for months (even years) and can be used as the base of a HelloFresh dinner.

6. Buy wholesome, less processed foods

Less processed foods tend to be cheaper, healthier and more filling than processed foods – for instance, rolled oats are cheaper than instant oats, and dried beans are cheaper than canned ones. Wholesome foods like whole grains, seeds, nuts, beans, fruits and vegetables are a great way to eat healthy without breaking the bank.

7. Buy frozen fruit and veggies

Given that fresh fruit and vegetables only really stay in season for a few months each year, buying fresh can end up being pretty costly. And just like how you can buy fresh to freeze, you can also buy frozen, instead of fresh. Frozen produce gives you taste and nutrition without the hefty price tag – and you can store them for months at a time without worrying about them wilting or going mouldy! Frozen fruit works great in baking, smoothies and as toppings for cakes or muesli, while frozen veggies are an easy way to liven up soups and stir-fries. 

Conclusion

Eating healthy on a budget doesn’t have to be difficult. Follow these simple tips and you’ll be well on your way to living a healthier lifestyle. And if you’re up for it, growing your own fruit and veg at home can help you save money, too!

Hope this post inspires you to start shopping healthily, no matter how tight your budget is. If you have any other tips, let me know! I’d love to hear from you.  


Keren x


Vegan Caramel

Can you really make a delicious vegan caramel without dairy? Well, of course you can! Read on to find out more.

Vegan Caramel

Firstly, a little life update – scroll down to get straight to the recipe.

People, I cannot believe it’s been months since my last blogpost. Between getting ready for the baby and organising things at work, I was left with very little time (and energy) to do anything else. I figured that I would have a ton of time during my maternity leave to catch up on things (doesn’t baby sleep all the time?). But as it turns out, while it is true that baby sleeps a lot, baby also feeds nonstop, pees like a drunken teenager, and cries in between sleeping and peeing. And baby’s preferred bed to sleep is – on mummy’s chest.

Today my baby is one month old. One month down, hundreds more to go. She’s slowly getting used to being a human and I’m slowly getting used to being a mum – nothing can ever prepare you for both. I’m acclimatising to the new routine and the inevitable sleep deprivation and now I’m able to squeeze in a bit of creative work in between feeding and changing nappies. Life as a new mother is hard – I don’t get much sleep, I have carpal tunnel syndrome in my hands from breastfeeding and my shoulder is sore all the time from carrying the baby around. That aside, I am doing well, and the baby is growing like a champ. Enough about me, it’s time to make some caramel.

Vegan Caramel

What I love about this recipe

Just five ingredients and minimal cooking effort for a sweet reward. What’s not to love? This recipe is coconut heavy so if you’re not a fan of coconut then it might not be for you. However, once cooked I find that it tastes less coconutty and more caramelly, so don’t dismiss it too quickly, you might still be pleasantly surprised.

It’s dairy-free and it tastes legitimately like caramel. The fleur de sel adds that extra depth of flavour but if you don’t have it, you can replace it with good quality sea salt. Texture-wise it is not a sticky caramel but a creamy one.

Make it, spread it, drizzle it, spoon it. This is what love tastes like.

Vegan Caramel

Vegan caramel

Delicious, rich and creamy dairy-free caramel

  • 400 ml coconut milk
  • 1 tbsp coconut oil
  • 1/2 cup coconut sugar
  • 1/2 tsp fleur de sel (optional – can be replaced with sea salt)
  • 1 tsp vanilla extract
  1. Add all ingredients into a saucepan
  2. Bring to boil on medium heat then reduce the heat to low simmer for 30 min, stirring every 10 min
  3. Watch for the next 10 min while it thickens and turn dark brown, stirring frequently.
  4. The caramel is ready when it covers the back of a wooden spoon. Turn off the heat and let cool before serving.

Store in an airtight container in the fridge for about two weeks.

P.S. If you make this, I’d love to hear from you. Leave a comment below or find me on Instagram or Facebook. Don’t forget to tag me @passionatelykeren so I won’t miss your post.

Keren x


Skillet Choc Chip Sweet Potato Cookie Brownies and Solidteknics NÖNI™ pan review


This Christmas I had the pleasure of trying out the NÖNI™ skillet by Solidteknics. I thought, what could be a better first use than to make something festive, like spiced sweet potato cookie brownies! But first, let me tell you about my new pan.


Having learnt about the potential dangers of nonstick cookware (see here and here) I am slowly transitioning my conventional nonstick pans (I’ve got 1 left now ) to safer and more environmentally friendly alternatives. I was excited to discover Solidteknics and their new cookware innovations: a range of beautifully crafted, sustainable pans with quality and durability to last many years to come. What I like about the nöni™ pan is that it is a seamless one-piece stainless steel pan. Being wrought from one solid piece means that it has no rivets, no welds or screws, no joints and therefore no more wobbly handles. It also works on a number of heat sources including induction, gas, ceramic, halogen, electric, oven, even fire if you wish to use it when camping in the bush.

Since I received my nöni™pan it has rarely seen the inside of my drawer. Due to its small size (I got the 17cm skillet, which is perfect for cooking or heating up small items) it gets used almost daily. The only issues I have with the pan is that occasionally, I get oil marks on the pan – they can be hard to remove using normal detergent. However, I’ve recently found out you can get a cleaning product called Barkeeper’s Friend, which will work wonders on those hard to clean oil marks, so hopefully this will no longer be an issue.

Anyway, if you’re looking for new pans for the new year, definitely consider this range.  Now that I have experienced their seamless stainless steels pan, I’m looking forward to trying their seamless wrought iron (AUS-ION™) pans next year, which perform just like normal cast iron pans but with half the weight and in a seamless one-piecer. I’ve never used bare cast iron before (most of my iron pots are enamelled) so it would be quite interesting going through the seasoning process (Note: all bare cast iron pans will need to be seasoned to make them non-stick). So that’s the plan for next year. For now, let’s make these super easy skillet cookie brownies.

This cookie brownie has the chewy fudgy brownie texture and crispy cookie top combined into one decadent dessert. It is also quite easy to make. I used my left over roasted sweet potatoes, but you can cook it however you like.  Just make sure they are cooked well or it will make mashing them difficult. The sweet potato adds moistness to the cake while boosting its nutritional content, and you won’t even notice it. The key to making this cookie brownie is not to over-bake it. Take it out as soon as a toothpick inserted into the centre comes out clean. Also, if you don’t have an equivalent size skillet that is oven-friendly, feel free to use an equivalent size baking pan.

Skillet Choc Chip Sweet Potato Cookie Brownies

Wet Ingredients:

  • ¾ cup cooked (mashed sweet potato)
  • ⅓ cup coconut oil (melted)
  • ⅓ cup coconut sugar (or plain sugar)

Dry Ingredients:

  • 1 cup plain flour
  • 1 tsp ground cinnamon
  • 1 tsp ground ginger
  • 1/2 tsp baking powder
  • ¼ tsp bicarb soda
  • ¼ tsp salt

Topping

  • ⅓ cup non-dairy chocolate chips
  1. Preheat oven to 180C.
  2. Sift the dry ingredients into a bowl. Mix to combine.
  3. Stir in the wet ingredient into the dry ingredients and mix just enough to moisten the mixture.
  4. Fold in chocolate chips, set aside a few tablespoons to dot the top.
  5. Pour mixture into the skillet and smooth the top with the back of the spoon or spatula. Dot with remaining chocolate chips.
  6. Bake for 25 minutes until the top is golden brown and the inside is cooked –  check by inserting a toothpick into the centre: if it comes out mostly clean then it’s done (a few moist bits are ok). If it’s still a bit wet, bake for another 2-4 minutes. The key is not to overbake the cookie brownie. Allow to cool for at least 10 minutes before serving.

P.S. If you make this, I’d love to hear from you. Leave a comment below or find me on Instagram or Facebook. Don’t forget to tag me @passionatelykeren so I won’t miss your post.

Keren x


If you like this post, sign up for my newsletter to get FREE recipes updates, lifestyle tips, and giveaways sent to your inbox!
As a vegan I hate spam. Your email address will not be sold or shared with anyone else.

[mc4wp_form id=”11238″]

December update (my big news)

Dear friends,

Christmas is around the corner and I hope you are looking forward to it as much as I am!

I thought it’s time for me to write a post update as you may have noticed my lack of activities on the blog and social media over the last few months.

Truth is, I had to take some time away from the digital world to find myself again in the real world. The last few months have been really a strange, crazy, scary, at times depressing and lonely but at the same time wonderful and incredible. Something big happened to me and I guess I never knew how much it would have impacted me on a personal and emotional.

I cut my hair…

Kidding. Well actually, I did cut my hair but that wasn’t the reason for all the drama.

I’m having a baby.

Yes, a baby!

Some days I still don’t believe it.

Some days I pretend that nothing has changed.

But there is nothing like pregnancy sickness and seeing your growing belly that zaps you back to reality. That you have another human growing in your body.

This whole experience has made me realised how little I know, and how little people (or at least my friends and family) talk about the emotional and mental rollercoaster associated with pregnancy. From trying to get pregnant, getting pregnant, and being pregnant. I wish someone had told me how tough it can be. Yes, pregnancy is wonderful, joyful, miraculous and all that jazz, but it is also very challenging. I wish someone had warned me how hard it can be. I could have been more prepared. 

But here I am now. I’ve survived the first trimester (it was awful, there I said it). But now, my pregnancy sickness has subsided and I’m feeling better and more like myself now… I’m on week 18 now and the baby is proofing nicely for autumn arrival. I watched it grew from a beating spot on the screen to now a fully fledged foetus with eyes and ears, and fingers and toes! 

I’m starting to ‘show’ a bit and looking more and more pregnant every day. I still have mixed feelings with the changes happening to my body – I love rubbing my growing belly but.…I can’t say I love the additional ‘cushion’ developing here and there. Nevertheless, I’m looking forward to the third trimester, to Christmas, to spending more time with Missa the dog, Nat the husband, and working on my new passion project – balcony gardening. I’m looking forward to sharing more of my garden with you in the future.

Anyway, if you’re still here, I just want to give you an immense and heartfelt thank you! Thank you for being such patient and loyal readers. Thank you for your email replies, likes, comments, tags, recipe-remakes, for everything. Thank you for making this blog feels like a worthwhile endeavour and thank you for being part of my life journey.

2019 will sure be a big year for me, I hope it will be for you too! In the meantime,

I wish you a very Merry Christmas and an amazing New Year. Take care my friends!

Much love,

Keren x

Creating a sustainable and ethical design with Julia Denes – Woodfolk

As I become more and more aware of our impact to the environment, I started to be more conscious as a consumer. Everything we do affect the environment. From our choice of food, our wastes, our transportations, our houses, our clothes, everything.

The good thing is, sustainable design movement is on the rise, and I am hopeful that the future will be filled with more sustainable, environmentally-friendly generations of people.

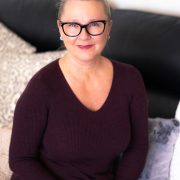
In this interview post, I sat down with one of my favourite designer, Julia Denes.

Julia Denes is a Sydney-based, Australian designer and the Founder of Woodfolk, a sustainable and ethical jewellery, homewares and accessories brand that works in collaboration with artisans in Nepal to handcraft its pieces from sustainable materials such as ceramic and Nepalese hardwood. She spent many years working as a qualified jeweller, designer and gemmologist in Sydney before launching Woodfolk in 2013. I absolutely love Julia’s work – the earthy tones, the organic, elegant forms, and the simple yet striking lines that commands attention. It brings me joy knowing these beautiful pieces are created sustainable and ethically. Here’s Julia…

Hi Julia, thank you for spending the time Just a warm up question, what did you have for breakfast this morning and why?

I always start my mornings with a Green Smoothie for brekky. I feel it helps me start my day on a healthy foot.

We know that you’re an uber-talented designer. Tell us something about you that most people might not know?

I love rom coms, eating chocolate, going to markets, singing in the car, going out for brunch on weekends. This is pretty much everything I do in my spare time.

Have you always wanted to be a jeweller/designer? What was your childhood dream?

I always knew I wanted to do something artistic, as I enjoyed it and it came naturally. I knew I wanted to be a jeweller when I spent two years travelling around the world and started making jewellery along the way with whatever materials I could find.

I can’t quite remember but I have a vague recollection of wanting to be a hairdresser as a child.

Tell us about your journey with Woodfolk, what inspired you to start this business?

As a designer and jeweller by trade, I have 10 years’ experience creating Fine Jewellery for prominent Jewellery houses around Australia and for private clients. I loved working with metal, diamonds and gemstones but at some point, started to feel drawn to more natural materials, such as wood and ceramics. Combining this new-found appreciation of these materials with my love of all things natural and ethical, I launched Woodfolk in August 2013. Woodfolk has given me the opportunity to express my creativity and apply my trade in a more authentic way, with inspiration coming from nature, my travels in third world countries and collaborations with the artisans I work with and their cultures. I’m proud to say that Woodfolk is now stocked in more than 70 stores around Australia, and over the last 4.5 years has developed a strong and loyal following.

What is the biggest challenge of running an ethical business?

Initially before launch, I found it a challenge to find the right people to work with overseas. I could have easily gone somewhere like China, India or Bali to work with a factory, not even needing any face to face contact, however that defeated the purpose of my business. I wanted to make it more personal and was looking to work with a family or an organisation that I respected. I chose Nepal because it felt like a good fit and I had always wanted to travel there. After doing months of research on materials available and skills of the local people, I booked a month-long trip there to give myself plenty of time.

The wonderful thing about Nepalese people is how open they are to helping you. From when I arrived, I found that they always made time to meet me, would always take my request seriously and if they couldn’t help, would provide details of someone that might be able to. I followed my instinct which eventually led me to exactly who I was looking to work with.

Tell us why people should support ethical businesses, and what can we do to ensure that we are not supporting businesses with unethical practices?

Like the Fashion Industry, jewellery has its own issues regarding the supply chain in terms of transparency around where its manufactured. Often, these products are made in China or neighbouring countries where cheap labour can be exploited and unfortunately, there hasn’t been much insight or transparency come through about the conditions of these factories.

I see transparency as being just as important as the design and the designer. From start to finish, one item might touch the hands and use the skills of 20 people so every customer has a right to know where their items are truly coming from. It’s my personal belief that people are inherently good and caring and that few would want to think that their purchases have been made in a sweatshop under terrible conditions. For too long, consumers have been kept in the dark about the supply chain. Transparency lifts the veil on a brands’ practices and allows consumers to factor in their behaviour as a global citizen into the purchasing decision.

As an ethical business, I hope to inspire other brands and business owners by providing a working model of what a fair trade and ethical business can look like. We demonstrate that working directly, personally and respectfully with our artisans and their families, using only natural materials that nature has provided us with, can be both fulfilling and profitable. Consumers should be asking brands where their products are manufactured and global movements such as Fashion Revolution are a true driving force behind consumer awareness around supply chain transparency.

Your design is so unique (and beautiful), tell us a bit about your creative process, including how you choose the material for your jewellery and your homewares?

Each piece is a collaboration between myself and our artisans in Nepal. All pieces are designed in my studio in Sydney, which can take anywhere between 1 and 3 months as there’s a lot of consideration and refining that takes place during this time. After the design work is complete, I will either travel to Nepal or send my designs over and from there finalise the design with our artisans. This is an important step as it is a demonstration of our collaboration – I want to know their opinion about the design and whether they think the materials, sizes, shapes are suitable and possible. I try to travel to Nepal as often as I can. When I go, it is essentially about making samples, but it is also about bonding and deepening our relationships, which is something you can’t do through a computer. Once the wood pieces are finished, these are sent back to me in Australia or if I have visited, I will take them home with me. Each item is then completed and finished in my studio. This includes all ceramics, silverwork and stringing. There’s a beautiful synergy in the process and collaboration of our pieces that make us different to other businesses.

The materials used are just as important as the pieces created. As a sustainable business with ethical practices, I use materials such as wood, ceramic, cotton, linen and nettle that nature has provided us with, without having to look too hard to find them, and without needing to fabricate them ourselves. These materials go through the cycle with us, and when no longer needed, can be turned into something else, or recycled.

What does a typical day in your world look like?

I don’t really have a typical day, however, mornings generally start with emails and a smoothie. Days can be filled with getting orders ready and sent; preparing for different design markets and trade shows; liaising with stockists and contacting new stores; developing new ideas to build on the Woodfolk range; photoshoots; all the usual business stuff; lots of cups of tea and the list goes on.

What inspires you? Where do you get most of your inspirations for your design?

I feel I’m inspired by different things each day. It could be a person, someone I know personally, someone I work with or someone I read about; it could be a moment walking in nature or a sudden surge of courage; it could be something visual such as a colourful flower, a beautiful photograph; lovely interiors; and every now and then its music, a song that I connect with straight away and play over and over again.

What is your favourite place in the world, and why?

Kangaroo Island, South Australia. The nature, the beaches, the wildlife are incredibly special. It’s all very up close, personal and raw. I camped there for a couple of weeks over Christmas break a few years ago and can’t wait for the opportunity to go back again.

Who is your role model, and why?

I wouldn’t say I have one role model but I am inspired by different people at different times. There are so many amazing people doing amazing things. I’m very inspired by ethical clothing designer Laura Seigel – her documentary Traceable is a must; New Zealand based Gosia Piatek from ethical brand Kowtow clothing; I also love the work of Shannon Sheedy from Dharma Door; and Carly Nance & Rachel Bentley from ethical store The Citizenry.

What are your goals and vision for Woodfolk? Or what can we expect from you in the next few months/year?

We’ve just launched our 7th collection called Earth, which is available now with my stockists and shortly via woodfolk.com.au. Having had a baby late last year, we’re also looking to include 100% cashmere baby blankets into our ongoing range. We’re also looking at the possibility of doing a pop-up store in Sydney sometime soon, so stay tuned!

If you could invite 3 people (historical or current) to a dinner party who would they be?

My Grandmother, Jane Austen, Brene’ Brown

And what would you serve? 

 I’m going through a pie phase so probably a vegetarian pie with a giant salad and a chocolate dessert.

If you are going to be stranded on an island and could only bring three things with you, what would they be?

A knife, a pot and a blanket

What’s the most influential book (or books) you’ve read to date?

Lord of the Rings by JRR Tolkien. Trust me I know its long, however that book has so much gold in it. The story is quite beautiful and the characters, their heartfelt relationships and their trust in the journey I find very inspiring.

What is one message you wish to share with the world?

Let your heart guide you in everything you do and you’ll be fine!

——–

Some images I took featuring Woodfolk homeware range.


I hope you enjoy this interview with Julia as much as I did.  You can find Julia and her gorgeous collection on:

Much love,

Keren x

Speaking Lessons

Lessons from Speakers Institute’s Weekend Premier Bootcamp

Have you ever been so nervous you can’t hear yourself because you heart was beating so fast and so loud?

I hadn’t, not until a few weeks ago at the Speaker’s Institute’s Premiere Bootcamp.

Honestly, I’ve never been interested in speaking on stage. I’m more into one on one conversations or talking to a small group of people in an intimate setting. But I’ve always wanted to become a better storyteller and have more confidence when I speak. I think being able to speak with influence is a great skill to have and that is why I went to this bootcamp: simply to be better than before.

I’m glad I did.  I learned so much during this bootcamp and met so many wonderful people. I learned not just how to speak better, but also about myself, my fears and my abilities. I also learned a bit about recycling technology, health and nutrition, physiotherapy, psychology, recycling technology, ocean conservation, agile software, and so much more!

The wonderful people at September 2018 Premiere Bootcamp

Today I thought I’d share some of the key lessons I learned from this transformative event. But first, let me tell you how I got there in the first place.

As with many people who were at the bootcamp, I went to Sam Cawthorn’s one-day free “StoryShowing” event back in June after being invited by my friend Stella, who, I can safely say, is an event junkie. But the event was so impressive that I signed up to their paid weekend bootcamp event on the spot. Already I learned valuable lesson number one – the free event ‘funnel’ works.

Honestly, I think I waited way too long for the bootcamp. Owning to prior commitments, I chose a date that was four months ahead. By then, the excitement from the one-day event had already worn off and the thought of spending the whole weekend learning to ‘speak’ (not to mention the gruesome 8am-8pm daily schedule) was becoming less and less appealing. Thankfully, I had the best accountability buddy in the world: Money. The only thing that kept me from bailing out was the fact that I had already paid for this event, and it wasn’t cheap.

And so, I went, completely unprepared. I had selected a topic to speak about, but apart from that, had done zero practicing or rehearsing. Day one was the worst. I completely flunked it on stage. I felt completely out of my depth, stupid, and scared.  It is quite ironic really, because my talk was about embracing the “comfort zone” and – yet there I was, in the most uncomfortable position I could ever imagine, and failing miserably.

However, through this experience, I gained so much clarity not just on my idea, but also with the best way to convey it. Every day of the bootcamp I had to got to speak on stage. And every day I was able to refine my message through feedback from expert speakers and other fellow students. The best feedback I received was from one of the students who said that with my first talk, he disagreed with my idea completely. For the second talk he was not fully convinced but thought that there was something there. But with the third and final speech, he was completely on my side. Same idea, same message, different speaker – me, version 2.0. And with that said, here are the key things that I’ve learned that completely transform me as a speaker, as a storyteller, as an influencer, as an individual. Are you ready?!

 1. It’s not about you. It’s never about you.

This was the biggest lesson from my first talk, after I completely bombed.

Imagine this, you’re standing on stage in front of strangers, eyes looking at you, a big digital clock counting down, you’ve forgotten your next line and your hands and legs are trembling. You’re terrified. You don’t want to look stupid. You don’t want to look bad. And you start saying ‘stuff’.

The more you’re trying to make yourself look good, the more nervous you become. You become obsessive with trying to remember every single word, and when you don’t (and trust me, it will happen), you’ll get even more nervous and start saying things that don’t make sense. Game over.

But it’s not about you. You need to free yourself of the fear that you might fail, that you might look like a fool, that you might bomb. Because your audience don’t really care about you, they only care about your message, and how it can help them.

If you forget about your own ego and start thinking about your audience, the people you’re talking to, and how you can give them something valuable to go home with, that’s when you start becoming a better speaker. And it’s quite liberating, really.

“Stop focusing on trying to look good/avoid looking bad and start focusing on making a difference.”

2. Speak from the heart.

I know this sounds very cliched and hippie-like. As a scientist and a professional auditor, I struggled with this idea myself. I am pro-fact, evidence-based, and head-first. In my line of work, I assess and review evidence and facts, not what people say or ‘feel’.

But as I dig deeper into this idea, the more I see the point, especially if you want to be an effective storyteller, or an influencer.  Studies have shown that buying decisions are made based on emotion and not logic. Even with what we believe are logical decisions, there is always an emotional part (or whole) made by our subconscious mind. Our conscious mind then uses our logic to justify that decision.

As a speaker, understanding this is essential. Especially when you’re trying to get others to support your idea. You need to connect with your audience by speaking not just to their rational minds, but also to their emotions and their subconscious mind.

‘How to speak from the heart?’ I hear you ask. Well, here’s how you can do it:

  1. Tell a genuine story from your personal life. “There was this one time when I…”
  2. Connect the story with your message. “That’s when I realised….”
  3. Explain how your message can benefit your audience. “This can help you with…”

When you speak from the heart you build a deeper connection with your audience. They’ll be able to relate to you, buy into your idea or see your point of view. It can be scary to talk about some of these personal stories but often, the reason is because of how significant it was for you. And if it was significant for you, chances are, it will be for others too.

3. Notes will f*** you up

If you want to be a better speaker, you must get rid of your notes. Though I get that they might provide you with some level of security and comfort, at the end of the day you (should) already know what your message is. You don’t need your notes, truly. If you absolutely need to have them, then make them talk points, not a script to read from. And if you’re worried that you’re going to forget, stumble and look like an idiot without your notes, go back to point number 1.

I saw first-hand how this played out during the bootcamp. I remember it very clearly.  It was day 2 of the bootcamp. Everyone had to do their six-minutes talk on stage. One of my fellow students went on stage and he had his notes with him. You could tell that he was nervous. He was started reading from his notes, and then went off for a while, and when he returned to the notes in his hands, he looked like he might have lost his place among his notes. There was this long awkward pause, and the speaker was getting more and more nervous with every second that passed. I could feel the suspense as the room was dead silent and everyone was waiting to see what he was going to do next.

And then something drastic happened. He tossed his notes onto the table in front of him in frustration. He shook himself and then just started talking. In that moment something changed. He was a completely different speaker. The difference was night and day. He was more ‘himself’, his voice got louder, he became more relaxed and he was much enjoyable to listen to. At the end of the talk someone asked him why he threw away the notes. He said, ‘the notes f-ed me up, man!”. He already knew what he wanted to say. His notes were holding him back!

There are so many more gold nuggets I’d love to share with you, but hopefully these three will get you off to a good start. Whether you need to present at work, give a talk at your local community, or even pitch a holiday idea to your partner, I think it’s worth honing your speaking skills. If nothing else, it makes you feel more confident and comfortable whenever you speak in front of crowd, and that, my friend, is a wonderful feeling.

Yours sincerely,

Keren

Funky Fields Minced Burger With Stuffed Cheese - Passionately Keren

Funky Fields Plantbased Mince Review + Burger recipe

Over the last few years, we’ve seen a huge increase in the popularity of veganism and plantbased foods. As a vegan, this is a super exciting time for me as new products continue to emerge, filling the gaps in the vegan market, making veganism more accessible, more interesting and more delicious. And today, I want to introduce you to one of the most innovative plantbased products in the market to date – Funky Fields’ “Minced” 100% plantbased mince that looks and tastes like, you guessed it, mince meat.

Funky Fields Plantbased Mince - Passionately Keren

The folks at Funky Fields did an absolutely brilliant job in presenting Minced. I’m super impressed by how ‘real’ it looks: from the packaging (not pictured here, but looks like the normal mince pack with plastic windows) to the squiggly strands and the iron red colour.

Funky Fields Minced - Passionately Keren

What’s is Funky Fields Minced made of?

This is the first question I asked myself. What is it actually made of? Here’s what it says on the package as well as on their website.

Ingredients:

I’m actually quite pleased with the ingredients list, it’s quite a short as far as processed foods go and has no numbers or ingredients that I can’t pronounce:

Rehydrated soy protein/isolate (58 %), water, coconut oil, soy flour, wheat gluten, almond, porcini mushrooms, tomato, fermented dextrose, tapioca starch, salt, malt extract (barley), colour (beetroot), natural aroma, maltodextrin, stabiliser (methylcellulose).

How does it tastes?

The second (and most important) question was, how does it measure up against real beef mince? Though I haven’t had the real thing for over 5 years, it used to be one of my favourites so I’m quite confident I’d be able to make a pretty accurate comparison between the two. But as a safety measure, I’m including my husband Nat in this test – he eats vegan at home but still eats meat from time to time, mostly when he eats with his parents.

Funky Fields Minced Burger With Stuffed Cheese - Passionately Keren

It tastes surprisingly very close to real mince. If I’m going to quantify it, I’d say it’s 85% similiar to normal beef mince. It can never completely be a hundred percent because it’s not actually beef, but it’s damn close! I love the texture, how it browns when cooked, how it sizzles and gives off that smoky aroma when it hits the hot oil on the frying pan. I tasted it when cooked, though I think next time I will brave myself to taste it uncooked, just to see what it tastes like without the effects of cooking. I think might struggle though, because it just looks so real!

Funky Fields Minced Burger With Stuffed Cheese - Passionately Keren

Funky Fields Vegan Burger (with stuffed cheese)

This will be the best vegan burger you’ve ever made. Delicious and juicy vegan burger patties made with Funky Fields Minced, stuffed with vegan cheese for next level vegan burger experience.

Vegan patties

  • 200 g Funky Fields Minced (half a packet)
  • 1 brown onion (finely diced)
  • Dairy-free cheese slices
  • 1 drop of liquid smoke
  • 2 tablespoon olive oil
  • 1/2 teaspoon sea salt
  • Freshly ground pepper

To make the burger

  • 4 burger buns
  • 1 red onion (sliced)
  • 1 continental cucumbers (sliced)
  • 1 Baby cos lettuce (leaves torn and rinsed)
  • 2 tomatoes (thinly sliced)
  • Vegan mayo
  • BBQ or Tomato Sauce

To make the patties

  1. Heat the oil on a frying pan, fry the diced onion until translucent.

  2. Place 200g of the mince into a bowl. Add in cooked onion, salt, and pepper. Mix until combined (I used my hands).
  3. Divide the mince into 8 equal portions, roll each into balls and then flatten into discs – around 1 cm thickness.

  4. Place 1 stack of vegan cheese in the centre of one of the patties. Put the second patty on top and pinch the edges to form a seal. Repeat with the remaining patties.

  5. Place the patty on a cold frying pan greased with a bit of vegan spread (I use Funky Fields spreadable) and cook one side for a few minutes on medium high temperature until brown, flip using a spatula, and cook the other side.

Assemble your burger.

  1. Layer your bun bottom with vegan mayonnaise, lettuce, tomato, and cucumber, burger patty, sliced red onion and BBQ/tomato sauce. Cover with a bun top. Serve immediately.

If you like crusty burger buns (I do). You can heat the buns on the pan as you cook the patties for a few minutes until light brown. The buns will soak up any left over drippings making them taste even better.

The patties held together nicely, much better than other vegan burger patties I’ve made previously. However, you still need to cook it gently, and not flip it too much, so you won’t risk it disintegrating. Trust me, your patience will be rewarded with the juiciest, most delicious vegan burger you’ve made!

So, what do you think? Would you try Funky Fields Minced?

Funky Fields Minced is currently available in Woolworths.

P.S. If you make this, I’d love to hear from you. Leave a comment below or find me on Instagram or Facebook. Don’t forget to tag me @passionatelykeren so I won’t miss your post.

Keren x

If you like this post, sign up for my newsletter to get FREE recipes updates, lifestyle tips, and giveaways sent to your inbox!
As a vegan, I hate spam. Your email address will not be sold or shared with anyone else.

[mc4wp_form id=”11238″]

Coconut Flour Choc Chip Cookies

Vegan coconut flour choc chip cookies

“Don’t tell me the problem. Tell me the solution”. One of my old bosses used to love saying this. At the time I thought it was a little annoying but I have to say, he’s got a point. Sometimes you need to stop focusing on the problem, and start thinking of the solution. And today, I’ve found a solution to my old, old problem – how to turn coconut flour into something tasty, and vegan.  The answer couldn’t more obvious. Vegan coconut flour choc chip cookies. I hope you believe in magic, or science, or soft crumbly cookies.

Coconut Flour Choc Chip Cookies

These vegan coconut flour choc chip cookies are soft, slightly chewy, and absolutely addictive. I won’t go as far as saying that these are healthy cookies, but they certainly healthier than your usual choc chip cookies, and tastes just as good if not better. If you’ve used coconut flour before, you’d know how tricky it can be. Most recipes would call for loads of eggs when using coconut flour because of the nature of coconut flour. It’s full of fibre, dense and absorbs a lot of liquid (which can make the resulting bake goods dry). But these vegan coconut flour choc chip cookies contain no egg, soft and chewy, and every bit delicious. I hope you give them a go.

Coconut Flour Choc Chip Cookies

Coconut Flour Choc Chip Cookies

Vegan Coconut Flour Choc Chip Cookies

A super delicious way to use coconut flour. These cookies are soft, just like those Subway cookies, but so much better for you.

  • 1/4 cup coconut oil (melted)
  • 1 tablespoon tahini (*optional – see notes)
  • 2 tablespoon almond butter (or your favourite nut butter)
  • 1/3 cup coconut sugar
  • 1 tablespoon ground flaxseed
  • 3 tablespoon water
  • 1 teaspoon vanilla extract
  • 1/2 cup coconut flour
  • 1/2 teaspoon baking soda
  • 1/2 teaspoon sea salt
  • 80 g dark chocolate (chopped into fine chunks)
  1. Preheat your oven to 180 C. Line a baking sheet with a baking paper. Make flax egg by whisking the ground flaxseed with water using a small whisk or a fork until thick frothy. Set aside for 5 minutes to thicken.

  2. In a blender, add melted coconut oil, nut butter, vanilla extract, and coconut sugar. Blend until well combined. Add the flax egg and blend again.

  3. In a separate bowl, mix coconut flour, baking soda, and sea salt. Stir in the coconut oil mixture. Stir in the chopped chocolate.

  4. Take one tablespoon of cookie dough. Roll into a ball. Flatten the ball to create a disc (about 1/2 cm thickness). Place onto the baking sheet.

  5. Bake the cookies until they are just set, for about 10 minutes. Careful not to overbake them.

  6. Allow the cookies cool on a baking sheet, and then move onto a wire rack to let them cool completely. Serve with a glass of your favourite dairy milk. Also great to make cookie sandwich!

* if you don’t want to use tahini, you can replace it with another tbsp of almond butter

P.S. If you make this, I’d love to hear from you. Leave a comment below or find me on Instagram or Facebook. Don’t forget to tag me @passionatelykeren so I won’t miss your post.

Keren x

Nicole Mahler

Lessons from Shark Tank and on sheer tenacity – Nicole Mahler

In this audio interview I sit with Nicole Mahler, the brain behind the scrumptious Dahlicious and Veglicious ready to serve plantbased meal with 5 star health rating, as we talk about her journey with Dahlicious, her experience with Shark Tank, and how she grows her business through sheer tenacity.

Dahlicious Delicious Cherry Tomato

[embedyt] https://www.youtube.com/watch?v=QiEOfLOIHUk[/embedyt]


I hope you enjoy this interview with Nicole as much as I did. If you wish to learn more about Nicole and her business, you can visit her website at Delicious Foods Australia.

You can find also find Nicole on:


Kerenx