The Ultimate Vegan Crepes

Oh crepes! Yummy vegan crepes! I call this Ultimate Vegan Crepes recipe because it is very simple and takes little time to prepare and so it’s perfect for when you’re craving something sweet (or savoury) but can’t be bothered with baking a cake.

It’s very similar to making a pancake batter, but with more liquid. I added allspice to the batter to give it a nice spice flavour and a lovely aroma. If you don’t have it you can skip it or replace it with cinnamon powder. For this recipe I use normal plain flour but you can use gluten-free flour to make it to be gluten free. I also use coconut sugar which you can replace with normal sugar or your favourite sweetener.

You can be creative with the filling. I love to use fresh fruits like sliced banana and strawberries with a generous drizzle of chocolate spread (I’m a big fan of Pure Harvest COCO² coconut and cacao spread). Yum!

The Ultimate Vegan Crepes

Quick and easy vegan crepes that everyone will love.

  • 1 ½ cups plain or GF flour
  • 3 tablespoons coconut sugar
  • 1 teaspoon baking powder
  • 2 cups soy milk (of your favourite dairy milk)
  • 1 tablespoon melted coconut oil
  • 1 tsp allspice ground
  • 1 tsp vanilla extract (optional)

Filling

  • Sliced banana
  • Sliced strawberries
  • Chocolate spread
  • Sesame seeds
  1. Mix all the ingredients in a bowl. If the batter is too thick, add a little more soy milk until you get the perfect consistency.
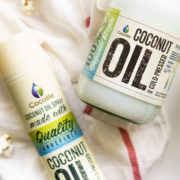
  2. Lightly oil a non-stick pan using an oil spray (I like using this coconut spray) over medium high heat. Pour 1/4 cup of the batter, then twirl the batter around to cover the bottom of the pan as much as you can.
  3. Cook for 1 or 2 minutes and then flip the crepe.
  4. Cook the other side for another minute.
  5. Add filling and serve.

f you make this, I’d love to hear from you. Leave a comment below or find me on Instagram and share your creation. Don’t forget to tag me @passionatelykeren so I won’t miss your post.

Keren x

Steamed Broccolini with Japanese Sesame Ginger Dressing

I thought I’d share with you a really easy dressing which you can use to make your greens taste wonderful.

I was inspired to share this recipe after a recent visit to a lovely Japanese restaurant. They served it cold and it was delish!  I personally like my veggies warm (especially in winter) so I made a warm version and also added some ginger. It took only 10 minutes to prepare (even shorter if you steam the veggies in the microwave).

By the way, I just finished watching What The Health on Netflix. Such an eye-opening! I highly recommend this movie if you need some encouragement to eat more veggies.

I use broccolini in this one but you can use any greens you like. You can also double or triple the batch for the sauce for bigger servings of veggies.

Steamed Broccolini with Japanese Sesame Ginger Dressing

Delicious broccolini with a super simple dressing

  • 1 bunch of broccolini
  • 1 teaspoon soy sauce
  • 1 teaspoon sesame oil
  • 1 tablespoon sesame seeds
  • 1 tsp shaved or grated fresh ginger
  1. Steam broccoli in a steamer for 7-10 minutes until cooked and the colour changed to bright green.
  2. Lightly toast sesame seeds on a small nonstick pan under medium heat for a few minutes until they just turn golden brown and fragrant. Careful not to overcook them.
  3. Mix sesame oil, soy sauce and ginger (if using).
  4. Drizzle the sauce over steaming hot broccoli and sprinkle with some sesame seeds. Serve.

Hope you like the recipe!

If you make this, I’d love to hear from you. Leave a comment below or find me on Instagram and share your creation. Don’t forget to tag me @passionatelykeren so I won’t miss your post.

Keren x

Giveaway – Cocolife Coconut Lovers Pack

Just a quick post to let you all know that I’m doing a giveaway on Instagram.

Thanks to the Cocolife I will be choosing TWO lucky followers from my Instagram account everyday for five days from 16 – 20 June 2017, to win a Coconut Lovers pack. That’s 720ml of Cold-pressed Virgin Coconut oil and the Coconut Oil Spray.

Here’s what you need to do to enter this giveaway.

1. Head over to this post on Instagram (with the picture like the one below) and tell us “WHAT YOU USE COCONUT OIL FOR?” Write it in the comment section.
2. Follow @livethecocolife on Instagram.
3. Live in Australia 🇦🇺. Sorry, it’s only open to Australian resident this time. Another reason to move to Down Under? 😄

That’s it! As for me, I use coconut oil everyday for cooking but my favourite is using them to make popcorn 🍿 🍿🍿🍿. Now it’s your turn! Good luck!

Keren x

Air-Fried Vegan Polenta Chips (or you can use the oven)

Well hello! Fancy something tasty tonight? How about some Crispy Air-fried Vegan Polenta Chips?

You do watch Netflix while having dinner right?

Beside, these stuff are healthy. They’re made of corn. Full of fibre, beta-carotene and carbs. We love carbs.

They’re very easy to make and once you learn how make them, I guarantee you will be making them again, and again..

Most polenta chips uses parmesan and so for this vegan version I use my vegan parmesan, which you can replace with nutritional yeast.

I love making this using an air fryer. I use Philips Air Fryer which I can’t recommend enough. It’s easy to use and makes everything crispy and crunchy with very little oil. That said, you can also use the oven. In face, until I bought an air fryer, I’ve been using the oven to make this. The good thing with oven is that it’s has more space so you can cook more chips than the oven, but it also takes about twice as long. With the air fryer it cooks really quickly but I would need to make two batches. At the end it’s the same, but I personally like using the air fryer more because I don’t have to flip the chips halfway through, which I need to do with the oven.

Crispy, delicious, vegan polenta chips. Give it a go!

Air Fried Vegan Polenta Chips (or you can use the oven)

Crunchy, air-fried, healthier, polenta chips that are super easy to make, but just as addictive.

  • Coconut oil spray (I use <a href="http://thecocolife.com.au/">Cocolife</a> – you can use code "passionatelykeren" to get 15% off your online order)
  • 2 cups vegetable stock (or 1 stock cube and 2 cups of water)
  • 250 g polenta flour
  • 1/3 cup
  • vegan parmesan
  • or nutritional yeast
  • Sea salt
  • Optional: 1 tablespoon finely chopped fresh rosemary
  1. Spray a baking pan with oil spray and set aside.
  2. Heat stock saucepan over medium-high heat and bring to boil. Gradually add the polenta in a thin steady stream, stirring constantly until all the polenta is incorporated into the stock.
  3. Reduce heat to low and cook, stirring constantly for 2 minutes or until mixture thickens. Remove from heat and stir in the vegan parmesan or nutritional yeast.
  4. Pour the polenta onto the prepared pan and use the back of a large spoon to smooth the surface. Cover with non-stick baking paper and set aside to cool, then place in the fridge for four hours or overnight to set.
  5. Turn polenta onto chopping board. Cut lengthways into 2cm strips then each strip into fingers (about 6-8 cm).
  6. Arrange polenta pieces on the air fryer basket with space in between each pieces, spray with coconut oil. Bake at 200C for 20-25 minutes. Alternately you can use the oven.
  7. To cook polenta chips in the oven, arrange strips on an oiled baking pan, bake for 20 minutes at 190C and then turn the chips around and bake for a further 20 minutes.
  8. Sprinkle with rosemary is using and season with sea salt. Serve immediately.

If you make this, I’d love to hear from you. Leave a comment below and let me know what you think. You can also follow me on Instagram and share your creation with me. Just tag me @passionatelykeren so I won’t miss your post.

Cheers,

Keren x

My Big News + Crispy Salt & Pepper Tofu recipe

Salt and Pepper Tofu is a classic Chinese dish that Nat and I like to order when we’re eat at Chinese restaurants but also make at home, when we feel like something tasty and crispy.

But first, I have an announcement to make.

I’m engaged!

Well it’s been three months but forgot to mention it here on the blog until now… I’m a bad blogger I know.

We’ve picked a date and the wedding is less than three months time. In fact, at the time this post is written we have 75 days before the wedding…crazy! Nevertheless, we’ve managed to have some the important wedding stuff organised, like my dress, the church, the venue, the photographer etc. Now it’s about organising the small details, which is probably is going to be as big of a job as the big stuff I think.

Crispy Salt & Pepper Tofu recipe

Delicious, crispy salt and pepper tofu that will make your Chinese grandmother proud

  • 300 gram packet of <a href="https://www.harrisfarm.com.au/products/tofu-firm-small-tly">firm tofu</a>
  • ½ cup vegetable or canola oil
  • ½ cup corn starch
  • 2 tbsp tapioca starch
  • 1 tsp sea salt
  • ½ tsp ground pepper
  • A ziplock bag
  1. Cut tofu into bite size pieces. Place on two layers or paper towels and top another two layer paper towels (you can also use a kitchen towel). Place a small chopping board on top of the tofu. s
  2. Meanwhile, mix corn starch, tapioca starch, salt and pepper in a ziplock bag.
  3. Heat the oil in a pan to medium-high heat.
  4. Add tofu pieces into the ziplock and shake gently to coat the tofu. Allow to sit for about a minute.
  5. Pan-fry tofu on one side until golden brown, for about 2-3 minutes, and the turn to the other side and cook for another 2 minutes.
  6. Drain on paper towel and keep warm (I normally place cooked tofu in a low temperature oven to keep them warm) while cooking the rest.

Now as far as the salt pepper tofu goes, you won’t believe how easy it is to make. All you need to is just cut, press, crumb, and pan-fry…and voila, a tasty, restaurant-worthy dish.

I use a ziplock to make the crumbing process less messy and so that I can just throw the leftover straight in the freezer. Less washing up = winning. Enjoy!

If you make this, I’d love to hear from you. Leave a comment below and let me know what you think. You can also follow me on Instagram and share your creation with me. Just tag me @passionatelykeren so I won’t miss your post.

Cheers,

Keren x

Nasu Dengaku | Japanese Eggplant

Harajuku Gyoza and Nasu Dengaku Recipe

A week ago I was invited to Harajuku Gyoza in Potts Point to try their vegan dishes. It was quite a pleasant surprise, as I visited them only a month ago for a quick lunch, and I thought to myself, ‘this restaurant is actually vegan friendly’. And indeed it is, and very much so. I went with my vegan friend, Jo, and we both had a great time tasting all their vegan dishes, from dumplings, to tacos, and finally a lovely dessert, for which we had no idea what it was made made of, but which looked and tasted delicious.

My lovely friend Jo


Japanese Plum Wine – delish!

Vegetable Gyoza. Great with some vinegar and chilli oil.

Open Tofu Taco, Tempura Eggplant, and Agedashi Tofu (veganised) – triple yum!

Raindrop Cake – delicate melt in your mouth jelly served with peanut powder and I’m not sure about the rest! Tastes good though :)


It’s not every day that I can eat more than just salad and vegetable tempura at a Japanese restaurant, and so I was very cheerful (the plum wine and sake might have contributed to the elevated mood as well).

What a spread! All vegan :)

I got home feeling motivated to create a Japanese-inspired video recipe. Nasu Dengaku, or miso glazed eggplant, is one of my favourite Japanese dishes to make at home because it’s so simple, healthy and most importantly tasty. It’s also especially useful for this time of the year when the weather is getting colder and I’m craving things that are more comforting. And this dish is just that, comforting, especially when eaten with a steaming bowl of rice… heaven-sent.

Here’s the video and the recipe. I posted it on Instagram a few days ago and a few people have tried the recipe and told me how delicious it is. If you don’t have sake, you can omit it, the recipe will still taste good.

[embedyt] https://www.youtube.com/watch?v=rUT1_jifq4Y[/embedyt]

Harajuku Gyoza and Nasu Dengaku Recipe

Simple, delicious, and comforting. Recipe adapted from fatfreevegan.com

  • 1 large eggplant or 2 small ones
  • 2 tablespoons mirin
  • 1 tablespoons sake
  • 2 tablespoons shiro miso
  • 1 tablespoons sugar
  • 1/2 teaspoon sesame oil
  • Toasted sesame seeds (for garnish)
  1. Cut eggplants lengthwise and score.
  2. Mix all the sauce ingredients.
  3. Brush the cut sides of the eggplants with the sauce and cook for 20 mins at 180C (or about 10 mins for smaller eggplants)
  4. Garnish with sesame seeds and serve with boiled rice.

If you make this, I’d love to hear from you. Leave a comment below and let me know what you think. You can also follow me on Instagram and share your creation with me. Just tag me @passionatelykeren so I won’t miss your post.

Cheers,

Keren x