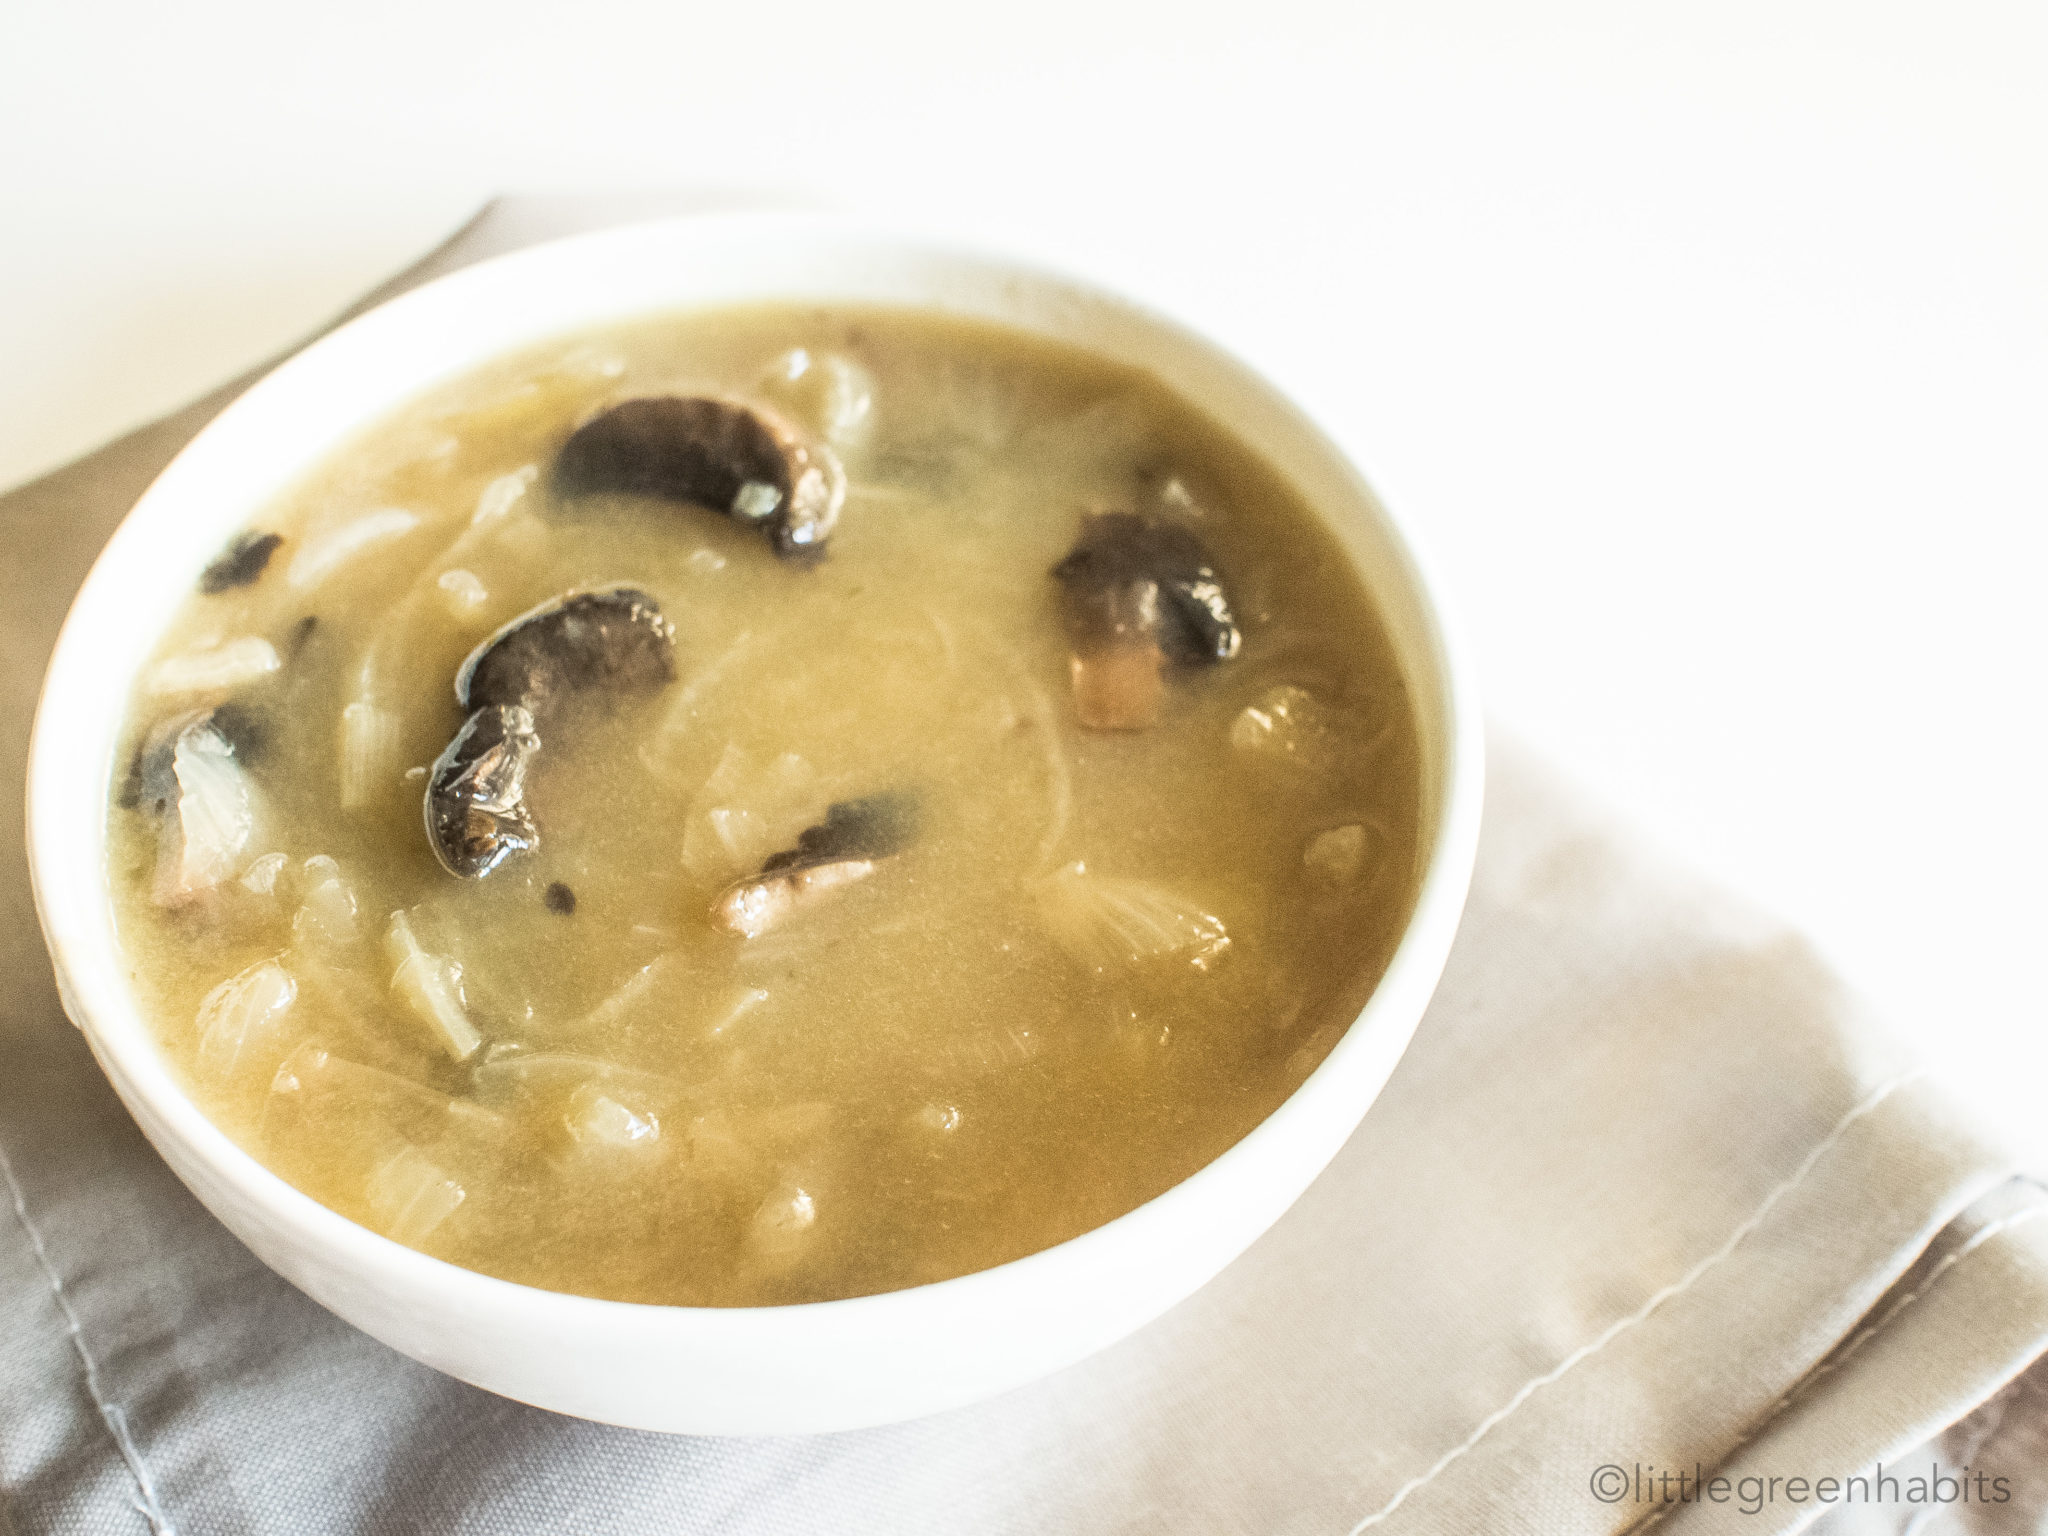
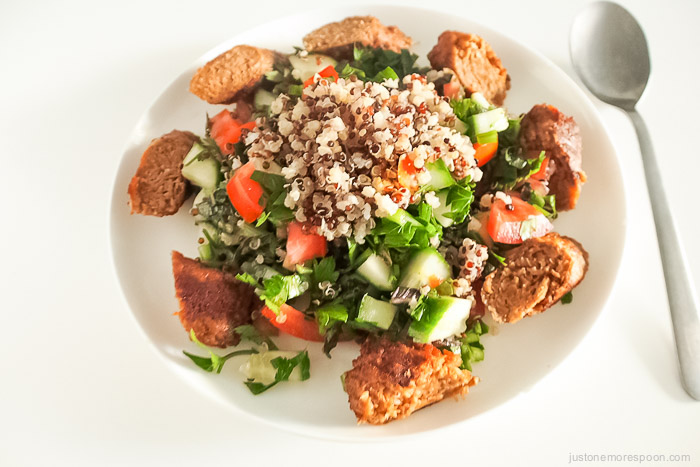
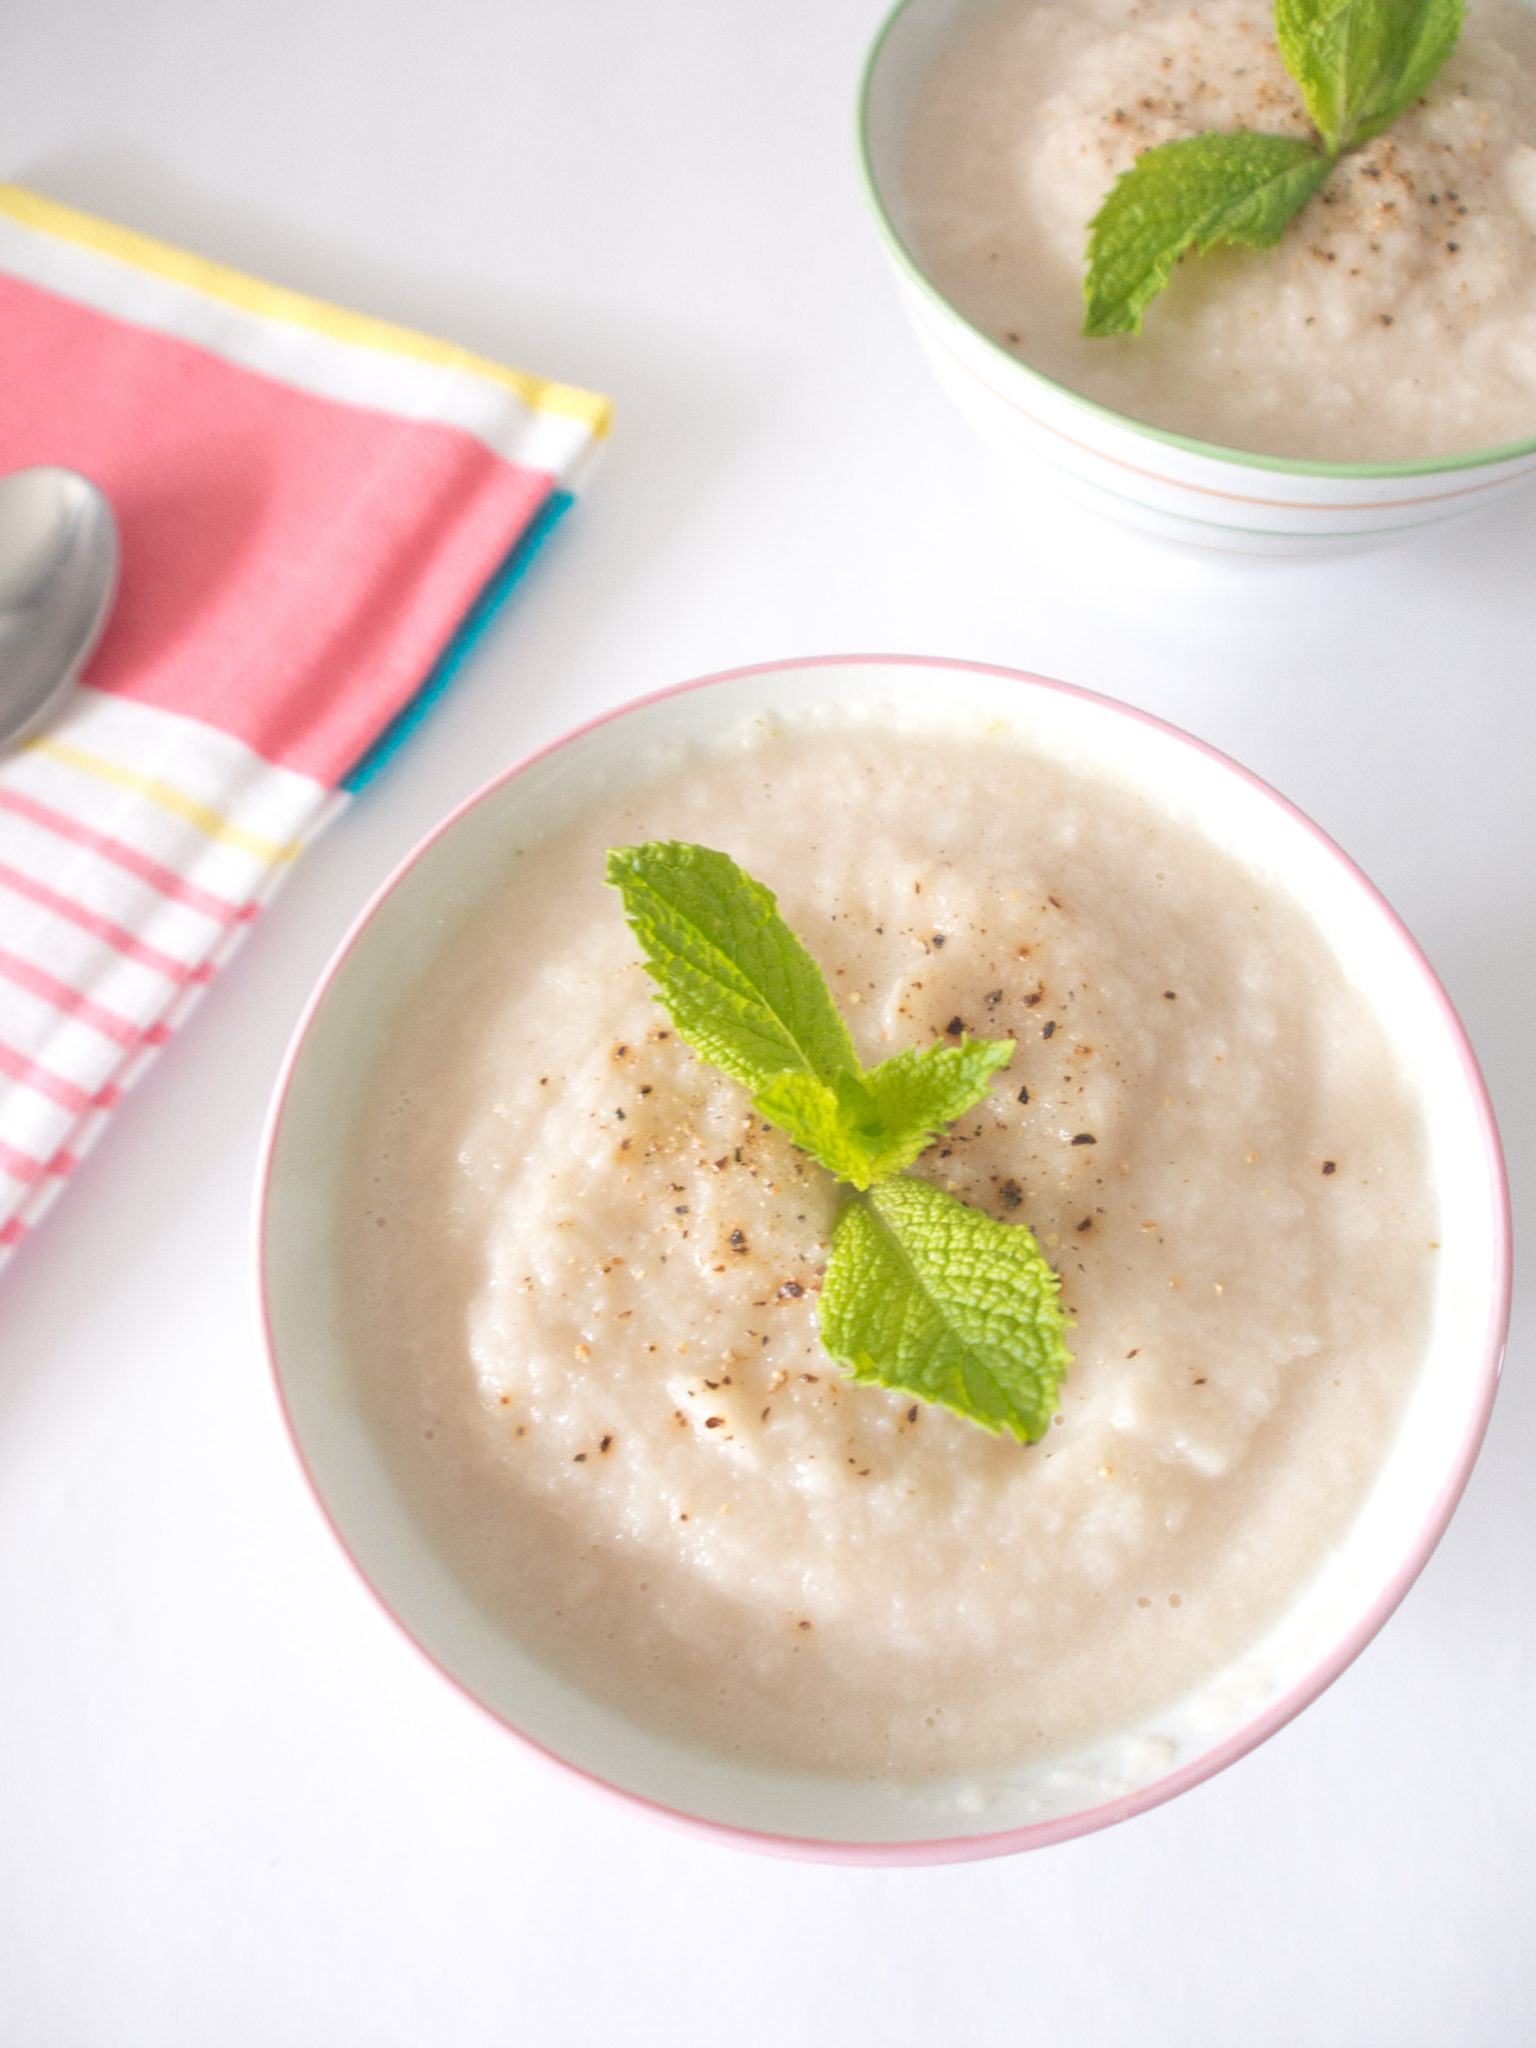
Tomato Soup - Passionately Keren

Fresh Tomato Soup

Tomatoes… or not tomatoes. That is the question.

Truth is, I was looking for a lovely poem on tomatoes on the internet. But I couldn’t find any. At least not one that would emotively describe how beautiful,  and divine vine-ripened tomatoes can be, and and how their scent could make one daydream of slurping a creamy tomato soup on a cold winter day.

The near freezing weather doesn’t feel so bad anymore.

Tomato Soup - Passionately Keren

If you love tomatoes like I do, you’re going to love this soup. Traditionally sour-cream is used to give tomato soup that rich and creamy flavour but since I don’t have vegan sour cream laying around I just used soy milk, and it worked beautifully. If you don’t have any fresh tomatoes, you can also use canned tomatoes. You’d need about 2 x 400g tomatoes for this recipe. However, if you can, do use fresh vine-ripened tomatoes for a fuller, richer tomato flavour.

Tomato Soup - Passionately Keren


Fresh Tomato Soup

A delicious, aromatic and creamy fresh tomatoes soup that will nourish your body and make everything just a little bit better.

  • 2 tablespoons olive oil
  • 1 large brown onions (diced)
  • 5 garlic cloves (minced)
  • 7 medium size vine-ripened tomatoes (chopped)
  • 4 bay leaves
  • 4 sprigs fresh thyme
  • 2 tablespoons tomato paste
  • 1 vegetable stock cube (I use Massel)
  • 1/4 tsp salt
  • 1/2 tsp black pepper
  • 1 tsp sugar
  • 2 cups water
  • 1/2 cup soy milk
  1. Heat olive oil in a saucepan and fry the onions over a medium heat until soft but not brown.
  2. Add the garlic, bay leaves, thyme and then stir so that the spices soak up the olive oil. Add the stock cube, salt, pepper and sugar and stir.
  3. Add the tomatoes. Break them up slightly with a wooden spoon and stir. Add water and bring to boil. Reduce to simmer and cover. Cook for 30 minutes.
  4. Take the soup off the stove and allow to cool slightly then remove the bay leaves and thyme sprigs.
  5. Puree soup with a blender (or a hand blender). Transfer back into a pan (if using blender) and heat gently. Add the milk, and season to taste.

Safety tip: For blending hot soups using a normal blender, fill less than halfway, remove your blender lid’s centre insert, and then hold a kitchen towel to cover the top while blending.

Tomato Soup - Passionately Keren

P.S. If you make this, I’d love to hear from you. Leave a comment below or find me on Instagram and share your creation. Don’t forget to tag me @passionatelykeren so I won’t miss your post.

Keren x

Brown Rice, Kale and Bean Salad

Brown Rice, Kale and Bean Salad

Brown Rice, Kale and Bean Salad

If I have to pick my favourite grain, it’ll be rice every time. It’s delicious, nutritious and most importantly, it’s filling. This is especially important when making a plantbased salad, especially when you want something substantial that can keep you going for a few hours. This Brown Rice, Kale and Bean Salad is one of my favourites salads to make because, not only is it easy to make, it’s also a great make-ahead dish for dinner party, lunch boxes or picnic. Unlike most salads, this salad stays fresh for about three days in the fridge. In fact, it tastes better the day after you make it.

The sturdiness and toughness of kale leaves makes kale perfect for this salad. They hold their shape and keep their crunchiness and freshness in the salad mix even after three days in the fridge. You don’t even need to shred them finely, just chop the leaves and then ‘massage’ the leaves in olive oil for about 2 minutes. If you don’t know what that means, you’re essentially scrunching the leaves with your hands to break down the cell walls which, in turn, softens the leaves to make them more enjoyable and easier to eat. It also helps release the sugars within the leaves to make them less bitter. You know you’ve done enough when the kale feels softer and tastes somewhat sweeter than before.

This salad is also a great way to use up cooked brown rice. I cook rice regularly and so I always have leftover rice. This salad is a perfect way to transform a day or a two day old rice into a delicious lunch or dinner meal. I hope you give this salad a try!

Brown Rice, Kale and Bean Salad

A deliciously simple salad that’s full of protein and fibre. It is satisfying, easy to make and can be made a day ahead. Perfect for parties, potlucks, picnics and to fill up lunch boxes.

  • Kale bean salad
  • 2 stalks of kale
  • 1 cup of black beans
  • 1 red onion (finely chopped)
  • 1 avocado (diced)
  • 1 to mato (diced)
  • 1 cup brown rice
  • 2 tbsp olive oil
  • 1/2 tsp cumin
  • 1/2 tsp garlic powder
  • 1 tbsp lemon juice
  • 1/4 tsp cayenne pepper
  • 1/2 tsp pepper
  1. Wash and rinse kale, tear the leaves off the centre leaves and the stem and then tear or chop to bite size pieces. Place into a bowl, add oil and a pinch of salt. Massage for about 2 minutes until kale softens and turns to a bright colour.
  2. Combine the massaged kale, red onion, brown rice, and beans. Set aside.
  3. In a small bowl, whisk together the olive oil, lemon juice, salt, pepper, cumin and garlic powder until thick, about 45 seconds.
  4. Drizzle the dressing over the salad. Gently toss, taste, adjust seasoning if needed and then top with diced avocado (I usually add the avocado last so it doesn’t get mushed when I mix the salad dressing). Let it sit to marinate for at least an hour if you can or leave overnight in the fridge for the flavours to develop.

I always have cooked rice in the fridge I didn’t have to cook the rice. However, you can also buy instant brown rice at the shop that takes minutes to cook in the microwave.

What’s your favourite way to use up leftover rice? 

P.S. If you make this, I’d love to hear from you. Leave a comment below or find me on Instagram and share your creation. Don’t forget to tag me @passionatelykeren so I won’t miss your post.

Keren x


If you like this post, sign up for my newsletter to get FREE recipes updates, lifestyle tips, and giveaways for sent to your inbox! I hate spam. Your email address will not be sold or shared with anyone else.

[mc4wp_form id=”11238″]

How To Make Vegan Parmesan

If there’s one vegan cheese you need to make, this is it. It’s super simple, very quick to make and delicious. There’s no fermenting or cooking involved so you can spend less time in the kitchen, and more time eating! Here’s a video I made which will show you how to make vegan parmesan in a few simple steps.


This recipe is adapted from Minimalist Baker and Beard and Bonnet, two of my favourite foodie bloggers. It’s super easy to make and it’s super handy to have around, especially if you love savoury sprinkles on everything.

vegan-parmesan-3

Once you’ve learned how to make vegan parmesan you’ll wonder how you could ever live without it. It’s dairy-free yet it makes everything taste nice and ‘cheesy’. Whether you’re trying to eat less dairy in general, or transitioning to eating more plant-based foods, or perhaps feeling slightly adventurous in the kitchen, this recipe will open up a world of possibilities.

You can sprinkle vegan parmesan on pasta, salads, roast vegetables or anything that needs a hit of ‘umami’. I especially love it on top of mushroom risotto and soup. Yum!

Oh, by the way, you’ll need a food processor to make this (I use Cuisine Companion) or you’ll need to pound the mixture using a mortal and pestle.

Enjoy!

how to make vegan parmesan

How To Make Vegan Parmesan

How to make vegan Parmesan

  • 1/2 cup raw cashews
  • ¼ cup silvered almonds
  • 3 tbsp nutritional yeast
  • 1/2 tsp sea salt
  • 1/4 tsp garlic powder
  1. Add all ingredients to a food processor and pulse until the mixture resembles fine crumbs (I used Cuisine Companion and it took less than 10 sec on Pulse setting with chopping blade).
  2. Store in the refrigerator for up to 2 months, or longer in the freezer.

how to make vegan parmesan

Did you make this recipe?

Please let me know how it turned out for you! Leave a comment below and/or share a picture on Instagram and tag me in the picture.


Keren x

Watermelon Rind Pickles

I always look for ways to reduce waste. I’m not a level 5 environmentalist and I still use plastic but I do try my best not to throw things out unless I really need to. Especially food. I hate throwing food away.

watermelon2

If you usually throw away watermelon rind (the white part of watermelon just underneath the skin) like I previously did, you’re missing out on some serious nutrition and cancer fighting phytochemicals. It’s probably the healthiest part of the fruit and we’re not eating it. In all fairness though, it does taste rather bland and is not as exciting as the sweet, refreshing, red part of the fruit. But what if I tell you that you can turn it into delicious tasting watermelon rind pickles? Would you try it?

Of course you would! You should. It’s amazing!

Watermelon Rind Pickles-5

Why I love watermelon rind pickles:

They’re simple, very easy to make and taste delicious. They have a lovely spicy aroma from the cloves and the star anise, and the pickling juice makes the rinds super nice and crunchy.

These are inspired by one of my food heroes, Alton Brown. They’re quick, they don’t need a lot of ingredients and you’ll never have to throw away watermelon rind ever again.

Watermelon Rind Pickles


Watermelon Rind Pickles
Recipe Type: Sides
Author: Keren
Prep time:
Cook time:
Total time:
Serves: 2 jars
A delicious way to use up those watermelon rind
Ingredients
  • Rind from half watermelon, approximately 500 grams
  • 1/2 cup apple cider vinegar
  • 1/2 cup water
  • 1/2 cup sugar *
  • 2 teaspoons sea salt
  • 4 whole cloves
  • 1 star anise pod
Instructions
  1. Scoop out melon leaving about 1/4-1/2 inch of red flesh.
  2. Peel off outer green with vegetable peeler and then cut into 1-inch cubes.
  3. Bring the apple cider vinegar, water, sugar, salt and spices to a boil over medium-high heat in a saucepan.
  4. Add the watermelon. Return to a boil and turn off the heat. Remove the pan from the heat.
  5. Transfer hot pickles to a quart jar carefully using a ladle. Pour on as much of the pickling juice as possible. Cover the jar and leave at room temperature until cool.
  6. Refrigerate overnight before serving. Great on salads or as a side to grilled dishes.
  7. Keep in the refrigerator and consume within a month.
Notes
You can replace sugar with your favourite sweetener such as stevia, xylitol, agave nectar or maple syrup. I use Natvia because it tastes more like real sugar.


Did you make this recipe?

Please let me know how it turned out for you! Leave a comment below and/or share a picture on Instagram and tag me in the post.

Keren x

Watermelon Rind Pickles-2

Vegan French Onion Soup with Mushrooms

Here’s my dairy-free take to the traditional French onion soup. Made hearty and satisfying with the addition of mushrooms.

Why I love this soup

This soup is not only comforting and delicious, but it is also good for you. Both onions and mushrooms are loaded with antioxidants and cancer fighting properties. They also help boost the immune systems and are full of beneficial phytonutrients. Too many big words? Basically, just make this :)

Onion Soup with Mushroom-3

Vegan French Onion Soup with Mushrooms
Recipe Type: Soup
Author: Keren
Prep time:
Cook time:
Total time:
Serves: 4
Delicious, nutritious and satisfying bowl of onion soup with the hearty flavour of Mushrooms.
Ingredients
  • 2 tablespoon olive oil
  • 1 kg brown onions (6 large onion), Peeled & Quartered
  • 350g button or flat mushroom, sliced
  • 2 tbsp tapioca flour
  • 4 tbsp water
  • 4 cups vegetable stock
  • 1 tsp salt
  • 2 tsp muscovado sugar or brown sugar
Instructions
  1. Peel and half onions. Slice thinly with a knife or add to Cuisine Companion bowl and chop for 15 seconds using chopping blade at speed 5.
  2. Replace blade to stirring blade. Add olive oil and saute for 10 minutes at 100 C.
  3. Add stock and cook for 30 minutes at 100 C reduce to speed 4.
  4. Add mushroom and cook for 5 minutes/100 degrees/speed 4.
  5. Mix tapioca flour with 4 tablespoon water to form a smooth paste.
  6. Add tapioca paste to CC bowl and mix for 2 minute / 100 degrees / speed 4.
  7. Serve in soup bowls and season with salt and pepper.
Notes
P.S. If you don’t have Cuisine Companion you can make this on the stove top. Just follow the direction and use large pot to cook the soup, stirring as needed.

Kale, brown rice and bean salad

Kale Bean Salad-2

I like 15-minute meals. Some days, 15 minutes is all I have to prepare a meal. Other days, 15 minutes is all I’m willing to spend in the kitchen.

Last weekend was one of those times where, either I’d make something very quickly or we’d go out for lunch. I chose the former. This salad took me 15 minutes to make using kale, brown rice, and beans as the main ingredients. Since I had leftover cooked brown rice I didn’t need to cook the rice.  If you need to cook your rice, add about 30 minutes to your cooking time. You can buy instant pre-cooked brown rice from the supermarket or do what I do, make a large batch of rice in advance and then freeze them. They keep for about 3 months in the freezer and it takes about 2-3 minutes to defrost in the microwave.

Why I love this salad

This kale, brown rice and bean salad not only easy to make, but it is also nutritious, delicious, and satisfying. It’s very ‘hands on’: you start by ‘massaging’ kale with a bit of oil to break down the fibrous structure of kale, making it softer and more palatable (i.e. so it won’t taste like grass). Then you just add the remaining ingredients, toss around for a bit and voila, the meal is served.

Kale is rich in antioxidants, anti-inflammatory benefits, cancer-preventative compounds, cholesterol lowering properties, vitamins and minerals. It’s low in calories (a cup of fresh kale has only about 40 calories) and rich in insoluble fibre which is good for digestion. Beans are an excellent source of antioxidants, complex carbohydrates, and soluble fibres. They help maintain your blood sugar levels, keep you full for longer, and are a great source of plant-based protein. Nutritional medicine not your thing? Just eat this, your body will thank you.

Easy kale, rice, and bean salad


Kale, Brown Rice and Bean Salad
Recipe Type: Salad
Author: Keren
Prep time:
Total time:
Serves: 2
Ingredients
  • 1 can of 4 beans mix, rinsed and drained
  • 2 cups of cooked brown rice
  • 2 large tomatoes diced
  • 1 ripe avocado, flesh removed and diced
  • 3 cups of kale leaves, stem removed
  • Sea salt and freshly ground pepper
  • Juice from half lemon
  • 2 tbsp. of olive oil
Instructions
  1. Place shredded kale leave in a large bowl.
  2. Add 1 tbsp of olive oil and gently massage the kale with your hand (just like kneading bread dough) for about 2 minutes or until the leaves are softened.
  3. Add rice, beans, tomato and avocado into the bowl.
  4. Drizzle with olive oil and lemon juice. Gently toss to mix.
  5. Season with salt and pepper and serve.

Did you make this recipe?

Please let me know how it turned out for you! Leave a comment below and/or share a picture on Instagram and tag me so I can see you creation.

Love and greens, 

Keren x 

Easy Broccoli Soup

This soup is perfect for a post weekend detox. One bowl, a handful of ingredients and voila, a hearty and delicious bowl of soup that is super nutritious and delicious. And guess what, it’s oil-free too.

Easy Broccoli Soup - 4

Easy Broccoli Soup - 1Cuisine Companion

Easy Broccoli Soup


Easy Broccoli Soup

Ingredients

  • 1 large broccoli (about 650g), roughly chopped.
  • 1 liter vegetable stock
  • 4 cloves of garlic, chopped
  • Freshly ground sea salt and pepper to taste
  • Pepitas, Vegan Parmesan and Kinda Bacon flakes (optional but they’ll make your soup tastier by an exponential factor)

Equipment: Tefal Cuisine Companion (see note)

Method

  1. Put all ingredients in the bowl (use the chopping blade)
  2. If using the Tefal Cuisine Companion, press automatic program soup (P1 100C 30 min).
  3. Do some shopping while the machine does its thing.
  4. Serve.

Note: You can also make this on the stove by putting all ingredients in a big pot. Cook on medium heat for 30 minutes or until the broccoli is tender and then blend the mixture using a hand blender.

Thick and scrumptious… just like a good soup should be.

Easy Broccoli Soup - 1

Roasted pumpkin and lentil salad with shiso leaves

I’ve only started using purple leaves or shiso leaves (also known as perilla leaves) a few months ago when I discovered this interesting looking plant amongst all the familiar herbs in the vegetables section. It has a very fragrant smell and it has this striking purple colour on one side of the leaf and a deep green colour on the other side. If you’re familiar with Japanese or Korean food, you may have come across this item without realising it (which I did). It is very popular in Korean cuisine in particular and is usually served pickled.

pumpkin-salad-3

It tastes somewhat like coriander (has a fragant note to it) but not as strong. At first, I didn’t know what to use it with so I experimented a fair bit. It seems to work on a lot of things. At the very least, it never ruined anything to which I added the shiso leaves. It adds an interesting flavour to Chinese stir-fries and it gives any salad I make a nice herbaceous twist.

It turns out that shiso leaves are rich in dietary fibre, essential minerals such as calcium, iron and potassium, and vitamins A, C and riboflavin, and the leaf components are undergoing research for potential anti-inflammatory properties. Needless to say, there are many reasons to try this delicious herb.

pumpkin-salad-1

One night recently I was rushed for time and had to make something quickly for dinner. So I made pumpkin and lentil salad with shiso leaves (among a few other things) and I was really surprised with how well it turned out. There’s not much preparation involved with this. Just roast the pumpkin (you can even leave the skin on if you can’t be bothered peeling it), cook the lentils, chop the shiso leaves, and combine everything in the bowl with olive oil and some seasonings. It is a great salad to have when you need something quick but more substantial than just salad greens.

Roasted pumpkin and lentil salad with shiso leaves
Recipe Type: Salad
Cuisine: Glutenfree, sugarfree, vegan and paleo
Author: Keren
Prep time:
Cook time:
Total time:
Serves: 4
A delicious and comforting salad that equally light and satisfying. It’s low in fat, high in fibers, vitamins and minerals and full of fresh flavours and aroma.
Ingredients
  • Half of butternut pumpkin, peeled and cut into big chunks
  • 4 sprigs of shiro leaves (about 10 medium size leaves)
  • 1 cup of green lentils, rinse well
  • 1/2 tsp salt
  • 3 tablespoons of olive oil
  • 1/3 cup of roasted pinenuts (optional but highly recommended)
  • Sea salt
  • Cracked pepper
Instructions
  1. Place pumpkin onto a nonstick roasting pan. Drizzle with about 1 tablespoon olive oil and generously sprinkle with sea salt. Toss to mix. Bake in a preheated oven at 180 C for 25 minutes or until cooked (if you can pierce it using a fork, it’s done).
  2. Meanwhile, transfer the lentil into a pan and cover with water, add 1/2 tsp of salt. Bring to a boil on medium heat. Turn down the heat and let simmer for 10 minutes until the lentils are tender but not mushy. Drain and rinse in cold water
  3. When the pumpkin is cooked, remove from the oven and let stand for 5-10 minutes until cool enough to handle. Chop into cubes.
  4. Pick shiso leaves from the sprigs. To chop the leaves,stack them on top of each other, roll them into a cigar and then slice thinly.
  5. Transfer all ingredients into a bowl, drizzle with the remaining olive oil and season with salt and pepper.
  6. Devour!
Notes
To roast pine nuts:[br]You can roast them in the oven for 15 minutes at 170C but the quickest way is on the stove. Heat a dry non-stick pan (no oil, no nothing) over medium heat for a couple minutes and add the pinenuts. Allow the pinenuts to toast for 30 – 45 seconds and then toss them in the pan. Repeat this process every 30 seconds until you start seeing them just turning brown, then remove and let them cool.[br][br]Be careful not to burn them.  They can go from nicely browned to burnt very quickly, so keep an eye on them.

pumpkin-salad-8

Quinoa Tabbouleh Salad

Lately, Buzz and I have been going to my local library on Saturdays. It’s the perfect place to do some work on Saturdays, especially since the weather has heated up for summer and I don’t have air conditioning at home. On these days we go to the local café (Victoria Park Cafe) for lunch and we end up getting falafel rolls each time, every time, without fail. I surprised myself with the fact that I could actually have the same food… again, and again, and again. I used to be more adventurous and would refuse to order the same thing from a restaurant as it seems like ‘wasted calories’ but it seems that as I am getting older, I’m less fussed about these things.

But one thing hasn’t changed. The foods I eat when I’m eating out still inspire me, and I still like re-creating them at home.

When we order our falafel wrap, we always ask for ‘extra tabbouleh’ (also called tabouleh or tabbouli). We both love our tabbouleh! One day, the café owner was so generous that he gave us much more ‘extras’ than anticipated and couldn’t finish our wrap. Guess there’s only so much falafels and tabbouleh one can eat in a single sitting. By the way, for those who are unfamiliar with tabbouleh, it is a traditional (and very popular) lebanese salad served as part of a mezze plate or use to fill a wrap.

Like our giant falafel wraps.

One day, back at home, I felt like some tabbouleh and decided to make my own customised version. I used quinoa to increase its protein content and I ended up accidentally making it gluten-free and wheat-free. And since there’re no falafels in the house, I added beans to the salad to make it more substantial and satisfying.

Not sure if you can get addicted to salad but it was hard to put the fork down once I started eating this.

Quinoa Tabbouleh Salad

Ingredients:

  • ½ cup of quinoa
  • 2 large tomatoes, finely diced
  • 1 large cucumber, finely diced
  • 4 cups of finely chopped flat leaf parsley
  • 1/2 can of red kidney beans, rinsed and drained
  • 1 tablespoon of lemon juice
  • 2 tablespoon of extra virgin olive oil
  • Sea salt and freshly cracked pepper to season

Method:

  1. Cook quinoa in 1 cup of vegetable stock until tender but not too soft. Check out this post for the complete instruction on how to cook quinoa. Set aside to cool.
  2. Transfer parsley, quinoa, tomatoes, cucumber and red kidney beans into a big bowl.
  3. Drizzle with the extra virgin olive oil. Toss gently.
  4. Season with  freshly ground sea salt and cracked pepper and serve

Though we love our falafel roll, we like to eat our quinoa tabbouleh salad with some Linda McCartney Vegetarian Sausages :)

So, have you had tabbouleh before? Do you like it?

Eat Me Skinny Kohlrabi Soup

kohlrabi-soup-19

This is diet-changing stuff. I’ve asked myself how something so creamy and yummy can also be so healthy and light. Oh, but it can. It’s called Kohlrabi.

Kohlrabi

Like most vegetables, kohlrabi is healthy and nutritious. This one is particularly rich in Vitamin C, though. Just a hundred-gram serving gives you all your daily Vitamin C requirement. And, my goodness, it is so low in calories it is almost criminal. It has the creaminess of potatoes but it has just one third of the calories.

One kilogram of raw kohlrabi has only 270 calories. To put this into perspective, that’s less than a calorie count of 100 grams of bread. Amazing, isn’t it?

kohlrabi-soup-11

Geeky science fact: Kohlrabi is actually man-made. Along with cabbage, broccoli, cauliflower, kale, collard greens, and Brussels sprouts, it was created by artificial selection from the wild mustard plant (brassica oleracea).  Artificial selection of a plant means the intentional selection of certain traits you like from the plant, so for example:

  1. Brocolli resulted from the suppression of flower development.
  2. Kale was the outcome from the enlargement of leaves
  3. Cauliflower came from sterile flowers
  4. Cabbage arose from suppression of the internode’s length (the bit of the plant stem between the nodes); and
  5. Kohlrabi was the result of enhancement of the lateral meristem (part of the plant cells involved in lateral/sideways growth)

Thankfully, contrary to artificial selection and cultivation, cooking Kohlrabi is not a complicated undertaking. Here’s as perfectly basic, easy-to-make soup with a great clean flavour which you can tweak to your heart’s content – wants spice, add cayenne; dreaming of Italy, add bay leaves and rosemary; or like it exotic, add cumin powder, you get the gist.

Eat Me Skinny Kohlrabi Soup
Recipe Type: Soup
Author: Keren
Prep time:
Cook time:
Total time:
Serves: 4
A creamy, comforting soup, without the calories. Great to have warm or chilled.
Ingredients
  • 1 tablespoons coconut oil
  • 1 large onion, chopped
  • 2 kohlrabi bulbs, peeled and chopped
  • 2 1/2 cups vegetable stock
  • 2 1/2 cups almond milk
  • Salt and black pepper
  • Vegan parmesan (I use
Instructions
  1. Heat coconut oil in a large pan. Add onions and cook gently until soft, about 10 minutes. Add kohlrabi and cook for 3 minutes.
  2. Add vegetable stock, and almond milk to pan, and bring to a boil. Cover, reduce heat to low and simmer 25 minutes or until kohlrabi is tender. Let cool for a few minutes.
  3. Using an immersion blender, bench top blender or food processor, puree soup until smooth.
  4. Season to taste with salt and pepper. Serve in heated bowls with freshly cracked pepper and a generous sprinkle of vegan parmesan.
Notes
Vegan, gluten-free, sugar-free

kohlrabi-soup-23