How To Make Kale Chips

Sitting on my top list of healthy treats is this crunchy, salty and moorish snack – Kale chips. Kale chips are so big right now, but man, they’re so expensive to buy. It can cost anywhere from $5-$10 a packet and yet, they are so easy to make…once you get the hang of it.

Kale chips (3 of 4)

It never ceases to amaze me how many different variety of vegetables are out there. Even though I make a conscious effort to always try new vegetables, I always find stuff I never tried before (not knowingly anyway).

First of all, in case you’ve been living under a rock in the past few years and never tasted Kale at all, what is Kale?

Kale chips (1 of 1)-2


Kale is a type of leafy green vegetable (also comes with purple leaves)

  • It’s a superfood
  • It has more iron than beef and more calcium than milk per calorie
  • It is high in fibre, vitamin K, vitamin C, calcium, iron, and beta carotene
  • It has anti-inflammatory and anti-cancer properties

To environmentalists, Kale is the new ‘beef” as it is highly sustainable and can grow in most climates. If we all eat Kale in place of meat, we would significantly reduce our carbon footprint and global warming caused by meat production for human consumption.

OK, forget about nutrition, environment or animal welfare – let’s talk taste.

Well, when eaten raw, kale can actually tastes quite strong and too earthy to a lot of people. When baked however, it tastes kind of like feathery thin potato chips. It is super crunchy and can be quite addictive if I may say so myself. It’s almost tastes too good to be healthy for you.

Although it takes a bit of preparation (rinsing, de-steming, drying), making Kale chips is very rewarding. I’ve suffered through many batches of burned or soggy kale chips over the years but I’ve learned some valuable lessons along the way and I’d love to pass my few tips along to you.

How to make perfect Kale Chips every time

  1. Play with your baking time. It may take less or more time to cook depending on the size of your leaves or the heat distribution of your oven. Every oven is different — mine is a fan force electric oven which tends to be hotter that most gas ovens. One piece of advice – Go low and go slow.

Before baking

Kale chips (1 of 1)


After baking… see how they shrink in size?

Kale chips (1 of 4)

  1. Make sure the leaves are dry prior to baking otherwise they might go soggy and;
  2. Try to have all the pieces approximately the same size for even cooking.
  3. That’s it! Let’s do it!


Kale chips (4 of 4) 


How To Make Kale Chips
Recipe Type: Snacks
Cuisine: Glutenfree, sugarfree, soyfree
Author: littlegreenhabits
Prep time:
Cook time:
Total time:
Serves: 2-3
Kale Chips
Ingredients
  • 1 bunch of Kale – washed
  • Olive oil
  • Sea salt and favourite dry herbs (i.e., cayenne, paprika) for seasoning
Instructions
  1. Wash and dry kale thoroughly. Use a salad spinner to drain most of the water and then dab dry using paper or kitchen towel. If the leaves are wet they will go soggy so make sure they’re dry.
  2. Remove the leaves from the thick stems and tear into bite size pieces.
  3. Toss in olive oil and seasoning (I used olive oil spray in cans).
  4. Place leaves on a baking tray lined with baking paper or foil.
  5. Bake in 150C oven for 15-20 minutes until crispy but not burnt – slightly brown on the outer edges but still mostly green. Turn the baking tray around halfway through for even cooking.
  6. Munch On!

Edible Mini Dipping Bowls

Brussels Sprout Mini Bowl-1

This is more an idea than a recipe and it’s so simple it’s almost not blog-worthy. But I thought I’d share it with you since you might find it useful.

When people serve vegetable sticks and dips at parties or events, often you see the vegetables are arranged nicely with the dip sitting in the middle, either in a bowl if it’s homemade or in the original container if it was store-bought. Nothing wrong with that except when people start double-dipping (ugh!) or you’re faced with the dilemma yourself.

It happens to me quite often, actually. I’ve always wondered whether it would be socially acceptable if I turned the carrot stick around and used the un-bitten end to get an extra dip. Sometimes the amount of dips you get at first instance is just not enough to cover the entire stick and you want an equal proportion of dip and carrots at each mouthful, since that’s the whole point of having dips, right?

Brussels Sprout Mini Bowl-1-3

This idea came to me one day when I was cutting up some carrots and celery at home to take to work, and thought I’d need some small containers to take my favourite Pilpel Dips to work, since I didn’t want to take the whole thing. I was cutting up some Brussels sprouts to eat with the dip, and a light bulb went on. Why not make mini edible bowls out of them. So I did! Behold the Brussels Sprouts Dipping Bowl. It’s study, it’s edible, and there’s no messy clean up after. The best about it is that everyone can have their own mini bowl of dip and walk around with it.

Why didn’t I think of this before?

Edible Mini Dipping Bowls (serve 2- 4)

Brussels Sprout Mini Bowl-3

Ingredients

  • A handful of fresh large-ish Brussels sprouts (about 4 sprouts), rinsed and dried
  • Some tasty dips
  • Some veggie sticks (carrots, celery, etc)

Brussels Sprout Mini Bowl-2

Method

  1. Cut the stem off and peel off the layers. These are your edible mini bowls.
  2. Spread ‘bowls’ on a plate and place a tablespoon on dips into each bowl. Note: You can also make your guess do this themselves if serving these at a dinner party
  3. Grab a veggie stick and dip away!


Easy Broccoli Soup

This soup is perfect for a post weekend detox. One bowl, a handful of ingredients and voila, a hearty and delicious bowl of soup that is super nutritious and delicious. And guess what, it’s oil-free too.

Easy Broccoli Soup - 4

Easy Broccoli Soup - 1Cuisine Companion

Easy Broccoli Soup


Easy Broccoli Soup

Ingredients

  • 1 large broccoli (about 650g), roughly chopped.
  • 1 liter vegetable stock
  • 4 cloves of garlic, chopped
  • Freshly ground sea salt and pepper to taste
  • Pepitas, Vegan Parmesan and Kinda Bacon flakes (optional but they’ll make your soup tastier by an exponential factor)

Equipment: Tefal Cuisine Companion (see note)

Method

  1. Put all ingredients in the bowl (use the chopping blade)
  2. If using the Tefal Cuisine Companion, press automatic program soup (P1 100C 30 min).
  3. Do some shopping while the machine does its thing.
  4. Serve.

Note: You can also make this on the stove by putting all ingredients in a big pot. Cook on medium heat for 30 minutes or until the broccoli is tender and then blend the mixture using a hand blender.

Thick and scrumptious… just like a good soup should be.

Easy Broccoli Soup - 1

Probiotic 101 and How To Make Rejuvelac

In this post I will show you how to make rejuvelac easily using quinoa. I came across rejuvelac while looking for ways to make vegan cheese. I gave it a go and have since successfully made a few batches. As it turns out, rejuvelac is not only easy to make but is also rich in probiotics. 

By the way, if you want to make vegan cheeses, I highly recommend the Artisan Vegan Cheese by Miyoko Schinner which, I must say, is ah-mayyy-zing! I’ve made several non-dairy nut-based cheeses using her recipes already. Anyway, I digress…let’s get back to our topic here: rejuvelac and tiny little microorganisms which call our body, home.

Warning – I’m going to geek out a little talking about science-y stuff here because bacteria is a topic that is very close to my heart. I love them because small as they are, they play a significant role in our very existence.

So, on that note…

Did you know most of our immune system lies in the gut?

If yes, well done! You must have paid attention in Science class.

If no, well, you’ve learned something new today and you can brag about your new-found knowledge tomorrow to your friends or colleagues.

Here’s another fun fact. A healthy human body is home to around 100 trillion bacteria.

That’s a hell lot of bacteria! That’s 100 microbes for every 1 gene in our bodies! We have more bacteria in us than we do genes.

Fascinating isn’t it?

Each of us has our own unique ecological community of microorganisms called microbiome that literally share our body space, living in our gut, mouth, skin, etc. Some of them are good, some of them are bad, and some just sit and watch the fight between the two. They can even make us fat.

A  recent study showed that when a scientist took gut bacteria from human twins — one lean and one obese — and transferred them into lean mice, the mice with bacteria from fat twins grew fat; those that received bacteria from lean twins stayed lean. This just goes to show how  important our gut bacteria are to our metabolism and our digestive system.


How To Make Your Own Probiotic

Probiotics are good bacteria which serve to prevent the overgrowth of potentially harmful microorganisms. Although study on probiotics is limited, we have tons of anectodal evidence that they are beneficial to our immune system and our digestive health.

And yes there’re still more research that need to be done to better understand how probiotic helps to promote health but I don’t see what you can’t self-experiment – most (great) scientists do it. I do it. Configure your body to promote healthy bacterial colonies and see how you feel.

You can get probiotic supplements from most health stores, but  they can be quite expensive; and why buy when you can make your own probiotics at home, by making rejuvalac.

Rejuvelac

Rejuvelac is an enzyme-rich, probiotic living drink made by fermenting sprouted grains such as rye, barley, millet, buckwheat, rice, quinoa, or other grains. It contains lots of vitamins B, K and E, proteins and enzymes that aid digestion, and the growth of good bacteria such as Lactobacillus bifidus and Aspergillus oryzae.

It tastes slightly tangy and earthy with a subtle hint of lemony sour. It is slightly fizzy and refreshing to drink. Again, it is very easy to make and quite inexpensive. You basically soak the grains, rinse daily until they sprout (i.e., produce a cute little tail at one end), add water, wait a few days while it ferments,  strain and voilà, you just made rejuvelac.

I highly recommend using organic quinoa as they are quick and easy to sprout, but feel free to use other whole grain if you wish, bearing in mind that it may take longer to sprout other grains. Avoid grains that are already sprouted, and irradiated grain (this usually done on rice) which prevents sprouting. If you’re a first-timer, go with quinoa. Get the freshest and the best quality quinoa you can afford to give yourself the best possible chance of success.

Rejuvelac

Here’s a simple recipe which you can experiment with.

How to make Rejuvelac

Rejuvelac (makes total of 4 cups)

Ingredients

  • 1/2 cup organic quinoa
  • Water, preferably filtered but I tried with Sydney’s tap water and it worked
  • Mason glass jars big enough to accomodate 2 cups of liquid, I used ex-pasta sauce glass jars

Method

Step 1. Sprout the quinoa

  1. Rinse and drain 1/2 cup of quinoa.
  2. Fill up the jar with water. Cover with cheesecloth secured with a rubber band.
  3. Soak overnight. My quinoa sprouted the next morning so if yours do the same, just drain the water and proceed to Step 2. Otherwise, continue below.
  4. Drain the water, leaving the quinoa moist, but not covered in water.
  5. Rinse and drain quinoa a couple of times a day until they sprout (maybe once in the morning and once in the evening).
  6. Note: It only took 24 hours before my quinoa started to sprout.

Step 2. Ferment sprouted quinoa to make rejuvelac

  1. Fill the jar containing the sprouted quinoa with 2 cups water. Cover with cheesecloth secured with a rubber band.
  2. Place in a cool dark place.
  3. Taste each day until it develops an earthy, tangy, fermented taste – usually 2 to 3 days depending on the temperatures.
  4. Once ready, pour the liquid into a glass and serve.

Step 3. Drink and make a second batch

  1. Serve rejuvelac with some fresh lemon juice. You can store it in the fridge in an airtight container for about 7 days.
  2. To make a second batch. Add another 2 cups fresh water to the soft seeds so they are just covered, and after a further 1-2 days pour off your second batch.
  3. Discard the quinoa seeds or add them to your salad.

Tips

  1. If you see some white bubbly scum on the surface of your rejuvelac during fermentation, just scrape it off.
  2. Always check the smell. It should smell fermented but not off. If it smells bad or if there is the slightest sign of mold, throw the whole lot away.
  3. I like to drink it chilled with some lemon juice.

So I hope you would try making your own rejuvelac. And if you do give it a go, let me know what you think.

Keren x

Interview with Kim Miller from Kinda Bacon

My first taste of Kinda Bacon was at the Sydney Vegan Festival last year. I was handed a packet by one lady to give out to other volunteers and the chefs who were doing cooking demonstrations. She looked stunning, tall and slender with such clear skin and the best boy-cut I’ve ever seen in my entire life. I later found out that her name was Kim, and she was the founder of Kinda Bacon – a delicious, crunchy, bacon-y snacks made from coconut.

Fast forward another year, and I had the privilege to interview Kim. Kim is such a lovely and cool person to talk to. She has a lot of experience in the twists and turns of life and you could tell from the interview how passionate she is with what she does and with her vegan lifestyle. Hope this interview will inspires you as much as it has inspired me.

Healthy Vegan Anzac Biscuits (Sugar-free and Gluten-free)

OLYMPUS DIGITAL CAMERA

If you’ve been looking for an easy, healthy and tasty recipe for Anzac biscuits, then let me introduce you to my gluten-free, and refined sugar-free version.

Anzac biscuits are traditionally made with rolled oats, sugar, golden syrup, butter, white flour and coconut. These healthy vegan Anzac biscuits, on the other hand, are made using coconut oil, nut butter and maple syrup and I must admit it’s pretty hard to stop at one.

OLYMPUS DIGITAL CAMERA


Why you will love these

These cookies are loaded with oats. Oats are low in calories (one cup gives you only 130 calories). They provide high levels of fibre and have a high satiety index which makes you feel full for longer.[1] Studies have also shown that oats can help lower your cholesterol levels,[2] reduce the risk of type 2 diabetes[3] and increase your appetite-control hormone,[4] which helps you lose weight.

I used a mixture of coconut oil and peanut butter, but if you want, you can replace these with macadamia oil, olive oil and your favourite nut butter such as almond or cashew butter.


Healthy Nutty Anzac Biscuits
Recipe Type: Baked Goods
Cuisine: Gluten free, sugar free, vegan
Author: Keren
Prep time:
Cook time:
Total time:
Serves: 20 cookies
A delicious healthy treat for the family
Ingredients
  • 2 cups gluten-free rolled oats
  • 1/2 cup desiccated coconut or coconut flakes
  • 1/2 cup flaked or chopped almonds
  • 3-4 tablespoons maple syrup or rice malt syrup
  • 2 tablespoons peanut butter
  • 2 tablespoons coconut oil (melted)
  • 2-3 tablespoon of hot water
  • 1 teaspoon vanilla extract
  • 1 teaspoon bicarbonate of soda (baking soda)
  • a pinch of salt
Instructions
  1. Add all the dry ingredients (oats, coconut, almonds and salt) into a bowl or a food processor (I use the Tefal Cuisine Companion).
  2. Add the wet ingredients (oil, peanut butter, maple syrup, water and vanilla extract) into the dry ingredients.
  3. Turn on the food processor – I use Cuisine Companion (dough attachment P7) and mix for about 15 seconds or until the mixture sticks together.
  4. Take a spoonful of mixture and form into a small ball. Place onto a baking sheet lined with baking paper. Repeat with the remaining mixture.
  5. Flatten the balls using the back of the spoon with enough room around them so they don’t crowd into each other.
  6. Bake in a low 150 C (300 F) preheated oven for 20 -30 minutes or until golden brown. Cool completely before eating.
  7. Store in an airtight container for about a week.
Notes
If you don’t have a food processor or cuisine companion you can just throw everything in a bowl and use your hands to mix everything together. It will take about 10 minutes to mix everything through but the result will be so worth it.


References:

[1] European Journal of Clinical Nutrition, September 1995; 49(9): 675-90

[2] American Journal of Clinical Nutrition, August 2002; 76(2):351-8

[3] Experimental and Clinical Endocrinology & Diabetes, February 2008; 116(2):132-4

[4] Nutrition Research, October 2009; 29(10):705-9

9 Tips For Giving Up Dairy

God, I love dairy

I love butter, yogurt, cream, and cheese. Especially cheese.

I love all kinds of cheese: the hard ones, the soft ones, the smooth and silky ones, the chewy and crumbly ones, the ones with hard rind, rindsless, washed rind, pasteurised, non-pasteurised, ashed, non-ashed, white, yellow, blue, green, sweet, salty, smoky, stinky, whatever… you name it, I love them all…

I used to eat cheese every day; at one point in time, I was eating about 200g of cheese a day on average. That’s a lot of cheese! I would have it for breakfast (cottage cheese and vegemite on toast were one of my favourite breakfast meals), for lunch with my sandwich or salad, for afternoon tea, as a snack and for dessert. I got nervous when I was low on cheese and I got frustrated when I went out for meals and didn’t have any cheese nearby.

Maybe I was French in a past life. Or a baby cow.

vegan cheese

My journey to a dairy-free life

I started cutting down butter and cheese when I learned about my dairy intolerances. All these years I had been putting up with an upset stomach and bloatiness, blaming it on sugar, alcohol, fatty and spicy food, but never dairy. I was ignorant. I was in denial. I love cheese too much.

Until one day I listened to a podcast episode. It is called Motherhood and Maternal Instinct, an older episode of the Food for Thought podcast, which is a vegan podcast. Colleen (the host) reads an essay on a rescued dairy cow named Dancers. Dancers is a dairy cow. From the time she was physically able to have a baby, she has carried a baby a year. For 279 days she carried her baby, curled high in her belly, closed to her heart. One day of each year she spent giving birth 24 hours to nurse her baby, nuzzling, washing and nursing the tiny creature with her rich colostrum. Then they would come, as they always came. To seize her baby away. Boys to the vealers, and girls to be raised for the same servitude as their mother. Faith see Dancers being rescued by a sanctuary, where for the first time, she was able to raise and nurse her baby. She nurses her baby girl until she’s 18 years old.

The episode opened my eyes. How did I not see it? As much as I knew where cow’s milk is from, it didn’t register to me that cows need to be pregnant to produce milk. Pregnant. Just like us humans. I didn’t know that in order to produce milk, dairy cows are kept almost continually pregnant. I didn’t know that they would give birth, only to have their babies taken away from them. I certainly didn’t know that their calves are considered as a waste-product, sent to slaughter in their first week of life so that their mothers’ milk can be harvested for me, for my consumption. That was it for me. No more hiding from the truth.

cashew milk

Some said that what I had read isn’t necessarily true. That I should go and visit a dairy farm and see how well our dairy cattle are treated at some of the farms. And I would love to, if I had the chance. I would love to be proven wrong. I really would.

But numbers don’t lie. And I did the maths. As innocent as dairy may seem, it is anything but. At the end of the day, someone has to die. Here’s why.

If a farmer owns 200 dairy cows to start with, each year he will have 200 new born calves to look after. If none were sent to the slaughterhouses, by the second year he would have 400 calves with the calves from the previous year reaching adulthood and breeding age, and with some of the females now pregnant by this stage. By the third year he would have at least 600, plus some new calves from the second generation of female cows, and so on. How could they up with the land and feed demand. How could they keep all the cows? It just wouldn’t work. At the end of the day, someone has to die. Dairy business is a business, and that’s bottom line.

But, what about cheese?

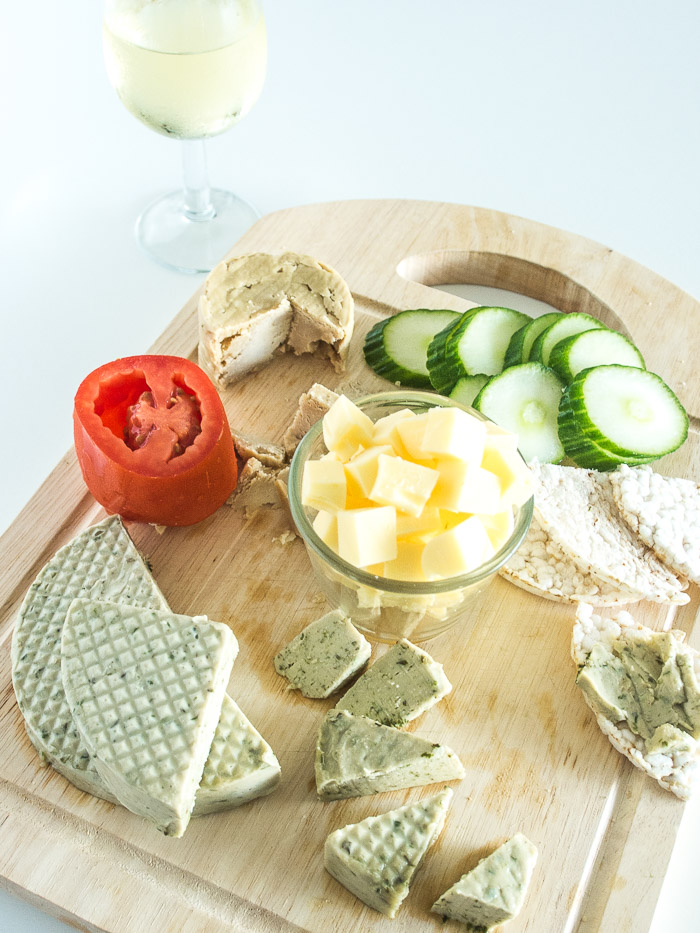
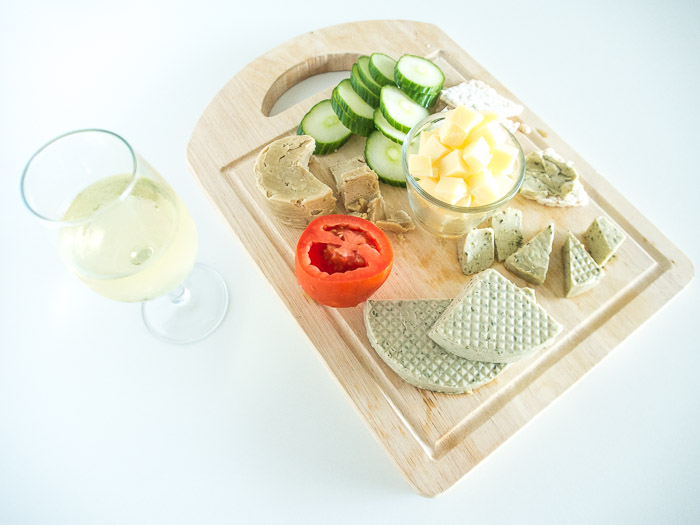
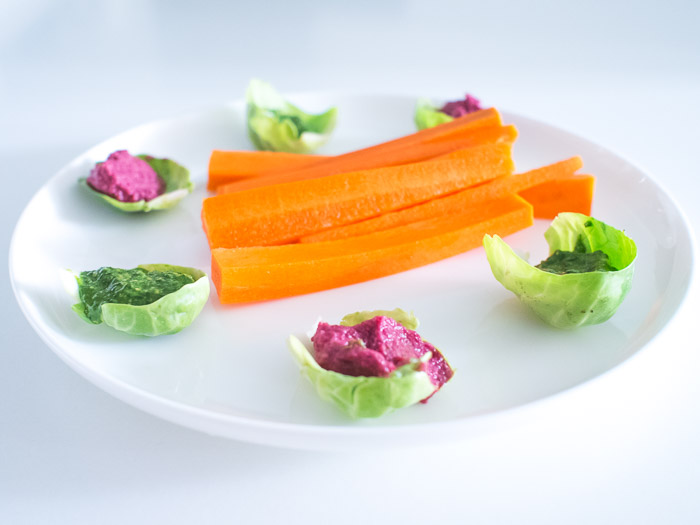
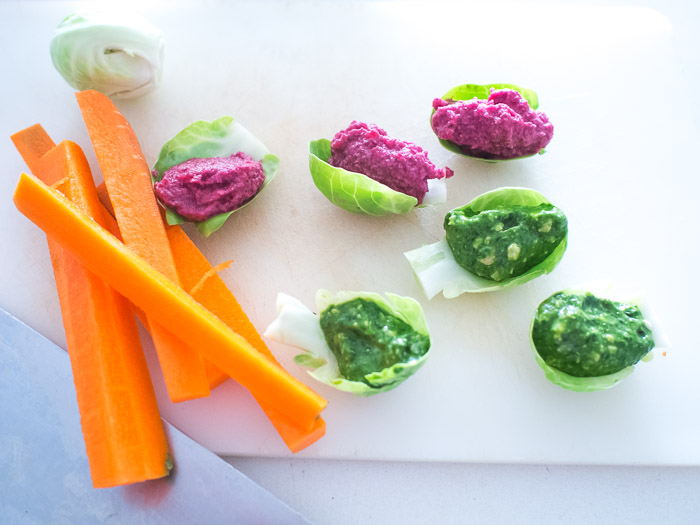
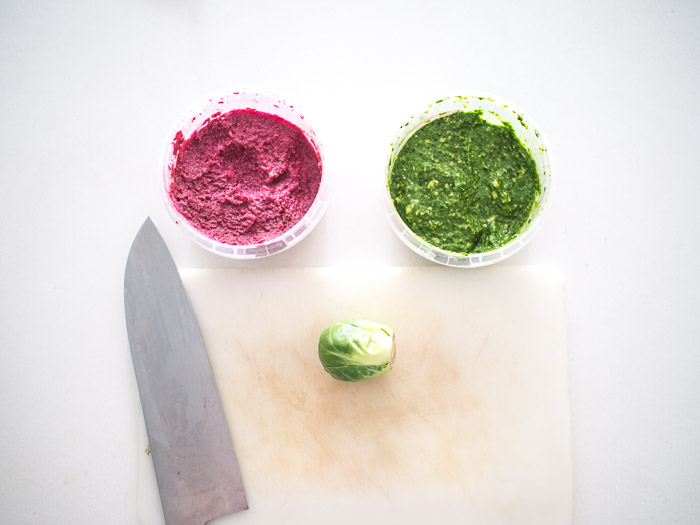
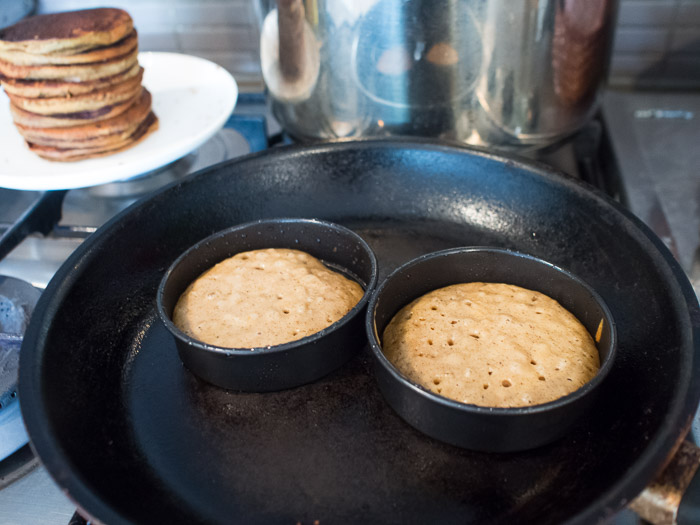
Glad you asked. One of the first thing I did when I went on a plant-based diet was to try and find a non-dairy cheese substitute.  I had no idea non-dairy cheeses existed, let alone the fact that we can create non-dairy cheeses. I’m not going to lie here, most non-dairy cheese won’t taste exactly like dairy cheese but they taste great in their own right. But imagine having cheese that is free from cholesterol, lactose and animal sufferings. Wouldn’t you prefer that?

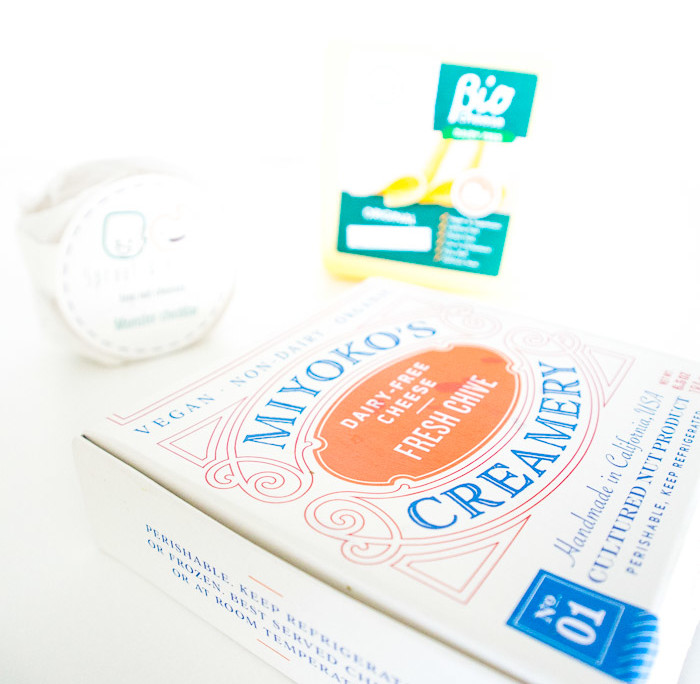
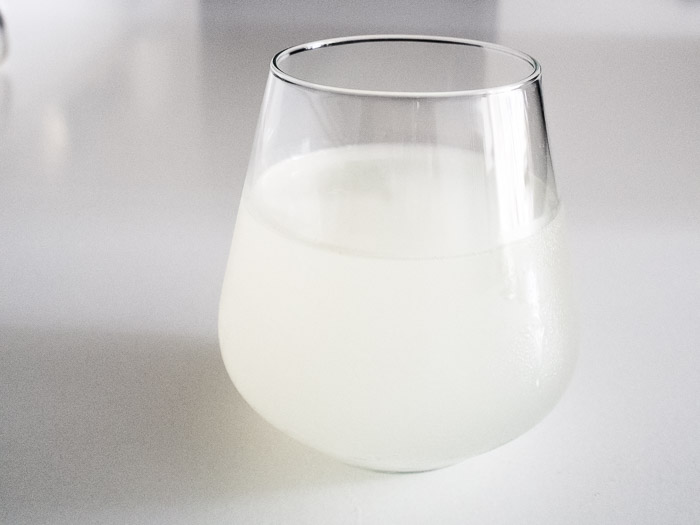
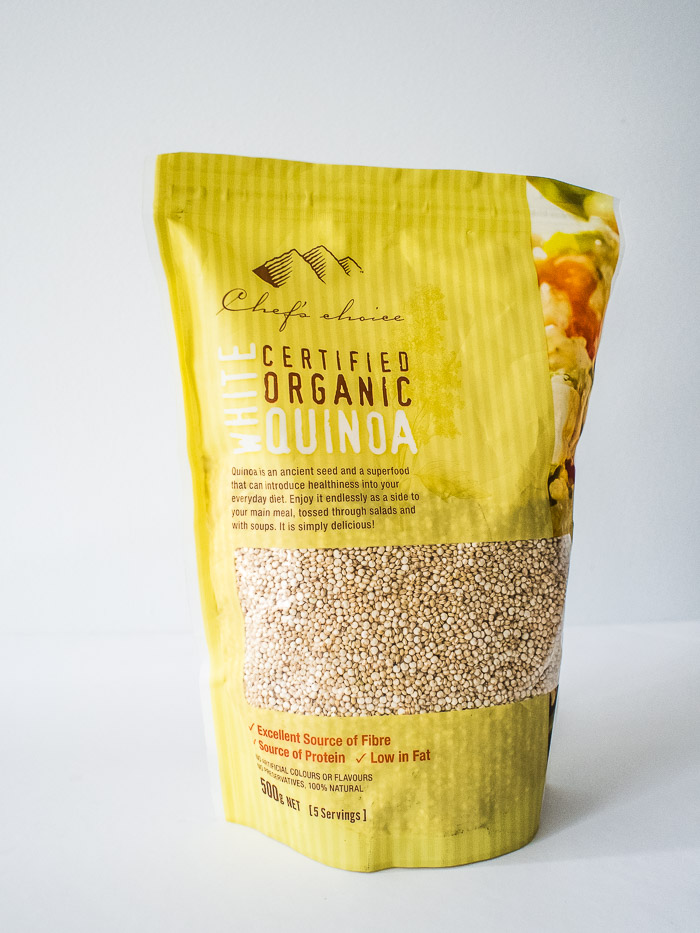
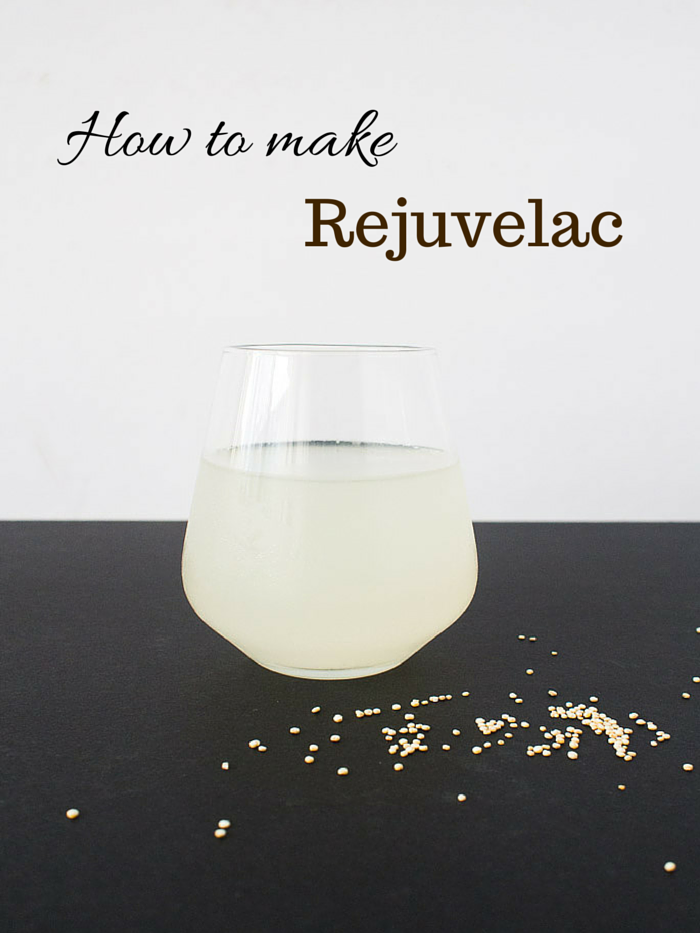
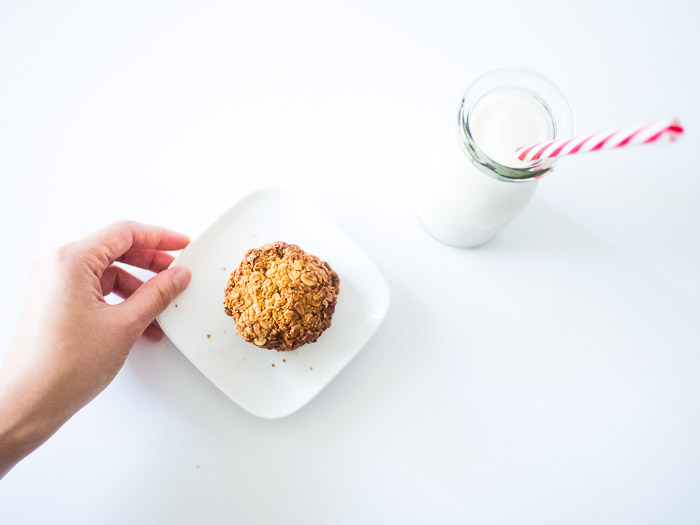
As part of my never ending pursuit of finding the best vegan cheese, I have tried a few different brands of vegan cheeses. I’ve tried: Sheese, which tastes like coconut flavoured cream cheese; Notzarella, a pretty close resemblance to (you guessed it) Mozzarella but doesn’t melt very well;  Miyoko Artisan Vegan Cheese, which tastes very much like a real brie and is my favourite; Sprout and Kernel’s Monster Cheddar which does reminds me of cheddar as it has a lot of depth and complexity; and Biocheese, which tastes so much like processed cheddar.  Most recently, I also attempted to make my own sharp Cheddar using rejuvelac which, I must say, makes me feel like a vegan cheese artisan.

OLYMPUS DIGITAL CAMERA

Life after dairy and why quitting dairy is so hard

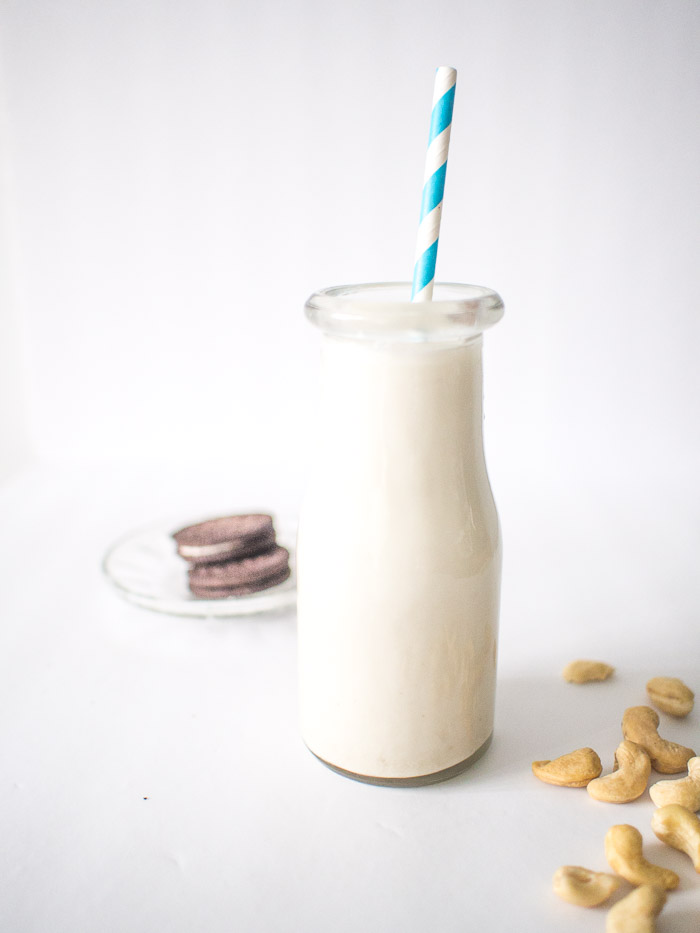
Clearly there is life after dairy. You can make milk out of any nuts, seeds or grains and similarly, you can replace dairy ingredients with plant based alternatives. I believe the reason why it’s so hard for people to give up dairy is because it’s such a strong habit that we’ve picked up from a very young age. When everyone around you is telling you to drink milk and eat cheese for calcium and strong bones, over and over again, it’s hard to believe otherwise. The same thing happens when the media constantly portrays the idyllic yet misleading view of dairy production with images of cows happily grazing in the paddock, which is as we know now, is far from the truth.

OLYMPUS DIGITAL CAMERA

Another reason why giving up dairy is so hard is because dairy products contain casomorphins, which is a type of addictive morphine found in casein. Cheese is the dairy product containing the most concentrated source of casein so this explains why it can be hard to give up cheese, even if it’s our body’s worst nightmare. You can read more about the connection between dairy and cancer in Dr. Campbell’s book, The China Studywhich outlines his ground-breaking discovery of the relationship between nutrition and cancer when conducting a study in the 1980’s in rural China called the China Project. In the meantime, here are my 9 tips for giving up dairy.

9 tips for giving up dairy

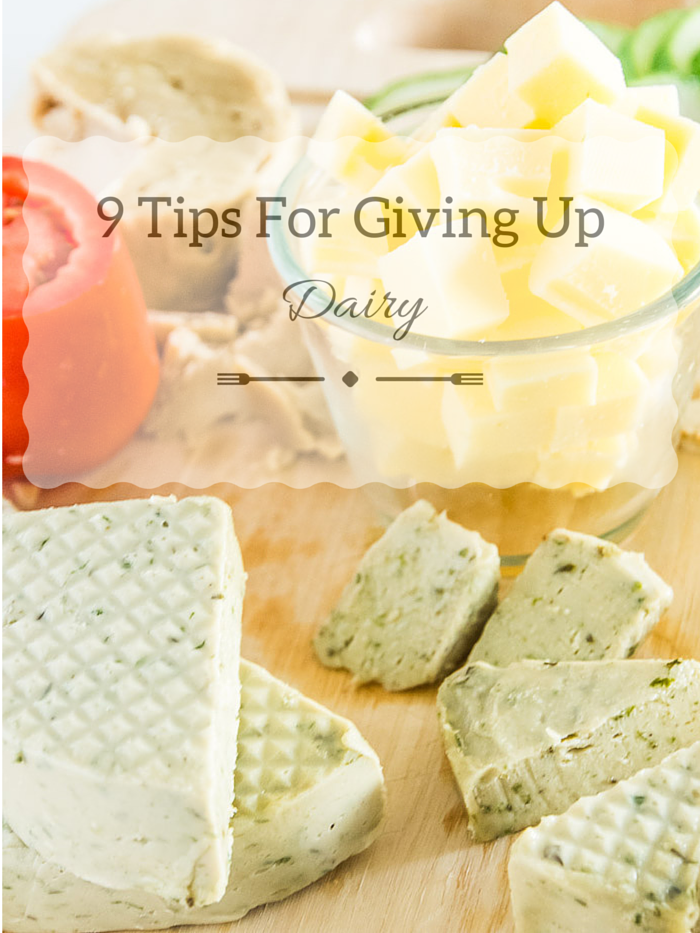
9 Tips for Giving Up Dairy

1. Recognise that it’s just a habit and believe that you can change it.

Believing that you can actually do this is absolutely critical. And you can. It’s just a habit, just like many of our lifestyle choices. And just like any old habit we can only break the habit by creating a new one. Set yourself a dairy-free challenge or perhaps start by replacing your favourite dairy food with something as comforting and that you equally like, for example have a handful of nuts or a favourite piece of fruit when you feel like a cheesy toast.

2. Find your reason and continuously remind yourself of that reason.

Whatever your reason is I’m sure it’s a strong one. Strong enough to make you consider giving up dairy. Remind yourself of this when you find yourself in a sticky situation. Like many old habits, your craving for dairy can creep up on you when you’re most vulnerable (like finding yourself at a dinner party full of cheeses, cakes and ice cream). Continue to remind yourself the reason you’re doing this in the first place (e.g. better health, sustainability, and so forth)

3. Educate yourself about dairy.

Read The China Study and other research articles to understand the negative impact of dairy upon our health, and the painful reality of life for a dairy cow.  Continue to read, learn and expose yourself to the ‘truth’ so your reasons and motivations remain firm and strong.

4. Be prepared.

Planning in advance is the secret for succeeding in pursuing a dairy-free life. Always plan your meals ahead of time and always be prepared to face challenges when eating out: hope for the best outcome but always plan, and prepare, for the worst (and be prepared to send back the salad which was inadvertently served in dripping-hot butter). I believe that if we anticipate obstacles and plan for them, we’re more likely to succeed.

5. Stock up on dairy-free alternatives.

There are a lot of great dairy-free products but it’s a matter of personal preference so you need to conduct some trial and error.  Sample lots and soon you will find some brands you love. Always look for the ‘Dairy-free’ label whenever possible as identifying dairy in packaged food products can be a bit tricky. Watch out for ingredients listed as butter, casein, caseinates, ghee, whey, sour cream, paneer, and nougat, just to name few. Check out the resource links below for a dairy-free shopping list which you might find useful.

6. Let the craving dissipate.

When the craving hits, tell yourself that you’ll wait for another 15-20 minutes before reaching for that cheese.  Take a walk, make a cup of tea or read the news. After 15-20 minutes, often the craving will dissipate and you may not even remember about craving some cheese in the first place. Do this enough times and eventually you will stop craving it.

7.  Get support from people close to you.  

Habits are much easier to create or change if you have social support. It gives you a better chance of making the change work. Research shows that getting support from spouses, family members, and friends is important in making behaviour changes that affect health. After all, they’re going to be your table companions when you start passing on the butter when you go out to eat.

8. Join a group.

Find people who are on a similar path as you, especially on the internet. Connect with like-minded people, and get their support and social accountability to help you transition. Charles Duhigg, the author of The Power of Habit, writes, “The evidence is clear: If you want to change a habit, you must find an alternative routine, and your odds of success go up dramatically when you commit to changing as part of a group”.

9. Treat yourself kindly.

Last but certainly not least. You will make mistakes, consciously or subconsciously. We’re all human, after all. Don’t beat yourself up over a guilty mouthful of butter or a surreptitious slice of cheese, and treat yourself with the same kindness as you treat others. You’ve got this!

Resources:

Vegan Gluten Free Pumpkin Pancakes

I love pumpkin, and I love pancakes. So when I had some pumpkin leftovers from making pumpkin soup, I thought of making pancakes with them. And since I’m trying to bake more gluten-free stuff in general, I thought I’d try to make the pancakes gluten free too. And it worked. I crafted the recipe based on by Vegan 8 Life Changing Pancake recipe which by the way, is on my ‘must try’ list.

OLYMPUS DIGITAL CAMERA

I used almond flour, tapioca and potato starch mix for my gluten-free flour mix and the combination seems to work quite well. You can just use potato starch if you don’t have tapioca starch but I won’t recommend using just tapioca starch on its own as it will make your pancakes a tad tough.

OLYMPUS DIGITAL CAMERA

OLYMPUS DIGITAL CAMERA

These pancakes are a bit dense and not as fluffy as wheat pancakes but I kinda like the denser texture. You might be tempted to use a bit more pumpkin puree here (I did) but try not to overdo it as it will make your batter too wet and you won’t get properly cooked pancakes (1 – 2 tablespoon extra should be ok). I also added a heap of spices in my batter because I like spiced pumpkin (who doesn’t). And don’t forget the salt: it brings out the flavour of all the different ingredients and makes them taste just that much better.

700 x 933

VEGAN GLUTEN FREE PUMPKIN PANCAKES
Recipe Type: Breakfast
Cuisine: Vegan, gluten free
Author: Little Green Habits
Prep time:
Cook time:
Total time:
Serves: 15
These are tasty, gluten–free, tender vegan pumpkin pancakes which are healthy, simple and easy to make. Perfect for chilly winter mornings.
Ingredients
  • 1 cup almond flour
  • ¾ cup non-dairy milk + 1 tbsp of lemon juice
  • 1/3 cup packed pumpkin puree
  • ¼ cup tapioca starch
  • ¼ cup potato starch
  • 4 tablespoon maple syrup
  • 1 tablespoon vanilla extract
  • 1 tablespoon coconut oil (melted)
  • 2 teaspoon baking powder
  • ½ teaspoon bicarbonate soda
  • 1 teaspoon allspice/pimento
  • ½ teaspoon cinnamon
  • ½ teaspoon salt
Instructions
  1. Combine 3/4 cup milk and lemon juice and let rest for 5 minutes to curdle. Then add melted coconut oil, maple syrup, pumpkin, vanilla extract and whisk to combine.
  2. Add flour, tapioca and potato starch, baking soda, baking powder, salt and all spices into Cuisine Companion equipped with the mixing blade. Mix using P9 for 5 second.
  3. Add the wet ingredients and mix using P7 for 10 second.
  4. If you don’t have a Cuisine Companion, sift flour, tapioca and potato starch, baking soda, baking powder, salt and all spices together into a large bowl. Pour the wet ingredients into the dry and stir well until smooth.
  5. Let the batter sit for 15-20 minutes before cooking the pancakes. This gives time for the baking powder and starch to soak up the liquid, which in turn produces a fluffy, well cooked pancake.
  6. Heat up a non-stick pan over low heat. Your pan needs to heat up for ten minutes, so there is even cooking with each pancake.
  7. I used a 4.5 inch round cookie cutter to produce perfectly round and evenly cooked pancakes. If you do this, place the cookie cutter on the hot pan and then spray the whole of the inside with non-stick spray. You must use non-stick spray, or the pancakes will stick to the pan. Once ready, add about 1/4 cup of batter to the pan and quickly smooth out the top with the back of a spoon. Let it cook for 3-4 minutes, or until the top is looking dry and the edges are dry and firm. Flip over and cook another 2 minutes. Let the pancake to cool down a little before serving to improve the texture.
  8. Serve with maple syrup, additional pureed pumpkin or whatever else you desire. The pancakes reheat well the next day in the microwave.

Cuisine Companion Launch and How to Make Whole Wheat Oat Dinner Rolls

What’s the first thing you do when you have a cooking robot? Get it to knead you some bread, of course.

Screen Shot 2015-03-19 at 1.46.41 am

A few weeks ago I went to a VIP event as one of the founding members of the Tefal Cuisine Companion Cuisine Club (Hello Bizzylizcook and Vegetaraian :o) . At the VIP event I got to play with this wonder machine and made a delicious vegan risotto and apple crumble effortlessly.

Cuisine Companion

It’s such a versatile machine. It chops, whips, mix, kneads, cooks, steams, blends, stirs, emulsifies, whisks, sears, crushes, mills and heats food. In the beginning I was afraid that it might be a bit complicated to use but it turns out to be quite easy and straightforward with an intuitive user interface and six automatic functions.

That first weekend I decided to test-drive my demonstration model, making one of my favourite breads, Maple Oat Bread. I use a combination of whole-wheat flour and oats which help lower the gluten content of the bread and increases its nutritional value. Though I’m trying to eat less bread, I’ve never been a fan of complete deprivation, so rather than stop eating it altogether I’d rather try making it healthier and better for me (and maybe eat a bit less of it). So when I discovered you can turn oats into flour and make bread with it, you could imagine my excitement.

Screen Shot 2015-03-19 at 1.45.53 am

Why I love it:

This bread is quite easy to make so you can certainly make it by hand if you want. However, the Cuisine Companion makes it even easier as you don’t have to knead it. The machine does all the work, including maintaining an optimum proofing temperature. Once I had put all the ingredients in, the only thing I had to do was to wait and then shape the dough into bread rolls. Too easy.

What’s good about it:

In my book, oat is superfood. Here’s 5 reasons why you need to make oat bread, not that you need any.

5 Reasons Why You Need To Make Oat Bread

  1. Oats are high in fibre and are a good source of antioxidants, vitamins and minerals
  2. Oats help you control your appetite [1]
  3. Oats help regulate blood pressure [2]
  4. Oats are rated no. 1 for breakfast, in satiety index [3]
  5. Oats may improve insulin sensitivity [4]

Screen Shot 2015-03-19 at 1.45.53 am

Whole Wheat Oat Dinner Rolls

Ingredients

  • 300ml warm water
  • 1 packet of dry yeast
  • 1 tbsp maple syrup (you can add up to 3 tbsp if you like it sweeter)
  • 1 cup of whole-wheat flour
  • 1 cup of rolled oats, plus a few tablespoons, divided

Methods

  1. Place the yeast and 300ml of warm water in the bowl fitted with the kneading/crushing blade. Launch the P1 pastry program. After 30 seconds, open the lid and add the flour, oat and salt. Note that this program will knead the dough for 2 minutes and then it will stop for 30 minutes while maintaining the temperature at 30C.
  2. After 40 mins, remove the dough using a spatula and knead for 5 mins or so by hand until it forms a loose ball.
  3. Place the remaining oats on a small bowl. Pick up the dough ball and gently roll it over the oats.
  4. Leave on a tray lined with baking paper. Leave to rest for 1 hr 30 mins.
  5. Preheat the oven to 200°C.
  6. Place a bowl of water on the lower rack in the oven (this will help achieve a nice crust). Bake for 25 mins. Lower the oven to 180°C and cook for an extra 15 to 20 minutes.

Disclosure: I received a complementary Cuisine Companion from Tefal both to play with and for editorial purposes.

You can find out more about the Tefal Cuisine Companion at https://www.cuisinecompanion.com.au/. It is now available at select Harvey Norman stores across Australia.

References:

[1] Nutrition Research, October 2009; 29(10):705-9

[2] Journal of Family Practice, April 2002; 51(4):369

[3] European Journal of Clinical Nutrition, September 1995; 49(9): 675-90

[4] European Journal of Clinical Nutrition, June 2007; 61(6):786-95

Interview with Melissa and Lainie from Meat Free Week

Did you know that Australia is ranked in the top three biggest meat-eating countries in the world (per capita), behind the USA and Luxembourg. Australians eat an average of 111.5 kg of meat per person per year, which is more than double the world’s average of 41.9 kg. This consumption compromises our health and with global meat production predicted to double by 2020, raises serious concerns about long-term sustainability and animal welfare.

Bowel cancer is now the second largest cancer killer in Australia. High consumption of red and processed meat has been linked to both bowel cancer1 and the increased risk of type 2 diabetes.

Globally, the growing demand for meat is leading to increased deforestation, water usage and climate change with the UN identifying the livestock industry as one of the most significant contributors to today’s most serious environmental problems.

It has also created the number one animal welfare issue in the world, factory farming.

Meat-Free-Week_1024x768_AUS

Australia’s annual Meat Free Week will return bigger and better from 23-29 March 2015. The week is dedicated to raising awareness of the amount of meat people eat and the impact it has on human health, the welfare of animals and the environment.

Meat Free Week challenges Australians to sign up to go without meat, including seafood, for seven days. By being sponsored, participants have the opportunity to raise funds for one of three leading charities – Bowel Cancer Australia (health), Voiceless the animal protection institute (animal welfare) and The World Land Trust (environment).

With a growing trend towards meat free or meat-reduced meals and the steady rise of flexitarianism over the past few years (a mainly a plant-based diet with the occasional inclusion of meat), Meat Free Week gives people the perfect opportunity to try out new foods, get more veggies in their meals and see whether a meat-reduced diet is for them, even if it’s just one day a week or one week a year.

And for the first time this year, Meat Free Week will also be expanding the campaign into the UK, gaining great traction with great supporters on board including Jamie Oliver, Paul, Mary and Stella McCartney.

This week I had the opportunity to interview Lainie Bracher and Melissa Hobbs, the founders of Meat Free Week – a global campaign to get you thinking about how much meat you eat and the impact that excessive meat consumption has on your health, animals and the environment, while raising money for several leading charities.

Screen Shot 2015-03-04 at 10.02.45 pm

In this interview, Melissa and Lainie spoke about their journey and what inspired them to co-found this initiative, how they managed to convince Jamie Oliver to be the ambassador for the campaign as well as some the backlash they have received from vegans and farmers.

Screen Shot 2015-03-04 at 10.02.56 pm
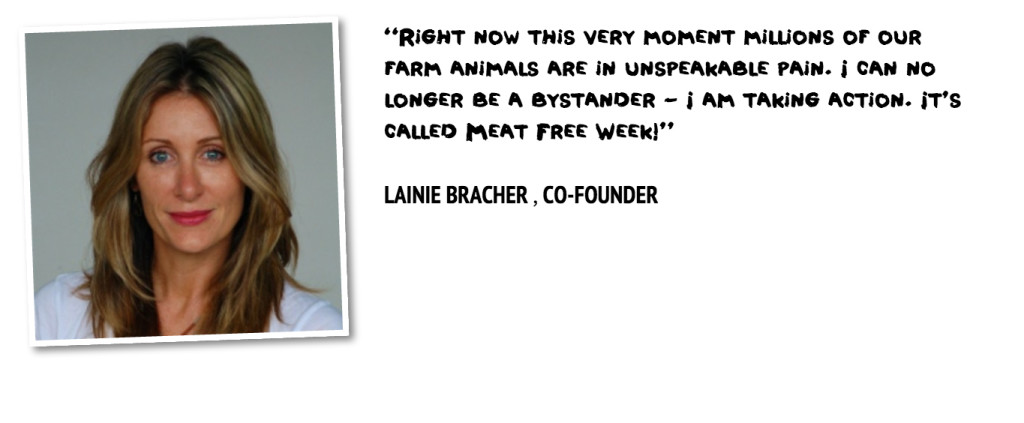
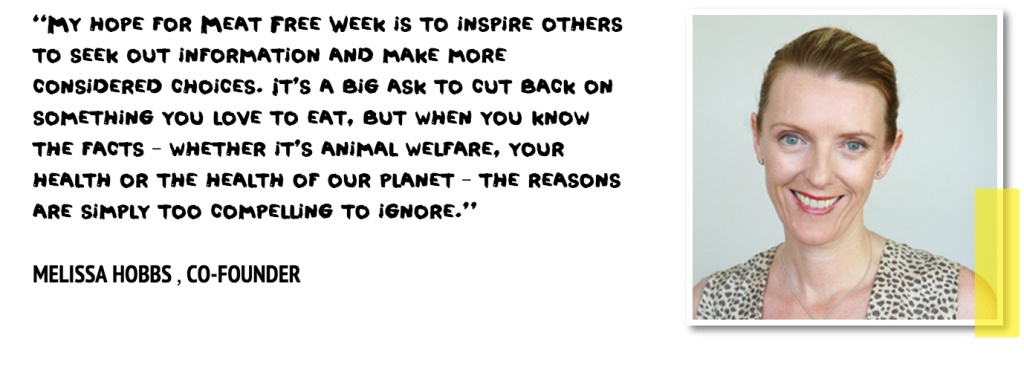
I know there are a lot of vegans who disapprove of campaigns that encourage people to eat ‘less’ meat such as Meatless Monday or Meat Free Week as they believe it distinguishes the consumption of other animal products (i.e. eggs or dairy) as being more ethically justifiably when they are all a result of tremendous violence, and it renders eating a small amount of meat any other day as ‘okay’ when it is not. The argument is that if we make an ethical decision to reject something that is morally wrong, then we must reject it all, every day, and not just on certain days.

I have mixed feelings about this ideal. On one hand, I want people to stop eating all animal products completely, but on the other hand I know that it is impossible for a lot of people to make such a drastic change without easing into it over time and I am glad for them to give it a crack without making them feel guilty as sin when they don’t stick to a plant-based diet from the very first day. I think Meat Free Week provides people with this opportunity in a fun and engaging way. It provides education. Education provides knowledge and awareness for people to make an informed choice. Love it or hate it, the campaign certainly has made a big impact with over 4,000 people signing up for the challenge, and raising over $150,000 for charity in its first two years.

So here’s the interview, do leave a comment or two and let me know what you think.

Resource Link:

Voiceless – An independent, non-profit think tank focused on raising awareness of animals suffering in factory farming and the kangaroo industry in Australia.

Bowel Cancer Australia – Bowel Cancer Australia works to reduce incidence, death and suffering associated with bowel cancer (aslo known colorectal cancer).

World Land Trust – A charity organisation with a 20 year track record of successful environmental projects. 

Recipes:

Here some of the recipes we talked about in the interview and my favourite ones from the Meat Free Week Website:

Note: You can also check out my recipe page for some plant based recipes and inspiration

Restaurant List – As picked by Chef and Meat Free Week Ambassador, Simon Bryant’s

Melbourne:
  • Veg out in St Kilda
  • Shakahari South Melb
  • Lord of the Fries Brunswick st Fitzroy is kind of clever and quite good
Sydney:
  • Iku various locations
  • Yuli’s in Surry Hills
Adelaide:
  • Zen house adelaide city East
  • Bliss organic adelaide central market precinct
  • Minestra in Prospect, not all vego but awesome vego and vegan choices
Darwin
  • I usually go to Hanamans and order vego
Brisbane
  • The Green Edge
  • Mondo Organics – not vego but offers really good vego/vegan options
Perth
  • Coming soon
MFW_iheart

Join the Meat Free Week

Meat Free Week is on 23rd – 29th March 2015. You can check out the Meat Free Week website or their social media channels to learn how you can be part of this great event.

  • Website: meatfreeweek.org
  • Facebook: Meat Free Week
  • Twitter: @meatfreeweekorg
  • Instagram: @meatfreeweek
  • Hashtag: #meatfreeweek

Here are the two really important things people can do to support Meat Free Week:

1. Sign up for Meat Free Week OR if not participating, donate. It’s easy and you’ll be showing everyone how it’s done!

You can register here to be sponsored as an individual or as a team and encourage others to join you. OR simply donate money directly to the charities here. After registering, downloading the App from App Store  or Google Play is a great way to get friends and family on the spot to sponsor you whilst you’re out and about. Monitor progress, share messages, get sponsors via Facebook and have friends and family make a donation right from the fundraisers smartphone.

2. If you’re already vegetariansign up and go vegan for the week. And if you’re a vegan (or already living meat free), sign up and sponsor a meat loving friend for the challenge.

So, are you up for challenge? Of course you are! Check out my 7 Tips For 7 Days Of Meat Free Eating if you need some help in getting started. I’ll also be running a giveaway very shortly to help motivate you to inject some greens into your diet so stay tune and subscribe if you don’t want to miss out on the announcement.

Keren