Vegan Adobo with Tempe and Brown Rice

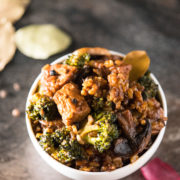
Today I’m going to share with you one of my favourite comfort foods –Vegan Adobo with Tempe and Brown Rice. It’s delicious, comforting, easy to make and a perfect one-pot meal. This recipe was actually inspired by Maz Valcorza from Everyday Vegan. I was shooting and directing a video recipe for the one of their online recipe courses and one of the recipes was a vegan adobo.

Her version uses brown rice and Bok choi and it was so yum! I was inspired to make my own version of adobo and so here it is. This vegan adobo uses tempe and brown rice as the main ingredients, as well as mushrooms and broccoli for flavour, nutrition and texture!

It’s like an asian version of risotto!

Vegan Adobo with Tempe and Brown Rice

If you’ve never heard of adobo before, it is a Phillipino/ Spanish dish that usually involves cooking meat, seafood, or vegetables in a vinegar- soy sauce marinate.

It is usually made with meat but I have found that tempe (or tempeh) and mushroom make the perfect meat replacement without sacrificing that delicious savoury flavour and texture that we all love from meat.

The key ingredients in this dish are garlic, soy sauce, apple cider vinegar, bay leaves, and coconut sugar (you can use normal or brown sugar too). You can use tofu instead of tempe or even your favourite legumes. I use broccoli for this recipe but feel free to use other greens. I’ve made this dish so many times using different greens, beans, etc and they always turn out good. Just make sure you don’t overcook it as they can turn out gluggy (kinda like risotto).

Lately, I’ve been switching between dark mushroom soy sauce to light soy sauce depending on what I feel like. You can tell the difference in colours (left – dark soy sauce, right – light). For some reason the dark soy sauce product more ‘sticky’ glaze. Both are equally delicious though.

Check out the how to video below and then the recipe on the bottom of the page.

[embedyt] https://www.youtube.com/watch?v=dTrcpj3en0U[/embedyt]

Vegan Adobo with Tempe and Brown Rice

Vegan Adobo with Tempe and Brown Rice

A delicious twist on the ever-so-popular Philipino dish, Adobo. Made vegan using tempe as the main protein, brown rice, mushroom and broccoli florets. Yum!

  • 1 tablespoon coconut oil
  • 1 packet (250g of raw tempe, diced)
  • 5 garlic cloves (diced)
  • 1 red onion (diced)
  • 2 cups sliced mushrooms (oyster or brown mushrooms are my favourite to use)
  • 2 cups broccoli florets
  • 3 tbsp soy sauce (dark soy sauce will give you a darker colour than light soy sauce)
  • 1 tbsp apple cider vinegar
  • 3 tablespoons coconut sugar
  • 4 bay leaves
  • 2 teaspoon whole peppercorns
  • 4 cups vegetable stock
  • 1 ½ cups brown rice
  1. Heat the coconut oil in a large pot over medium-high heat. Cook pieces until golden brown on both sides, then remove. Stir in the red onion and garlic; cook until they soften and brown, about 6 minutes.

  2. Pour in soy sauce, bay leaf, peppercorn, vegetable stock, and vinegar. Add the tempe and rice, increase the heat to high, and bring to a boil. Reduce heat to medium-low, cover, and simmer until the rice is about 30-40 minutes.

  3. Stir in broccoli florets and mushrooms, cover for 5 minutes until broccoli and mushroom is cooked through

Vegan Adobo with Tempe and Brown Rice

I absoloutely love a one pot meal. Especially since I often don’t have time to cook an elaborate meal for dinner (strange coming from a food blogger I know). What’s your favourite one-pot meal? Share it with me in the comments below and I’ll try to make veganised one-pot deliciousness :) ✎ ♥

Did you make this recipe?

Please let me know how it turned out for you! Leave a comment below or share a picture on Instagram and tag me so I can see your creation.

Keren x

⋙ Original post published in December 2016. Updated with video in September 2017 ⋘ 

Best ever gluten-free vegan waffle

This really is the best ever gluten-free vegan waffle I’ve ever made.

No complicated gluten-free flour mix (one of my pet peeves in gluten-free baking), no egg, no dairy, and no fuss! You just need to throw all the ingredients in the blender, blend, and then you have a thick and creamy waffle batter which will yield waffles so delicious you’ll forget about taking a snap for Instagram (there’s a reason why you haven’t seen any waffle posts on my Instagram account until now)

You just need to throw all the ingredients in the blender, blend, and you have a lusciously thick waffle batter which will yield waffles so delicious you’ll forget about taking a snap for Instagram (Note: there’s a reason why you haven’t seen any waffle posts on my Instagram account until now).

The only ingredient that might be difficult for some to find, is dairy-free yogurt. I make my own soy yogurt so I’m overflowing with this stuff but you can use either use Coyo or any other type dairy-free yogurt you can find at the store. If you’re desperate for waffles and you don’t have the yogurt, you can replace it with 2/3 cup of dairy-free milk. It will change the texture and flavour of the waffles a little bit but they will still be tasty.

These waffles are crunchy on the outside and soft on the inside, with mildly sweet and nutty flavour. This recipe makes about 6 -8 waffles depending on your waffle pans. I like to make a double batch so I can keep some waffles in the freezer for whenever I feel like one in the morning. The real challenge is trying not to eat the whole batch as you’re cooking it!

Best ever gluten-free vegan waffle

A simple yet delicious gluten-free vegan waffle that will blow your mind

  • 1/2 cup rolled oats
  • 1/2 cup uncooked brown rice (whole rice)
  • 1 cup dairy-free yogurt (I used homemade soy yogurt)
  • 1 tbsp melted coconut oil (olive oil works fine too)
  • 1 tbsp sugar or your <g class="gr_ gr_59 gr-alert gr_spell gr_inline_cards gr_run_anim ContextualSpelling multiReplace" id="59" data-gr-id="59">favourite</g> sweetener
  • 1/2 tsp baking soda (sifted to prevent blobs of baking soda in your waffle)
  • 1/2 tsp baking powder
  • a pinch of salt
  1. Pour all ingredients into a blender and for a few minutes until smooth.
  2. Pour enough batter into your waffle pan and cook until crispy. I use a stovetop waffle pan so I cook each side for about two minutes on <g class=”gr_ gr_57 gr-alert gr_spell gr_inline_cards gr_run_anim ContextualSpelling ins-del multiReplace” id=”57″ data-gr-id=”57″>medium high</g> heat, but just follow your waffle maker’s instruction if you’re using an electric waffle maker.
  3. Slather with loads of your <g class=”gr_ gr_53 gr-alert gr_spell gr_inline_cards gr_run_anim ContextualSpelling multiReplace” id=”53″ data-gr-id=”53″>favourite</g> nut butter and maple syrup and serve.
  4. Store in the fridge for up to a week or in the freezer for up to a month. Just pop them in the toaster to reheat.

If you make this, I’d love to hear from you. Leave a comment below or find me on Instagram and share your creation. Don’t forget to tag me @passionatelykeren so I won’t miss your post.

Keren x

Udon Noodle Stir Fry With Oyster Mushroom

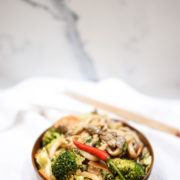
I’ve realised that apart from my Superhero Fried Rice, I have not shared a single stir fry recipe on this blog. That comes as a shock to me, especially considering that I cook stir fry every week! Well, today we will change that.

This recipe makes enough for four servings, which is great for meal prep, or if you like to eat leftovers like I do. Feel free to use other types of mushrooms, add tofu, other veggies, etc. As long as you keep the proportion somewhat the same, you should be alright :)

Udon Noodle Stir Fry With Oyster Mushroom

Easy and hearty stir-fry made with chewy Udon noodles and delicious oyster mushroom

  • 2 tablespoons coconut oil
  • 1 red onion (diced)
  • 5 garlic cloves (finely chopped)
  • 1 long red chilli (sliced)
  • 1 broccoli (cut into florets)
  • 2 carrots (sliced)
  • 400 g oyster mushrooms
  • 1/4 cup vegetarian oyster sauce
  • 1 tbsp light soy sauce
  • 2 packet of udon noodles
  • 1 tsp sesame oil
  • Ground pepper
  1. Heat oil in a wok over high heat. Add onion. Stir-fry for a couple of minutes or until softened. Add garlic and chilli. Stir-fry for another minute until garlic is fragrant.
  2. Add broccoli florets and carrot slices then add vegetarian oyster sauce and soy sauce. Stir-fry for two minutes until the vegetables are just tender.
  3. Add the Udon noodles and toss using tongs for 1-2 minutes or until heated through.
  4. Remove from heat and drizzle with sesame oil.
  5. Add a pinch pepper, taste and adjust seasoning.
  6. Serve with chopped fresh chili.

If you make this, I’d love to hear from you. Leave a comment below or find me on Instagram and share your creation. Don’t forget to tag me @passionatelykeren so I won’t miss your post.

Keren x

Nutty Vegan Choc Bites

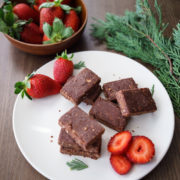
Today I want to share a super quick and easy raw vegan chocolate recipe I think you will love. It is my “go to” recipe whenever I’m craving chocolate. It is delicious and very satisfying, chewy and tastes a bit like coconut-rough.  There’s something distinctly nostalgic about these beauties.

This recipe only has six ingredients and requires no cooking. You just need to make sure the coconut oil is in liquid form. If the oil is solid, you will need to heat it slightly either using a small pan over the stove or in the microwave.

I’ve made this a few times, already, using a variety of nuts and sweeteners, and they’ve all worked. Just keep in mind that you will get more fudgy texture when you use syrup or dates as opposed to sugar.

If you’re of the experimental mindset then you’ll love the recipe. It is quite foolproof so feel free to experiment with the sweetener/oat/nut component. Perhaps use desiccated coconut or quinoa flakes, instead of oats, or even a mixture of both. Or use cashews, macadamias or walnuts instead of almonds, or a mixture of your favourite nuts. The sky is the limit.

Nutty Vegan Choc Bites

A super easy and quick recipe for deliciously nutty, raw, vegan, chocolate bites.

  • 1/2 cup cacao powder
  • 1/2 cup coconut oil (melted)
  • 1/4 cup of your favourite sweetener (coconut sugar, coconut nectar, maple syrup, dates, stevia, Natvia, Norbu, etc)
  • 1 cup rolled oats*
  • 1/2 cup raw almonds (or your favourite nuts)
  • 1/4 tsp sea salt
  1. Process the oats, almond, sweetener (maple syrup, coconut sugar or dates) and salt in food processor until crumbly.
  2. Mix melted coconut oil with cacao powder. Add to the oat nut mixture and process again until combined.
  3. Scoop chocolate mixture into silicone mini muffin mould and flatten the surface using the back of a teaspoon. Alternatively, you can also pour into a baking pan (if you use a pan, make sure to cut them into squares before cooling).
  4. Pop in the fridge for at least 20 minutes to set.

You can really creative with this recipe: swap oats with desiccated coconut, rice puffs, or quinoa flakes and use your favourite nuts instead of almond.

If you make this, I’d love to hear from you. Leave a comment below or find me on Instagram and share your creation. Don’t forget to tag me @passionatelykeren so I won’t miss your post.

Keren x

Vegan Pear Cake

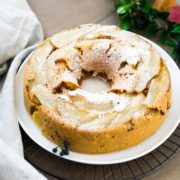
What could be a better way to rekindle my old love for pears than making a Vegan Pear Cake? I honestly can’t remember the last time I had pears before last week. It could have been six months or even a whole year. They had kinda fallen off my radar until I started painting a few months ago.

Did I tell you I started painting again? It’s been quite a learning process! I will write a post about it one day. Maybe next week.

I actually bought the pears just to use as a model for my still-life painting. But after finishing the painting, I took a bite of the halved pear and, boy oh boy, I had forgotten how heavenly pears taste!

It was tender, juicy and sweet. It almost feels like meeting an old friend again. All the memories of wonderful moments together start to resurface and you wonder ‘how could we ever have lost touch?’

Pear and banana cake

That’s it. For the rest of the season I’m putting pears on my weekly shopping list. It’s a lovely, versatile and easy-to-use fruit and I want to use it more. Be prepared to see some expearimentation on the blog in the near future.

I’m looking forward to it already.

As for this Pear Cake, its very easy to make (you know me… I like easy). Just slice the pears and lay them on the base of the cake tin (I use a bundt tin but a normal tin would be easier to work with). Mix the dry ingredients, blend the wet ingredients, combined the two together, bake and voila, you have yourself a lovely Vegan Pear Cake.

Pear Cake

A cake for all pear lovers out there.

Pears

  • 4 pears

Dry

  • 1 1/2 cup wholemeal flour*
  • 1/2 cup oat flour**
  • 1/2 cup almond meal
  • 3 tsp baking powder
  • 1/2 tsp bicarb soda
  • 1/4 tsp sea salt

Wet

  • 1 1/2 cup soy milk
  • 1 ripe banana
  • 1/2 cup coconut sugar
  • 1/3 cup coconut oil
  • 2 tsp vanilla extract
  • 2 tsp <a href="http://www.beyondlatte.com.au">Beyond Latte</a> (or replaced with 1 tsp ground ginger)
  1. Preheat oven to 180°C fan, and grease the sides and base of a 24 cm cake tin.
  2. Slice one pear thinly and arrange it in the base of the cake tin. Slice or chop the remaining pears into about 1 cm chunks and set aside.
  3. Add almond meal into a large bow. Sift remaining dry ingredients on top and stir to combine.
  4. Blend wet ingredients in the blender. Pour onto dry ingredients and gently stir until just combined.
  5. Fold through pears gently (careful not to over mix), then spoon the mixture into the tin carefully so you (don’t disturb your pear arrangement). Spread the top out flat with a spatula.
  6. Bake for 35-45 minutes until a wooden skewer inserted in the middle comes out clean.
  7. Remove from the oven and leave in the tin for 10 minutes, then turn upside down onto a wire rack and carefully remove the base. Leave to cool before slicing
  8. Serve sprinkled with almond meal and icing sugar if desired. I like to have mine with a dollop of vegan lemon cream cheese.

*You can replace the different flour with plain flour or gluten free flour to make it gluten-free
**You can make oat flours by blending rolled oats in a blender for a few minutes until fine crumb

If you make this, I’d love to hear from you. Leave a comment below or find me on Instagram and share your creation. Don’t forget to tag me @passionatelykeren so I won’t miss your post.

Also, do you have any ideas what I should make with my weekly pear haul? I’d love to hear your thoughts.

Keren x

Pear Cake

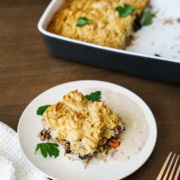
Indonesian style Sheperd’s Pie (Pastel Tutup) – Vegan

Indonesian Style Sheperd's Pie (Pastel Tutup) – Vegan

A hearty meal with fragrant spices and delicious plantbased filling

Mashed potato:

  • 500 g potatoes
  • 3 tbsp vegan butter
  • 1/2 tsp ground nutmeg
  • Salt and pepper to season

Filling:

  • 1 large onion (chopped)
  • 250 g pack firm bean curd (finely diced)
  • 2 carrots (finely diced)
  • 1 cup black fungus
  • 100 g dry rice noodles
  • 2 tsp peanut oil
  • 1 vegetable stock cube
  • 1 cup coconut milk
  • 1/2 tsp nutmeg
  • 1/2 tsp five spice powder (optional)
  • 1/2 tsp sea salt
  • 1/2 tsp ground pepper

Vegan Bechamel Sauce

  • 3 tbsp <a href="https://www.passionatelykeren.com.au/glorious-butterless-butter/">vegan butter</a>
  • 2 tbsp plain flour
  • 2 cups soy milk
  • 1/2 tsp nutmeg
  • Black pepper
  • Sea palt

To make the mashed potatoes mixture:

  1. Peel potatoes and cut into large chunks. Cook in a large saucepan of boiling salted water for 20 minutes or tender but not falling apart. Drain. Mash potato with a potato masher or a large spoon until fluffy.

To make the filling:

  1. Soak rice and black fungus with hot water for 5 min until soft.
  2. Cut rice into short strand and chop up the fungus.
  3. Heat oil in a non-stick pan on medium high heat, cook chopped onion until soft and fragrant.
  4. Add in chopped beancurd, and carrots, stir for 2 minutes.
  5. Add stock cube and coconut milk. Bring to boil and simmer until carrots turn soft, around 5 minutes.
  6. Add in black fungus, vermicelli, five spice powder, nutmeg, salt, and pepper. Stir well.
  7. Adjust the taste, bring to boil and then remove from heat and aside to cool for a few minutes.
  8. Pour filling on the pans and let cool slightly (about 5 minutes)
  9. Cover with mashed potato mixture (you can just spoon it on top or use a piping bag like I did).
  10. Bake for 30-40 minutes or until the top is nicely brown. Serve with a good drizzle of vegan bechamel sauce.

To make the Bechamel Sauce

  1. Place oil and flour in a saucepan on medium heat and cook for 5 minutes.
  2. Gradually pour in the soy milk and whisk to prevent lumps. Season with salt, pepper and nutmeg.

If you make this, I’d love to hear from you. Leave a comment below or find me on Instagram and share your creation. Don’t forget to tag me @passionatelykeren so I won’t miss your post.

Keren x

Vegan Apple Pie

Friend, my wedding is now due in less than two months and I still haven’t finished organising it.

Instead, I’ve been procrastibaking. And made this really yummy Vegan Apple Pie.

Because pies make me happy.

Vegan Apple Pie

Don’t be intimidated by the look. At first glance this vegan apple pie looks like a lot of effort. But actually, it is pretty easy to make. The only time consuming part is the slicing and layering the apple slices, which I must say, I’m not very good at. But hey, if I can do it, you can do it too.

The pie crust is also a lot simpler to make than the traditional recipe. There’s no rolling required and because it’s made completely from oatmeal, it also healthier and gluten-free. Doesn’t it look impressive?

Vegan Apple Pie

I think it would taste amazing with a scoop of dairy-free vanilla ice-cream. But, according to the dressmaker, I need to lose one or two kilos to make the dress looks perfect. So no ice-cream for me tonight. At least I can have my pie and eat it too :)

Vegan Apple Pie

Oat Flour Pie Crust

  • 1 1/2 cup oat flour*
  • 2 teaspoon coconut sugar
  • 1/2 teaspoon sea salt
  • 1/4 cup melted coconut oil
  • 5 tbsp cold water

Apple Pie Filling

  • 4-5 Granny Smith apples (peeled and cut into thin slices)
  • 1/3 cup coconut sugar
  • 1 tsp ground cinnamon
  • 1/2 tsp allspice
  • 1/4 tsp nutmeg
  • 1/4 tsp sea salt
  • 1 1/2 tsp fresh lemon juice
  • 1 Tbs melted coconut oil

For the pie crust

  1. In a large bowl, mix together flour, sugar, and salt.
  2. Stir in the melted coconut oil and mix until crumbly.
  3. Add in the cold water to moisten the mixture to form a dough.
  4. Press the dough into a pie pan using your fingers, including the side edges.

For the apple filling

  1. Preheat oven to 180C.
  2. Place apple slices and all the ingredients in a large bowl and gently toss the apples to coat. Let sit for 10 minutes.
  3. Drain the apples through a sieve, reserving the liquid from the marinade.
  4. Simmer the liquid in a small pan until it’s reduced to at least half and becomes somewhat thicker.
  5. Arrange the apple slices in the pie pan, starting from the outside edge of the pan and spiraling towards the center. Insert apple slices into any gaps that you see.
  6. Pour the reduced liquid onto the apple pie leaving 1-2 tablespoons for glazing.
  7. Bake for 35-45 minutes or until the apples are tender and the pie crust is golden brown.
  8. Glaze the pie with the remainder liquid. Allow to cool for at least 10 minutes before serving.

*To make oat flour, blend rolled oat in a blend until it turn into fine crumbs.

If you make this, I’d love to hear from you. Leave a comment below or find me on Instagram and share your creation. Don’t forget to tag me @passionatelykeren so I won’t miss your post.

Keren x

Vegan Apple Pie

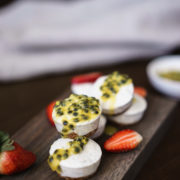
Vegan Passionfruit Ice Cream Cups

Today I’m sharing my latest kitchen creation – Vegan Passionfruit Ice Cream Cups. Make this when you need some icy treats, yesterday. 

And yes it’s currently very cold in Sydney and I have no business making ice treats. However, I’m one of those weirdos who love eating ice cream when it’s freezing colds. Why not? The ice cream melts slower and it reminds me of summertime :)

The recipe for this dessert is very simple. You don’t need to cook or churn the batter, just blend and chill. Also, the great thing about making them in little cups is that they defrost a lot quicker and you can just bite straight into them rather than messing around with a scooper. You don’t even need to make the base but it gives a lovely flavour and texture to the ice-cream.

Note: Since the recipe uses coconut cream, you’ll need to do a bit of preparation the night before. Leave one or two cans (use two cans) of coconut milk in the fridge at least overnight. The cooling process will allow for the ‘cream’ to float to the top, which is what we need. You can use the liquid part for smoothies or mix it with coffee to make a nice cold coffee drink.

In this recipe I’m using Norbu – a sweetener made of monk fruit extract. It’s tastes just like sugar but with 96% less calories and none of the bitterness of other sweeteners. I’ve been experimenting with it and I’ve used it in this desert. I love it.

Monk fruit or known by Chinese as ‘luo han guo’ has been around for century and is commonly used by Chinese as medicinal herb for treating cough and sore throat. I still remember my mum making me a cup of this luo han guo tea, whenever I have a sore throat. You can other sweetener if you like such as maple syrup, agave nectar, stevia or even sugar. If you’re using stevia, make sure that you adjust the amount to achieve the sweetness of 2 tablespoons sugar, which is what we need.

Vegan Passionfruit Ice Cream Cups

Bite-size, no churn ice cream recipe perfect for entertaining. Just blend and chill!

  • Base
  • 1/2 cup raw almond
  • 5 pitted medjool dates
  • 1 tbsp coconut flakes (or shredded coconut)
  • 1 tbsp coconut oil
  • a pinch of salt
  • Filling:
  • 1 cup coconut cream (the thick creamy bits from a can of coconut milk left in the fridge overnight)
  • 2 tbsp of your favourite sweetener (I use Norbu)
  • 1 1/2 tbsp lemon juice (about half a lemon)
  • 2 tbsp Passionfruit pulp (plus extras for serving)
  1. Add all the ingredients for the crust into a food processor or a small power blender until a dough forms.
  2. Place about a teaspoon into a mini muffin silicon tray and press down with your fingers to flatten and cover the base. Place in the freezer while you make your ice cream filling.
  3. Blend all the ingredients until is well-combined and smooth. Pour over the base, cover with foil and place back into the freezer for at least 3 hours.
  4. Take out of the freezer and allow to slightly defrost for about 5-10 minutes before eating.

If you make this, I’d love to hear from you. Leave a comment below or find me on Instagram and share your creation. Don’t forget to tag me @passionatelykeren so I won’t miss your post.

Keren x

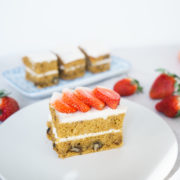
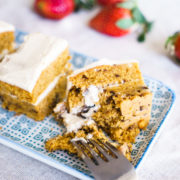
Vegan Carrot Cake

Well hello, I have a delicious vegan carrot cake recipe for you. It’s simple, easy to make, and most importantly, it’s yum.


Vegan baking can be a bit of a hit and miss. When it’s a miss (a.k.a #fail) it can be devastating. Especially when you use expensive organic ingredients which I often do.

Luckily, I have been having more luck than misfortune at baking this year. This cake is certainly one of my successes. I’ve made them three times in a row now and as I look at these photos, I feel like making them again.

Gosh, wedding is in eight weeks and it doesn’t look like I will lose the one to two kilograms needed to make my dress looks ‘perfect’ (said the seamstress…). Thank God for Sphanx!

I cut the cake into halves and frost them with this Lemon Cream Cheese Frosting, which although optional, I highly recommend because it takes the cake to a whole new dimension. I only used about a third of the batch for frosting the cake so you don’t need to make the whole batch. However, because it’s so good (and very light) I ended up serving it with the cake as a side as well.

I also use a teaspoon of Beyond Latte – Ginger Latte Mix for a bit of a ‘ginger kick’. The mix also have turmeric which gives the cake a lovely golden colour. You can replace it with 1/2 teaspoon of ginger powder if you want.

Try this vegan carrot cake you must. It’s delicious.

Vegan Carrot Cake

Easy and delicious vegan carrot cake for everyone!

Wet Ingredients:

  • 2 large carrots (grated (about 277 gram))
  • 1 1/2 cup milk
  • 1/2 cup raw sugar
  • 1/3 cup melted coconut oil
  • 2 tbsp apple cider vinegar
  • 1 tsp vanilla extract

Dry Ingredients:

  • 2 cups flour
  • 2 tsp baking powder
  • 1/2 tsp baking soda
  • 2 tsp ground cinnamon
  • 1 tsp Beyond Latte <a href="http://www.beyondlatte.com.au">Ginger Latte Mix</a> (optional)
  • 1/2 tsp ground nutmeg
  • 1/2 tsp ground clove
  • 1/2 tsp salt
  • 1/2 cup chopped walnut
  • 1/2 cup of <a href="https://www.passionatelykeren.com.au/vegan-lemon-cream-cheese-frosting/">Lemon Cream Cheese Frosting</a>
  1. Preheat oven to 180C. Line a 34 x 24 cm baking pan
  2. In a large bowl, whisk together the dry ingredients.
  3. In a separate bowl, whisk together the wet ingredients.
  4. Mix the dry ingredients into the bowl with the wet ingredients and stir until just combined.
  5. Bake for 30 to 40 minutes or until a toothpick inserted comes out clean. Let cool for 5-10 minutes, then carefully remove them from pan and transfer to a wire rack to cool completely before frosting.

If you’re a super lazy person (like me at times) you can put all the ingredients and pulse them in a blender. You want to be careful though, not to overblend so you still get some texture from the carrots of the nuts.

If you make this, I’d love to hear from you. Leave a comment below or find me on Instagram and share your creation. Don’t forget to tag me @passionatelykeren so I won’t miss your post.

Keren x

Vegan Lemon Cream Cheese Frosting

A healthier frosting that’s creamy and delicious, but also good for you. It’s light, refined sugar free, dairy-free, and oh so addictive! Use it to frost carrot cake, muffins or serve with pancakes.

Vegan Lemon Cream Cheese Frosting

  • 1 ½ cups raw cashews (soaked for at least 4 hours or overnight, drain)
  • 1 can of full fat coconut milk
  • Juice from 1 lemon
  • 2 tbsp coconut oil
  • 2 tsp pure organic vanilla extract
  • 3 tbsp maple syrup
  • 1/4 tsp sea salt
  1. In a food processor or power blender, blend all ingredients on high for a few minutes until creamy, scraping the sides to ensure even blend.
  2. Chill in the fridge to thicken for at least 1 hours before using.
  3. Store in the fridge for up to one week.

**Prep time does not include the time needed to soak cashews.

If you make this, I’d love to hear from you. Leave a comment below or find me on Instagram and share your creation. Don’t forget to tag me @passionatelykeren so I won’t miss your post.

Keren x