The secret to fluffy, pillowy vegan pancakes

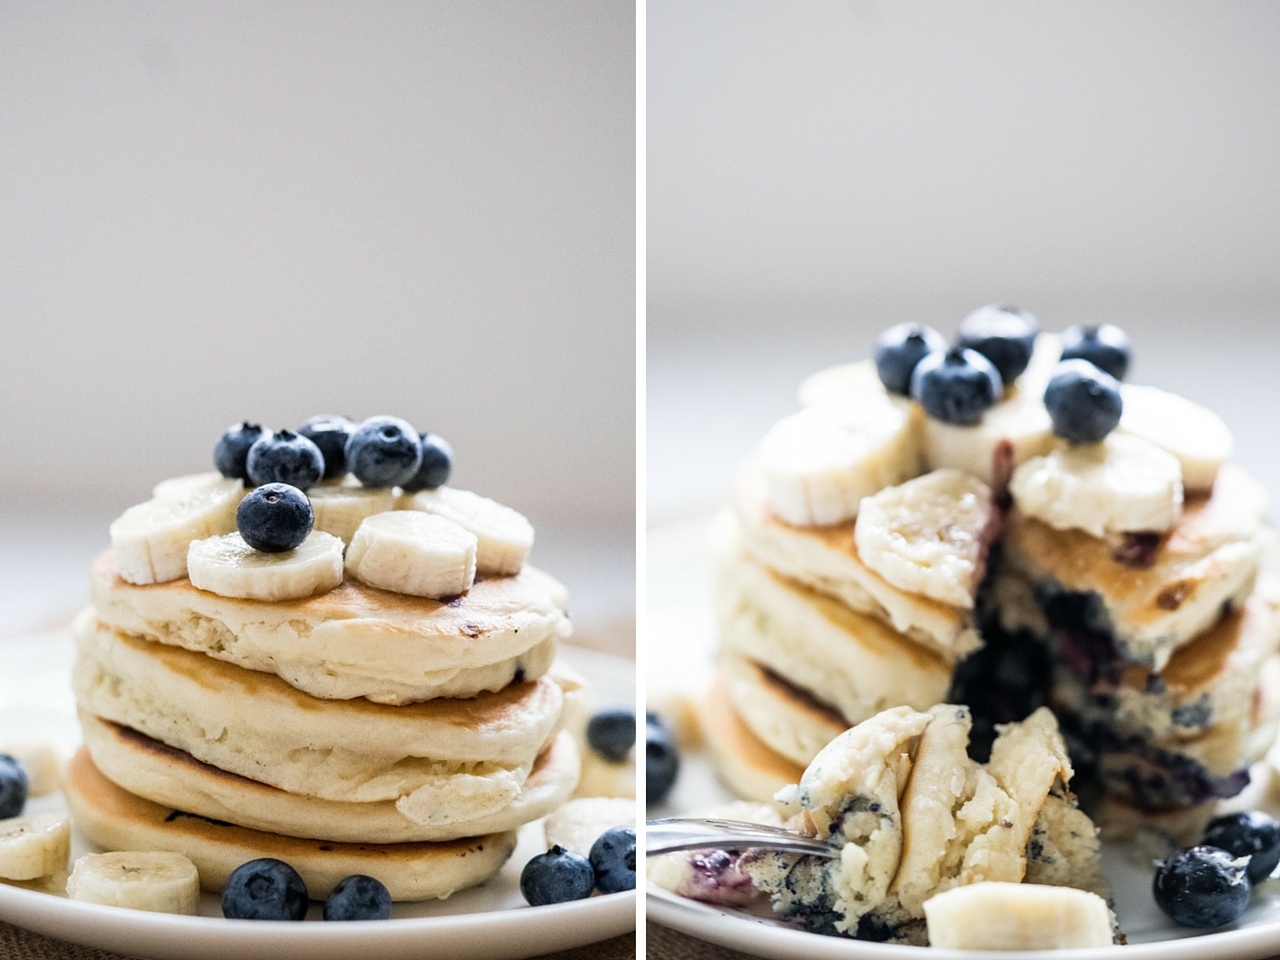
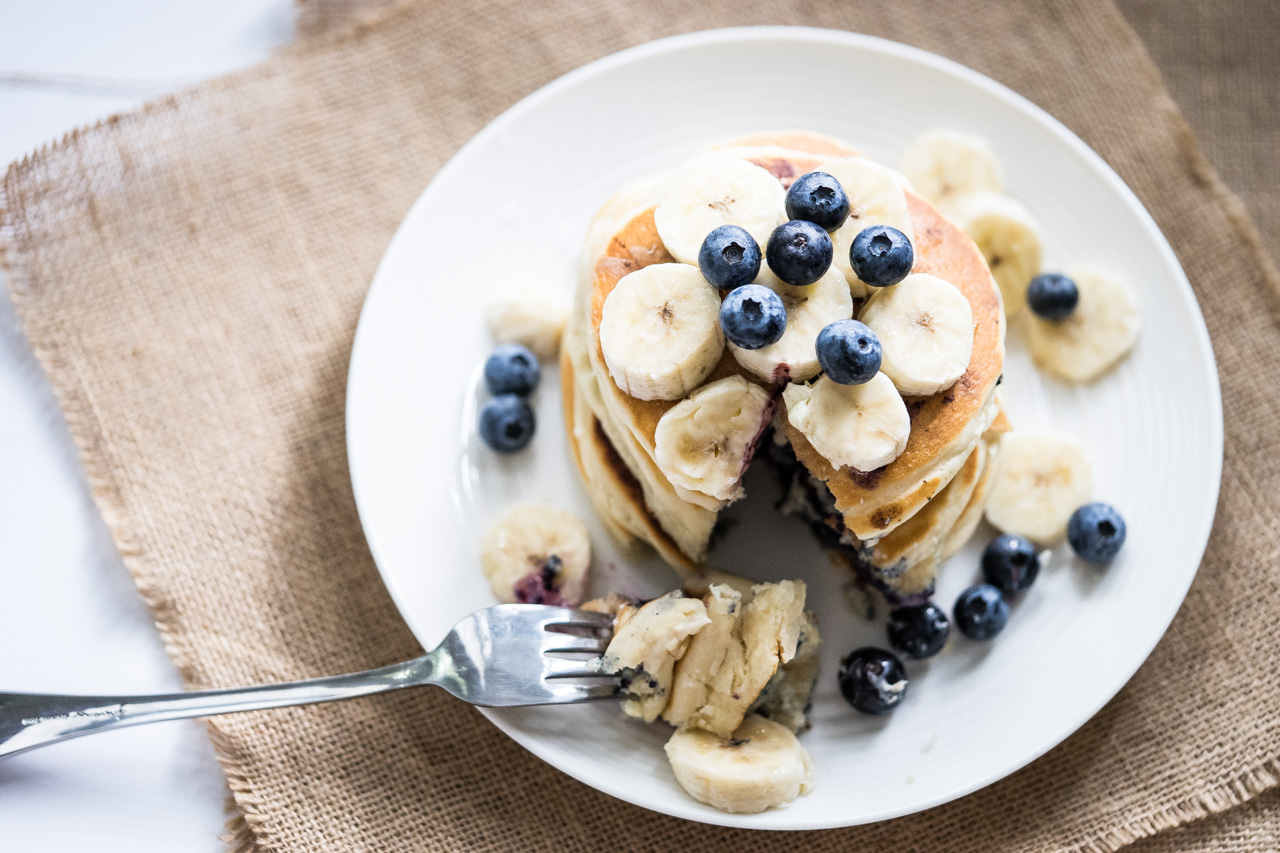
Today I will share with you the secrets to perfectly round fluffy, pillowy vegan pancakes that will rock your world.

Blueberry pancake-6

The world (or your mum) may have once convinced you that you can’t make a soft, fluffy baked goods without eggs. But that world is changing now. Welcome to the age of egg-free cooking and baking. We’ve got pancakes, baby.

Soft fluffy vegan pancake

  1. Do not overmix the batter. Use a spoon or a fork to mix it all through, they don’t need to be smooth and God forbid, do not use an electric mixer!
  2. Do not use the batter straightaway. Let the batter rest for about ten minutes to allow the gluten to settle and the baking powder and vinegar to react. Usually this is about the time you need to get your pan out, oil it and preheat it for cooking.
  3. Use medium low heat. Not hot, not low but medium low, meaning slightly on the low side but not too low. Each stove is different and so you will need to play a bit with your stove to figure out the right setting.
  4. Do not use too much oil. You want a very thin layer of oil. You can try using an oil spray or use a paper towel to spread the oil on the pan. You can also use a non-stick pan.
  5. Do not overcrowd the pan. Make one or two pancakes at a time (unless you have a very large pan). If making more than one make sure you leave enough room between each pancakes as the batter may spread a little before they start to puff up.

Bonus Pro Tip: Use an oiled measuring cup to scoop out the batter. This will ensure your pancakes are all the same size and the oil prevents batter from sticking to the cup.

Fluffly Vegan Blueberry Pancake

Let the chicken have their eggs as our pancakes do not need them to puff, fluff and be as the soft, pillowy goodness that they are meant to be.

Now let’s pancake.

Blueberry pancake-3


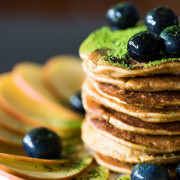
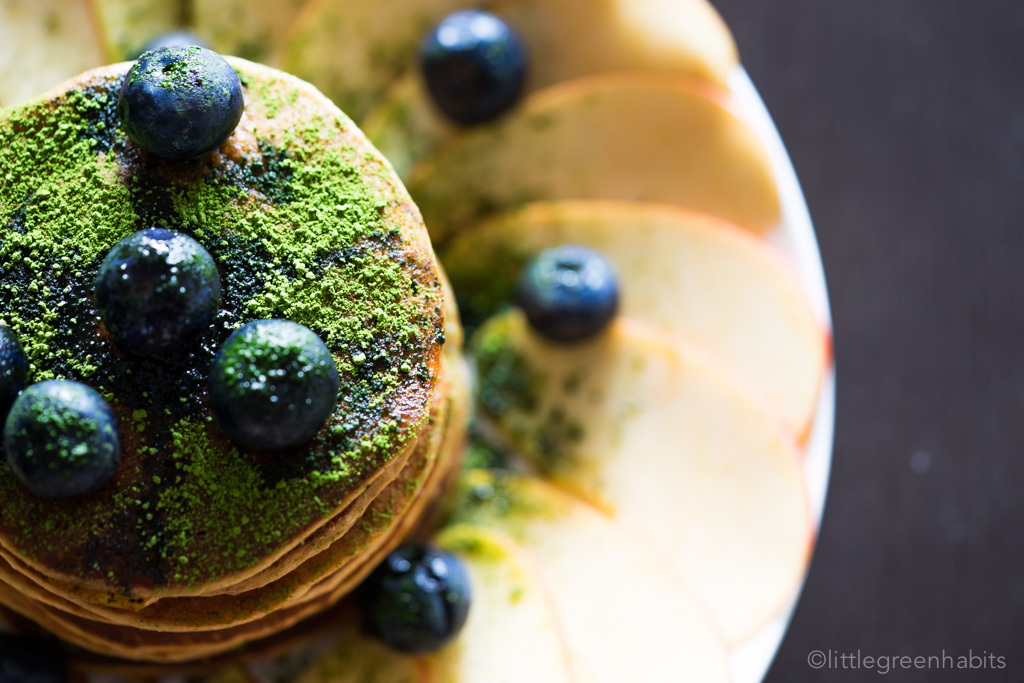
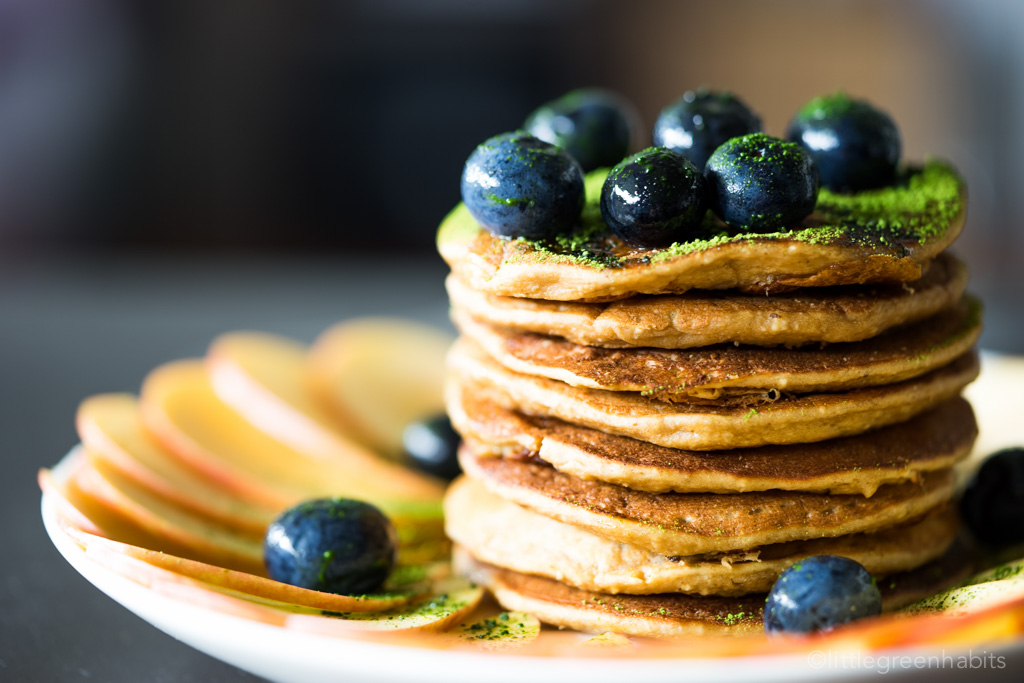
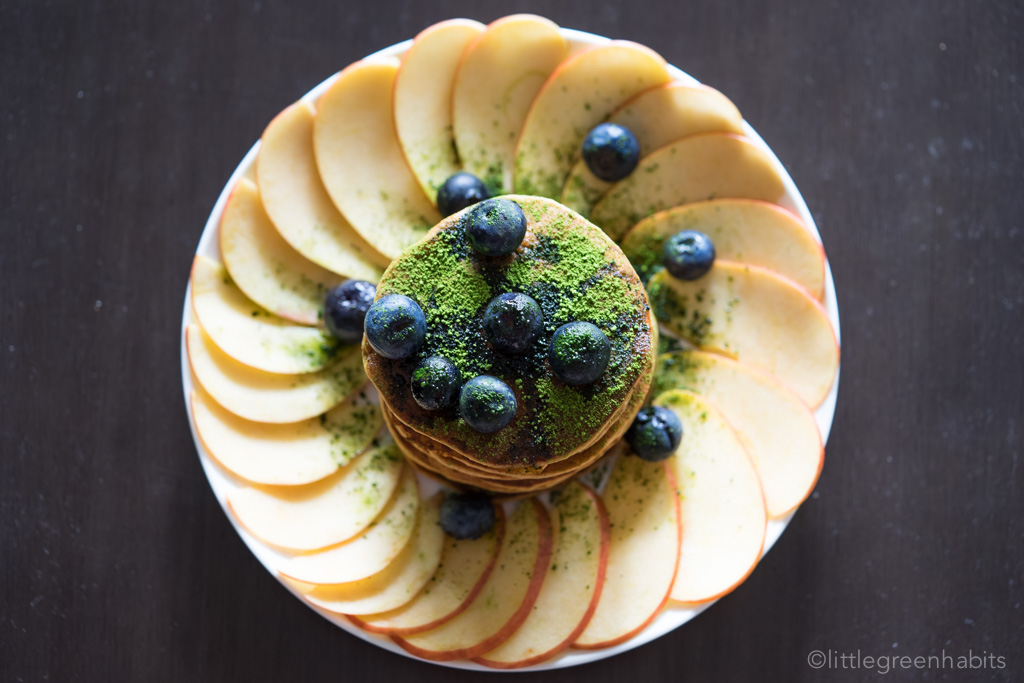
Blueberry vegan pancakes
Recipe Type: Breakfast
Author: Keren
Prep time:
Cook time:
Total time:
Serves: 4-6
Soft, fluffy pancakes with
Ingredients
  • Dry ingredients
  • 1 cup flour
  • 1 1/2 tbsp baking powder
  • ¼ tsp salt
  • Wet ingredients
  • 1 cup soy milk (or your favourite nut milk), I use Nutrisoy brand
  • 1 tsp apple cider vinegar
  • 1 tbsp sugar, mixed in 3 tbsp water
  • 2 tbsp vegetable oil (plus extra to oil the pan)
  • Half a cup of blueberries
Instructions
  1. In a large mixing bowl, sift together all the dry ingredients. Make a well in the center.
  2. Mix all the wet ingredients together.
  3. Add the wet ingredients into the dry ingredients and mix until just combined. Careful not to overmix the batter (a few lumps are ok).
  4. Let the batter rest while you preheat the pan over medium-low heat.
  5. Lightly coat the pan in oil and preheat your pan for about 5 minutes. You could also use a non-stick pan.
  6. Pour about 1/3 cup of batter of pancake batter on the pan to form a circle. Drop 5-6 fresh blueberries into the pan. Cook for about 3 minutes until bubbles start to appear. Flip and cook for another 3 minutes or so until the pancakes is golden
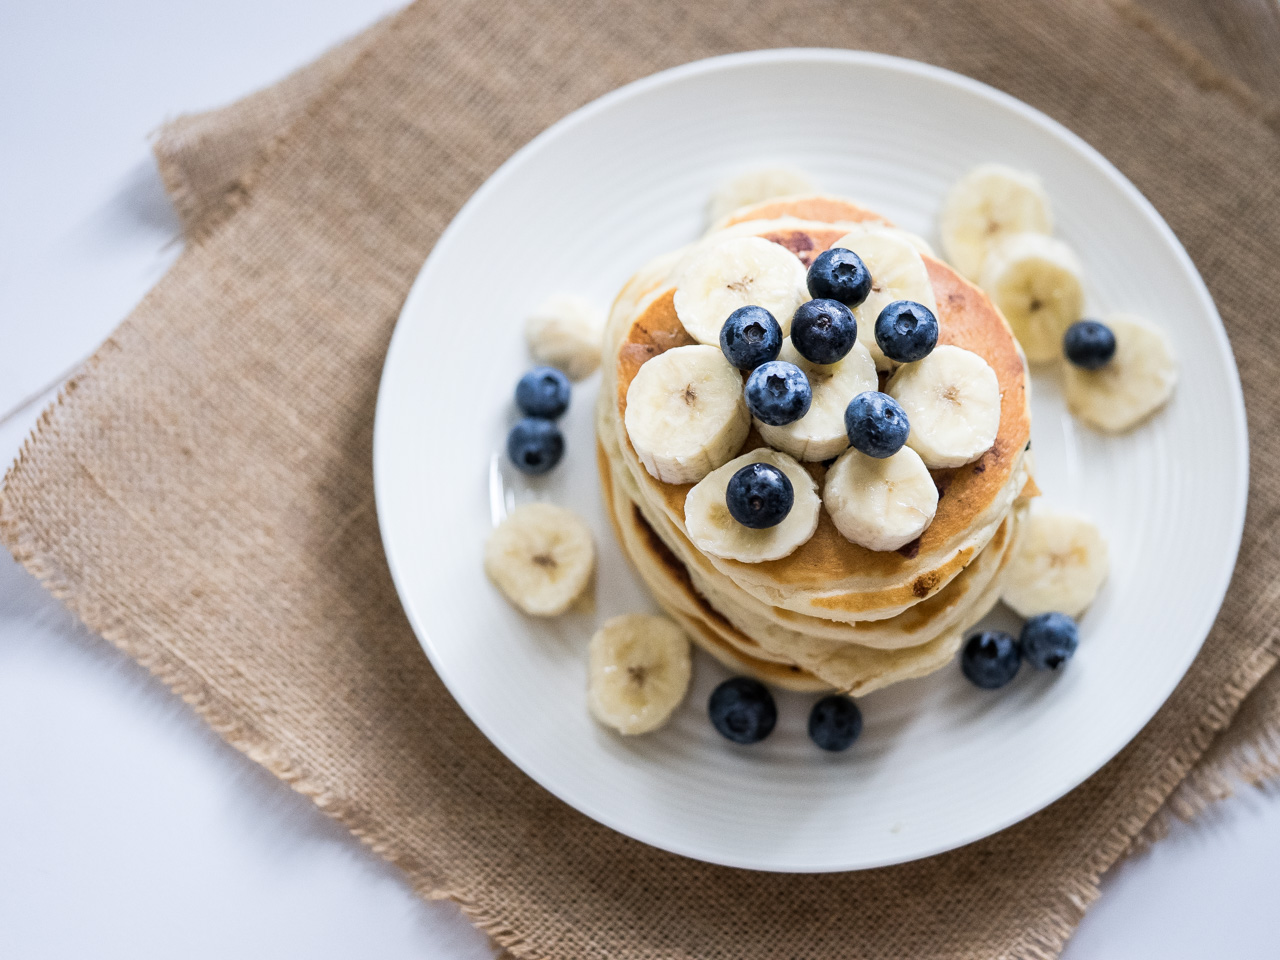
  7. Keep pancakes covered to keep warm until ready to serve. Top up with more blueberries or maple syrup. Enjoy!
Notes
You can replace blueberries with chopped bananas, chocolate, coconut flakes, nuts, anything you want really.


Blueberry pancake-4


Creamy Mushroom Vegan Pasta

Because carbs make you happy, science says. And I’m all about happiness.

Last year on my short trip to Europe I had one of the best mushroom pastas I’ve ever had. It looks like what would have been a dieter’s nightmare – an enormous serving of spaghetti laced with sliced mushrooms, sitting on a glistening pool of olive oil and garlic.

It was delicious! (Insert lip-licking emoji here) I figured that life’s too short to think about calories, especially when you’re in Italy.Rome

This recipe is my attempt to re-create that memory, this time with a bit less oil and a bit more cream. Because who wouldn’t want a creamy mushroom pasta?

Creamy Mushroom Pasta-6

This recipe is very simple to make. You just need mushrooms, zucchini and broccoli (you can also use broccolini, snow peas or asparagus).

The sauce is inspired by Minimalist Baker and is a delicious blend of almond milk, vegan cheese, nutritional yeast, lemon juice, and dried chilli. I used a mixture of Miyoko Schinner and Sprout and Kernel vegan cheeses for optimum creaminess but you can use any of your favourite vegan cheeses. If you don’t have vegan cheese, you may be able to replace it with ½ cup of cashew cream.

Creamy Mushroom Pasta-3


Creamy Mushroom Vegan Pasta
Recipe Type: Main
Author: Keren
Prep time:
Cook time:
Total time:
Serves: 2
A deliciously creamy pasta dish that’s cheesy, satisfying and undetectably vegan.
Ingredients
  • 300 grams dried spaghetti
  • 3 tablespoons exra virgin olive oil (I used Cobram Estate)
  • 10 cloves garlic, minced, divided into 2 portions
  • 1 cup sliced Swiss brown mushrooms
  • 1½ cups (200 g) roughly chopped asparagus
  • 150 g vegan cheese, grated (I used Miyoko’s Kitchen’s Cheese and Sprout and Kernel Monster Cheddar)
  • ¾ cup (180 ml) unsweetened almond milk or your favourite non-dairy milk
  • 2 tablespoons nutritional yeast
  • 1-2 tablespoons lemon juice
  • ¼ tsp dried chilli
  • Sea salt and black pepper to taste
Instructions
  1. Bring a large pot of water to a boil. Season generously with sea salt. Add pasta and cook according to package instructions, then drain and set aside.
  2. Heat a large skillet over medium-high heat. Once hot, add olive oil, 1 portion of the chopped garlic, and broccoli.
  3. Sauté for 3-4 minutes, stirring frequently until the broccoli is almost tender.
  4. Lower heat on the skillet to medium and add mushroom, almond milk, vegan cheese, the remaining portion of chopped garlic, nutritional yeast, and dried chilli. Season with a generous pinch sea salt, black pepper and add lemon juice.
  5. Taste and adjust flavour as needed, adding more nutritional yeast for cheesiness, dried chilli for heat, or lemon juice for acidity.
  6. Add cooked drained pasta directly to the sauce along with sautéed broccoli and mushrooms. Toss to coat and enjoy immediately.
  7. Leftovers can be stored in the refrigerator up to 3 days. Reheat in the microwave or on the stovetop, adding a bit of almond milk if it’s dried out.

Creamy Mushroom Pasta-1

If you made this recipe please let me know how it turned out for you! Leave a comment below or share a picture and tag me on Instagram!

Love,

Keren x

Superfood Tempe Taco

With the weather getting cooler it’s time for something comforting, something warm, and something spicy. It’s time to Taco!

Avocado and Tomato

There’re a few reasons why I love Mexican food. I love food with bold flavours, the kind of food that punches you in the face with a strong taste and then makes you come back for more. It’s sexy and daring. It’s passionate.

One of my favourite Mexican foods is taco. I mean, who doesn’t like taco? It’s tasty, easy to make and it’s great for parties!

DSC05330

Traditionally, taco is made with meat but I make mine with tempe, walnuts and chia seeds. These make the taco highly nutritious and their unique texture gives the taco that ‘meaty’ and chewy taste, even though it’s completely plantbased.

You can find tempe (also spelled tempeh) at your local supermarket, health food store or an Indonesian or Malaysian speciality grocery store. You want to get raw tempe, as the cooked version is often flavoured and not as firm as the fresh type so it might be difficult to grate.

Superfood Tempe Taco

Why I love it

It’s not only that this superfood tempe taco is easy and quick to make, it’s also nutritious, delicious, and high in protein. The added chia seeds provide a boost of omega 3 and they also help thicken the taco’s ‘meat’ mixture in next to no time.

The leftover ‘taco meat’ can also be used to spice up salad or sandwiches for lunch the next day, if you can manage not to eat it all in one sitting.

DSC05352

The key is to a good taco is a good taco seasoning. You can get it at the store or you can make it your self. If you’re a big taco fan, I recommend making it yourself because it’s so easy to do and you can customise it to suit your preferences.

You just need to get all the spices, mix them together and then store the mixture in an airtight jar to keep its freshness. The best thing about making your own taco seasoning is that you can adjust the taste to your liking. You can make it as hot (or as mild) as you like, you can add more of the spices you like, maybe reduce the salt, or add more pepper.

DSC05335

Superfood Tempe Taco

Ingredients:

  • 1 pack (250) raw tempe, grated
  • ¼ cup walnut, finely chopped
  • 2 cups vegetable broth
  • 2 tablespoons taco seasoning*
  • 1 tablespoon olive oil
  • 2 tablespoon of chia seeds
  • 1 onion, diced
  • 3 garlic cloves, diced
  • 1 avocado, diced
  • 2 tomatoes, diced
  • ½ red onion, sliced
  • ¼ cup non-dairy cheese
  • 8 hard taco shells

Method:

  1. Heat oil in a sauté pan on medium-high heat.
  2. Add onion and stir for about 3 minutes, until it begins to soften.
  3. Add garlic; cook and stir until fragrant, about 1 to 2 minutes.
  4. Stir grated tempeh; cook, stirring occasionally until lightly browned, about 5 minutes.
  5. Pour vegetable broth over the tempeh mixture and reduce heat to low. Add the taco seasoning, oregano, and ground red pepper. Cook, stirring regularly, until most of the liquid has evaporated, about 5 minutes.

*How to Make Taco Seasoning

Ingredients:

  • 1 tablespoon cumin
  • 1 tablespoon oregano
  • ½ – 3 teaspoon chilli powder (depending how hot you like it)
  • 2 teaspoon garlic powder
  • 2 teaspoon onion powder
  • 2 teaspoon paprika
  • ½ teaspoon cayenne pepper
  • ½ teaspoon salt
  • ½ teaspoon pepper

Method:

Mix all the ingredients together

Tips:

  • Make a big batch of taco seasoning and use it to season roast vegetables, salads, wraps, etc
  • Use lettuce leaves in place of taco shells if you want to make it lighter (or if you run out of taco shells)
  • Use leftover taco meat to fill sandwiches or to sprinkle upon your salads.

Did you make this recipe?

Please let me know how it turned out for you Leave a comment below or share a picture and tag me on Instagram!


Keren x


This recipe is also created in collaboration with Australian Avocado

Tempe Scramble

One of the things I love to make for breakfast is tempe scramble. It’s perfect for weekend brunch or even for lunch. Actually, it doesn’t really matter what time of the day you have it. Indonesians often eat lunch for breakfast, dinner for breakfast and dessert for at any time of the day so you won’t be breaking any cultural traditions. I know this because I grew up in Indonesia and I’ve had mee-goreng, fried rice and toasted chocolate sprinkle sandwiches for breakfast. People still do.

Tempe is fermented soybeans originally from Indonesia. Yes, the correct spelling is without the ‘h’. It’s pronounced tém-pé, without the ‘h’ sound at the end. Here in Australia (and I guess a lot of Western countries) everyone spells it incorrectly. I’ve started doing that too, just so people know what I’m talking about. But tempe, not tempeh, is the correct spelling, and I will start spelling it correctly now since I’m Indonesian and I should know better.

Tempe Scramble-5-2

I’m surprised a lot of people have not tried tempeh, which is a shame because tempeh is even better than tofu in terms of its nutritional value and wholesomeness. I speculate a lot of people are afraid to try it or they’ve had a bad experience before. Maybe it wasn’t cooked right, or maybe the tempe they used wasn’t fresh. Fresh tempe smells and tastes delicious. The fermentation process that makes tempe (transforming the soybean into a cake or patty form) gives it a firm texture and an earthy mild flavour. It also has the same fermented aroma as cheese. Try to find raw organic tempe if you can. They can be fresh or frozen, but make sure they’re not pre-cooked or flavoured. You can also make them yourself. It takes a fair bit of time and it can be daunting at first but it’s actually quite simple, once you know the tricks of the trade. I sometimes make my own tempe but these days I don’t have a lot of time so I just buy them. I use the Nutrisoy brand and I can say they make great, authentic tempe! You can find them at Indonesian or Malaysian grocery stores.

Tempe Scramble-7

Why I love this tempe scramble

Tempe is great source of plantbased protein, Vitamin B12, iron and probiotics. Tempe scramble is one of the easiest things you can make using tempe. If you have a food processor, you can make it even quicker by chopping all your ingredients (separately of course) using the food processor and all you need to do is cook! Regardless of how you cut up the ingredients, it’s a great meal for when you want to make something fast and it creates an aromatic, slightly crunchy scramble with a somewhat meaty and chewy texture. Serve the tempe scramble with a slice of toasted sourdough bread or some steamed vegetables and you have a deliciously filling meal.

Tempe Scramble
Recipe Type: Breakfast
Prep time:
Cook time:
Total time:
Serves: 2
An aromatic, slightly crunchy eggless scramble made with a somewhat meaty and chewy texture. Rich in plantbased protein, nutritious and delicious
Ingredients
  • 250 raw fresh tempe, minced or grated
  • 1 onion, sliced
  • 3 garlic cloves, sliced
  • 1 tablespoon of olive oil
  • 1 tablespoon soy sauce
  • 1 tablespoon nutritional yeast
  • a pinch of cayenne pepper
  • salt and pepper
Instructions
  1. Using a non-stick frying pan, heat olive oil over medium heat. Add onion and garlic. Cook for about two minutes or until soft.
  2. Add tempe into the pan. Stir for a minute.
  3. Add soy sauce, nutritional yeast and cayenne pepper. Stir for a few more minutes until golden brown.
  4. Add a pinch of salt and pepper. Taste and adjust seasoning.
  5. Serve with toasted sourdough bread or some steamed vegetables.
Notes
Add spinach with kale or any other greens you like: diced asparagus, spring beans, or even peas and corns.[br]Add some shredded dairy-free cheese for a cheesy twist.[br]Add a tablespoon of chia or linseed (or your favourite superfood) for nutritional boost.[br]Use this to fill wrap or sandwich, layered with sliced avocado and tomato.

Did you make this recipe?

Please let me know how it turned out for you! Leave a comment below and don’t forget to share a picture on Instagram and tag me. I’d love to see your creation.

With love,

Keren

Tempe Scramble-3

Chandra Koftas

This recipe has a special place in my heart as Isa Chandra personally recreated the dish when she came to Sydney a few years ago to attend the Sydney Vegan Festival. It was delicious. The original recipe actually comes with a creamy cashew sauce but I like to make these koftas as is, without the sauce, and use them to fill a veggie wrap or have as finger food.

Kofta traditionally refers to a meatball or meatloaf, and is popular in Indian cuisine. It usually consists of ground meat mixed with spices, but these koftas are vegan by using chickpeas and zucchinis!

Chandra Kofta-3-2
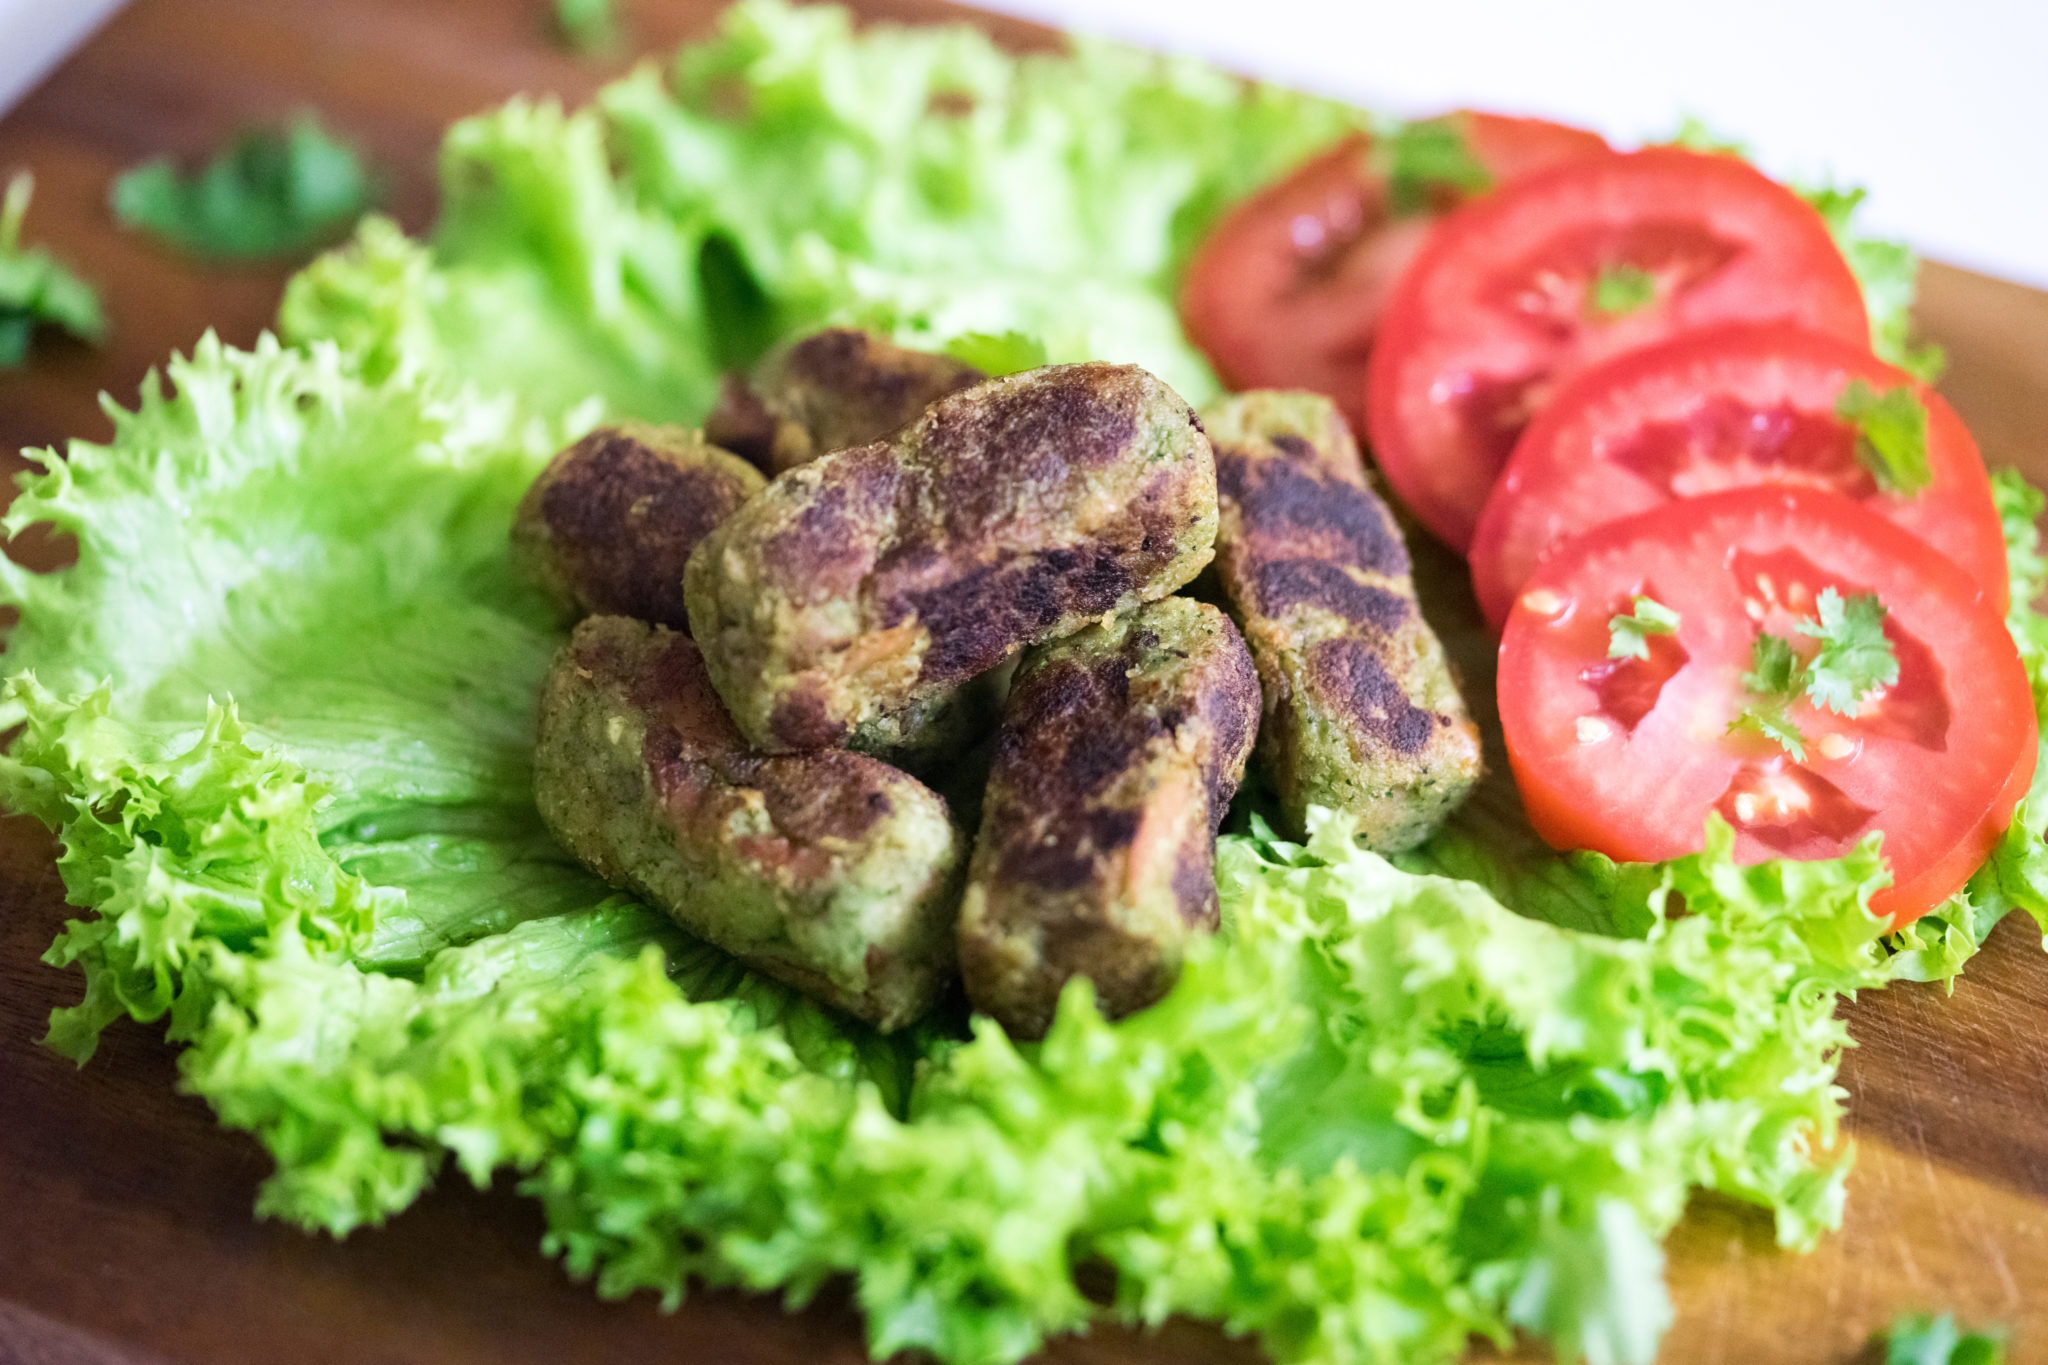
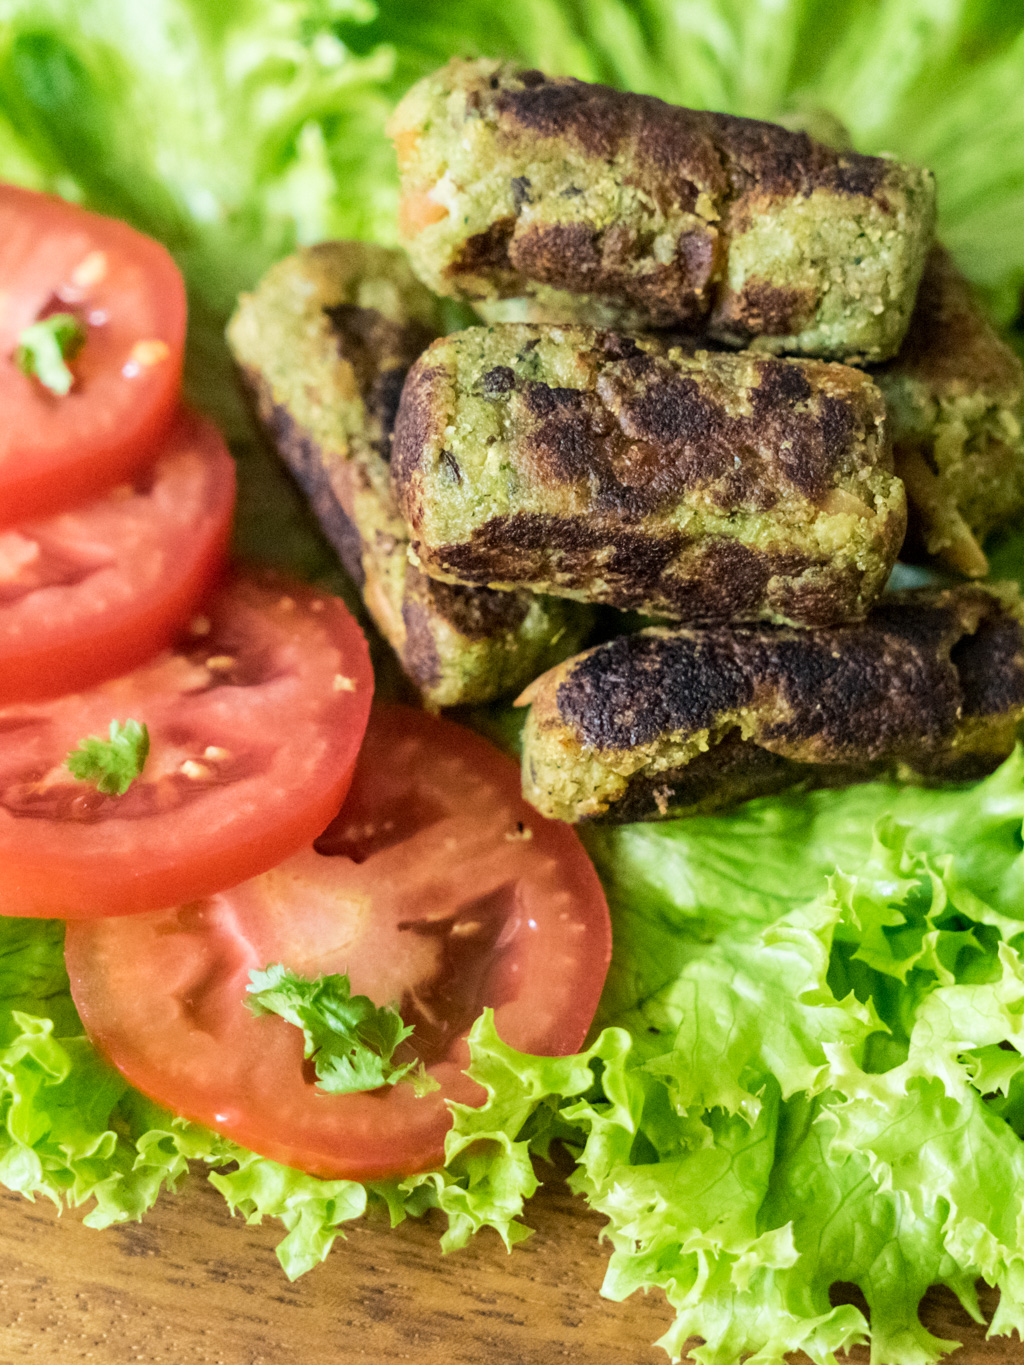
Why I Love These Chandra Koftas

These koftas are a feast of flavours and texture. Bite into the crispy skin and you’ll find a soft dumpling with ‘surprise’ bits of toasted almond and zucchini on the inside. These koftas are substantial but light at the same time.


Chandra Koftas
Author: Keren
Prep time:
Cook time:
Total time:
Serves: 20
Recipe adapted from Isa’s Does It Cookbook
Ingredients
  • 1 can chickpeas, rinsed and drained
  • 1 cup slivered almonds
  • 3 teaspoons cumin seeds
  • 500g zucchini, shredded
  • 1/2 cup finely chopped fresh coriander
  • 2 tablespoon minced fresh ginger
  • 5 cloves garlic, minced
  • 1 teaspoon salt
  • ½ tsp of freshly ground black pepper
  • 2 ½ cups Panko breadcrumbs
  • Spray oil
  • Fresh coriander, for garnish (optional)
Instructions
  1. Prepare the kofta mixture
  2. In a medium bowl, mash the chickpeas until they are mushy but not quite pureed.
  3. Preheat a large, heavy pan over a medium heat. Toast the almonds for about 7 minutes, tossing frequently, until they are golden and browned in some spots. Transfer immediately to the bowl containing the chickpeas. Next, toast the cumin seeds for 3 minutes or so, until fragrant and a shade or two darker. Transfer those to the bowl as well.
  4. Add the zucchini, coriander, ginger, garlic, salt, and black pepper, and mix well.
  5. Now add the breadcrumbs and use your hands to mix and mush until it holds together. Cover with plastic wrap (or a plate) and place in the fridge for at least 30 minutes.
  6. Preheat oven to 180C. Line a baking tray with baking paper to keep the formed koftas from sticking. Scoop up about ¼ cup of the mixture. Roll between your hands to pack it well, and then roll into a spherical shape. Set on the baking paper and continue to form all koftas (I got about 20 koftas).
  7. Spray the koftas with cooking oil spray and bake for about 20 minutes or until brown. Roll them around halfway to get them browned on all side.
  8. Garnish with coriander and serve with some rice.

Please let me know how it turned out for you! Leave a comment below and don’t forget to share a picture on Instagram and tag me. I’d love to see your creation.

Chandra Kofta-1

Matcha Latte

Drinking matcha latte has become a morning and afternoon ritual for me. It’s soothing and comforting, not to mention smooth, creamy and delicious. The act of making the tea itself is very calming, especially on a very busy day. It brings me back to me. It allows me to pause, breathe and enjoy a moment of calm among the bustle. I’m here, right now, alive. Life is good.

Why I love my Matcha Latte

Unlike green tea where leaves are discarded after they are infused into the hot water, with matcha you’re drinking the actual leaves. It’s rich in antioxidants and nutrients. But above all, I love the taste of matcha, especially matcha latte. Matcha itself has a very strong earthy taste but it becomes a lot milder after you mix it with milk (soy milk in my case). It also has a high amount of caffeine (similar to a cup of coffee) but unlike coffee, it doesn’t cause adrenaline spikes. It creates a rather calm alertness with no spikes and crashes. It comes on gently and leaves just as gently. It’s beautiful.

I currently use organic matcha tea powder from Kenko Tea, which are pure stone ground tea leaves with slight sweetness, and grassy tones with a slight tannin. This is one of the best tasting matchas I’ve had here in Australia. Yes, it may seems quite expensive at first at $44 per 30 grams, but it’s actually cheaper than a buying a cup of latte. 30 grams gives you around 30 cups of matcha latte so it works out to about $1.50 a cup.

Matcha latte-6

This is how I make my matcha latte almost every day. It’s nothing fancy and it’s probably not the best way to do it, but it works for me. I don’t use a sieve and most days I don’t even use a milk frother (though it will taste even better if you do). But honestly, you can just use warm or hot milk and it would be just as nice. You really can’t mess it up. Matcha latte is amazing and I hope you will try it one day, if you haven’t already.

Matcha Latte


Matcha Latte
Recipe Type: Drinks
Prep time:
Total time:
Serves: 1 cup
Ingredients
  • 1 scoop of organic matcha tea powder
  • 1/4 cup of hot water
  • 1 cup of soy milk
Instructions
  1. Add matcha tea powder to cup.
  2. Add a bit of hot water and whisk the powder with the bamboo whisk until pasty.
  3. Then add the remaining water and whisk vigorously to dissolve and make lots of air bubbles.
  4. Heat soy milk on the stove on in the microwave for 40 second on ‘high’.
  5. Add to the matcha tea and stir the surface using the bamboo whisk to make air bubbles (I’m not very good at this).
  6. Sip and enjoy the moment :)

Did you make this recipe?

Please let me know how it turned out for you! Leave a comment below and/or share a picture on Instagram with the hashtag #littlegreenhabits.

Love and (matcha) greens,

Keren

Vegan Choc Chip Hot Cross Buns

Vegan Choc Chip Hot Cross Buns

With Easter just around the corner (and very early this year) I thought it’s time for me to share this recipe. I remember my first Easter as a vegan and I struggled finding vegan hot cross buns, especially the chocolate chip variety. So I went and made my own, and I’ve been making them ever since for Easter.

Friends, this is what Easter is made for…


Why I love these vegan choc chip hot cross buns

Aside from the sensation of biting into warm gooey chocolate, these buns smell as delicious as they are tasty. The added spices give them that traditional hot cross buns smell and taste, but with a sprinkle of chocolate magic.

Vegan Choc Chip Hot Cross Buns
Author: Keren
Prep time:
Cook time:
Total time:
Serves: 9
Ingredients
  • Dough
  • 2 tsp instant dried yeast (1 sachet)
  • 2 tbsp sugar
  • 1 cup of soymilk (or your favourite non-dairy milk)
  • 3 cups plain flour
  • 1/2 all spice
  • 1/2 tsp nutmeg
  • 1/2 tsp cinnamon
  • a pinch of salt
  • 100g dairy-free dark chocolate, finely chopped (or dark chocolate chips)
  • 2 tsp organ egg replacer (equivalent of 2 eggs)
  • 4 tablespoons water
  • Flour Paste for Crosses
  • 2 1/2 tbsp plain flour
  • 1 tbsp sugar
  • 2 tsp water
  • Sugar Glaze
  • 1 tablespoons sugar
  • 1 tablespoons boiling water
Instructions
  1. If you’re using cold soymilk, heat the milk microwave for 20 seconds until lukewarm but not hot to the touch (you can also use the stove to do this).
  2. Mix sugar and soymilk. Add yeast and mix. Stand for about 10 mins until frothy. If the yeast doesn’t froth at this stage, it’s not active and you’ll have to get some fresh yeast.
  3. Whisk egg replacer powder and 4 tablespoons water in a small bowl until thick and frothy.
  4. Sift flour, salt and spices into a big bowl. Stir in the yeast mixture, egg replacer mixture, and then the chopped dark chocolate. Knead for 5-10 mins or so until it becomes a smooth, elastic dough. Use a mixer with dough hook attachment to speed up the process. It took me 2 minutes to do this using the Tefal Cuisine Companion.
  5. Place dough in an oiled bowl, cover with cling wrap and leave to rise in a warm space for an hour (an oven with the light turned on works a treat).
  6. Turn dough out and divide into 9 portions. Roll them into balls and place them on a baking tray. Cover with a tea towel and leave in a warm place till nearly doubled.
  7. Preheat oven to 180C
  8. Make the flour paste by mixing ingredients together until smooth. Pipe crosses on buns using a piping bag.
  9. Bake buns for 20 mins or until light golden brown.
  10. Make the sugar glaze by mixing all the ingredients together. Brush glaze over hot buns.
Notes
Use dairy-free milk chocolate if you like it sweeter.[br][br]For the traditional hot cross buns, replace chocolate with mixed dried fruits.

Vegan Choc Chip Hot Cross Buns-6

Did you make this recipe?

Please let me know how it turned out for you! Leave a comment below and don’t forget to share a picture on Instagram and tag me. I’d love to see your creation.

With love,

Keren


Raw Vegan Chocolate Caramel Hearts

I’m not a romantic. If you’re my boyfriend, you’re lucky if I remember your birthday. Chances are, I won’t remember our anniversary, when we met, when we first kissed, held hands or other dates with any romantic significance.

Raw Vegan Chocolate Hearts-04450

Ok, I’m not literally that bad. If we’ve been together long enough (say, three years), I’d probably remember your birthday. But I probably won’t remember your phone number. Isn’t that’s what contact lists are for, anyway?

Raw Vegan Chocolate Hearts-04407

In saying that, I do cook chocolate hearts for my dearest once in awhile. When the stars are aligned I feel like whipping up some bittersweet chocolate love for him. Like tonight. You don’t need to be a romantic to make chocolates for your loved one. Or do you?

Why I love these chocolate hearts

Although you don’t need any excuse to eat chocolate, here are some, just for fun. These raw vegan chocolate caramel hearts are intensely chocolatey (almost bittersweet) with a nice sweet caramel centre. They are refined sugar-free and contain more antioxidants than your normal chocolate bar. The chocolate is made with raw cacao, which is from unroasted cocoa beans and is the purest form of chocolate you can consume. Romantic or not, this is love.

Raw Vegan Chocolate Hearts With Caramel Centre
Recipe Type: Dessert
Author: Keren
Prep time:
Total time:
Serves: 30 hearts
Ingredients
  • Chocolate
  • 1/3 cup raw cacao powder
  • 1/2 cup coconut oil, liquid
  • 1/4 cup maple syrup
  • 1/2 tsp vanilla extract (organic and alcohol free if possible)
  • Caramel
  • 5 medjool dates, pitted
  • 3 heaped tsp cashew butter
  • a pinch of sea salt
  • 2 tsp water
Instructions
  1. For the chocolate, whisk all chocolate ingredients in a bowl.
  2. For the caramel, add all ingredients in food processor and process until smooth.
  3. To make the chocolate hearts, add 1 tsp of chocolate into heart shaped silicon mould, add 1/8 tsp of caramel and fill the remaining space with extra chocolate.
  4. Plate in the refrigerator for at least a couple of hours to set. Serve.
  5. These chocolates will melt at room temperature so keep them in the fridge until the second you want to eat them.

Note: Quality ingredients are the secret for a delicious raw dessert. Make sure you buy the best you can afford. I used Loving Earth cacao powder; JaxCoco coconut oil, organic and alcohol free vanilla extract; and cashew butter from Naturals by Melrose.

Did you make this recipe?

Please let me know how it turned out for you! Leave a comment below and don’t forget to share a picture on Instagram and tag me. I’d love to see your creation.


With love,

Keren x 

Raw Vegan Chocolate Hearts-04404

Rhubarb Onion Chutney

Sometimes you feel like something that is both sweet and savoury. So you make something a little like this Rhubarb Onion Chutney…


Why I love it

It’s a delicious chutney for whenever you wanted something sweet with a savoury twist. I like it. It’s one of those dishes that plays trick with your head. It looks sweet but it also tastes savoury so you don’t really know what to do with it. It reminds me of the first time I had cranberry sauce with roast (back in my pre-vegan days), it’s weird in a delicious kind of way. This chutney is great with baked tofu or salad… or as a dip with freshly toasted olive bread.

Rhubarb Onion Chutney-2-1

Rhubarb Onion Chutney
Recipe Type: Dips and Sauces
Author: Keren
Prep time:
Cook time:
Total time:
Serves: Two 300ml mason jars.
Ingredients
  • 1 large onion
  • 1/3 cup xylitol *see notes
  • 1/2 cup dried cranberries
  • 1/3 cup white wine
  • 1/3 cup white vinegar
  • 1 tbsp balsamic vinegar
  • 1 knob ginger, grated
  • 1/2 tsp salt
Instructions
  1. Trim rhubard leave and cut into 1cm pieces
  2. Using Cuisine Companion with a chopping blade, Chop rhubarb and onion 5 seconds speed 5.
  3. Add vinegar and sugar and cook at speed 3, 30 min, 100C
  4. Remove the lid and cook for another 30 min, speed 3, 100C until the liquid reduced and the mixture becomes thick.
  5. Transfer to a sterilised jars.
Notes
*Xylitol is a natural sweetener that is extracted from any woody fibrous plant material. It tastes just like regular table sugar but contain less calories. You can replace 1/3 cup of xylitol with 1 cup of normal sugar.[br][br]*If you want a more subtle savoury flavour, use half an onion instead a whole onion.[br][br]*For manual method, chop everything by hand and then bring to a boil on the stove and then bring the heat down to simmer, stirring once in a while until the mixture becomes thick.


Did you make this recipe?

Please let me know how it turned out for you! Leave a comment below and/or share a picture on Instagram and tag me in the picture. I’d love to see your creation.

Keren x 

Vegan Peanut Butter Banana Pancakes

Finally! Gluten free, refined sugar-free, vegan pancakes that don’t suck. It’s super easy to make too!
   DSC04107

Why I love these pancakes

Well what’s not to love. It’s sugar-free, gluten-free, vegan, and the batter sets beautifully to allow for some flipping action. Peanut flour gives this pancake a lovely nutty taste and also gives it a protein boost (the one I use contain 16g protein per 1/4 cup). You can find peanut flour at the health-store (I got mine from iHerb). Combined with banana, these pancakes are mildly sweet, protein-dense and every bit delicious.
DSC04084

Vegan Peanut Butter Banana Protein Pancakes

Ingredients
  • 1/2 cups gluten-free oat flour* see tips
  • 3/4 cups peanut flour
  • 1 large ripe banana
  • 1 tbsp baking powder
  • 1 cup soy milk
  • 1 tsp vanilla extract
  • a pinch of salt
  • Rice malt or maple syrup
  • Your favourite fruit and topping (I use blueberries and match powder).

Method (Cuisine Companion)

  • Place all ingredient except the peanut flour in the bowl  fitted with the kneading/crushing blade. Mix at speed 10 for 30 seconds. Gradually add the flour through the opening on the lid, still at speed 10, until just mixed.
  • Cook 1/4 cup of batter on an oiled non-stick pan over medium heat.
  • Cook for about 4 minutes until bubbles appear on surface. Flip and cook for another 2-3 minutes or until cooked through
  • Serve with some maple/ rice malt syrup

Notes and Tips

1. Make oat flour by processing rolled oat in a food processor or a blender
2. Mix rice malt or maple syrup with peanut butter for peanut butter sauce.
3. You can also use a blender to mix the ingredients or manually by hand using a whisk.

Did you make this recipe?

Please let me know how it turned out for you! Leave a comment below and/or share a picture on Instagram with the hashtag #littlegreenhabits
Image
DSC04126