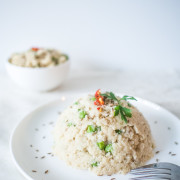
Vegan Vegetable Frittata

Vegan Frittata

Who says that you can’t make egg-free frittata?

But honestly, if you asked me a year ago if I could make frittata without eggs, I would have said, ‘hell, no!’

Vegan Frittata

Frittata, by definition, is an omelette – specifically an Italian-style omelette filled with various ingredients. And as we all know, you need eggs to make omelette.

Or do you?

Vegan Frittata

Fast forward to the present day. I’ve learned that you can make egg-free omelette. And since you can make egg-free omelette, you can make egg-free frittata. Hallelujah.

Vegan Frittata

To make a vegan frittata you need to use chickpea flour, vegetable starch (I use arrowroot powder but you can also use corn starch or potato starch), nutritional yeast, onion, garlic and mustard powder. All of these ingredients are very important for both texture and flavours so don’t skimp or omit any of them. The recipe yields a texture similar to that the normal frittata, but slightly softer and tender, somewhat like scrambled eggs (without the eggs, of course).

Vegan Frittata

Why I love it: 

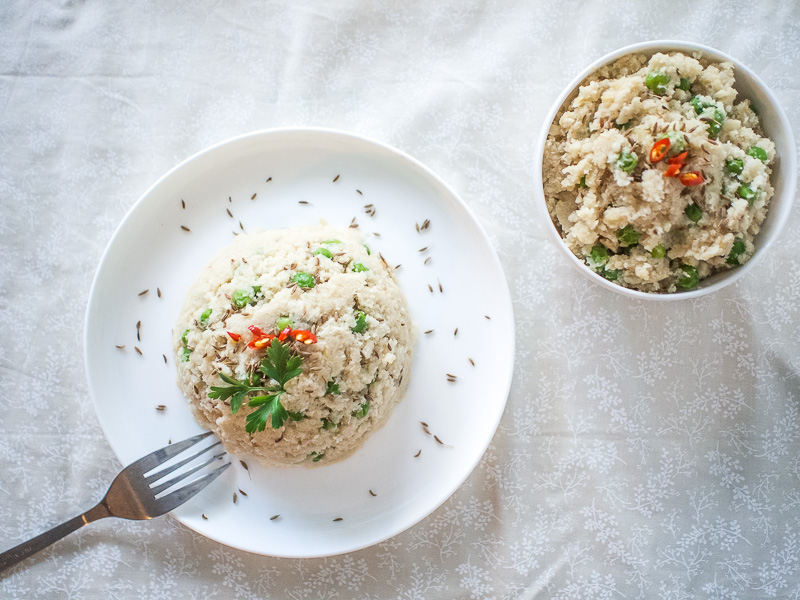
It really reminds me of egg frittata! I served mine with Sriracha sauce (I’m a bit of a Sriracha addict) and garnished it with some fresh parsley leaves. The leaves add freshness to the dish, and also make the frittata look pretty and stylish on the plate. It didn’t take long before I made a huge mess of the plate, though.

This vegan vegetable frittata recipe uses no oil apart from greasing the baking dish so it’s perfect for those who are looking to eating more whole foods as part of a plant-based diet. It is full of protein so it’s just like eating real frittata (minus the cholesterol and saturated fat)

Vegan Frittata


Vegan Frittata
Recipe Type: Breakfast
Author: Keren
Prep time:
Cook time:
Total time:
Serves: 4-6
Ingredients
  • Omelette batter
  • 1 cup chickpea flour
  • 1 Tbsp arrowroot powder (or cornstarch)
  • 3 Tbsp nutritional yeast
  • 1/2 tsp salt
  • 1/2 tsp mustard powder, garlic powder
  • 1/2 tsp baking powder
  • 2 ½ cup vegetable stock
  • Fillings
  • 2 cups of chopped vegetables – I use:
  • ¼ cup chopped spring beans
  • ¼ cup diced red capsicum
  • ½ cup chopped asparagus
  • 1 cup shredded kale
  • Seasoning
  • ½ large red onion
  • 3 garlic cloves
  • A pinch of black salt or Kala Namak (optional but highly recommended)
  • Freshly ground pepper
  • [url href=”https://www.passionatelykeren.com.au/make-vegan-parmesan/” target=”_blank”]Vegan parmesan[/url]
Instructions
Cuisine Companion Method
  1. Preheat oven to 180 degrees C.
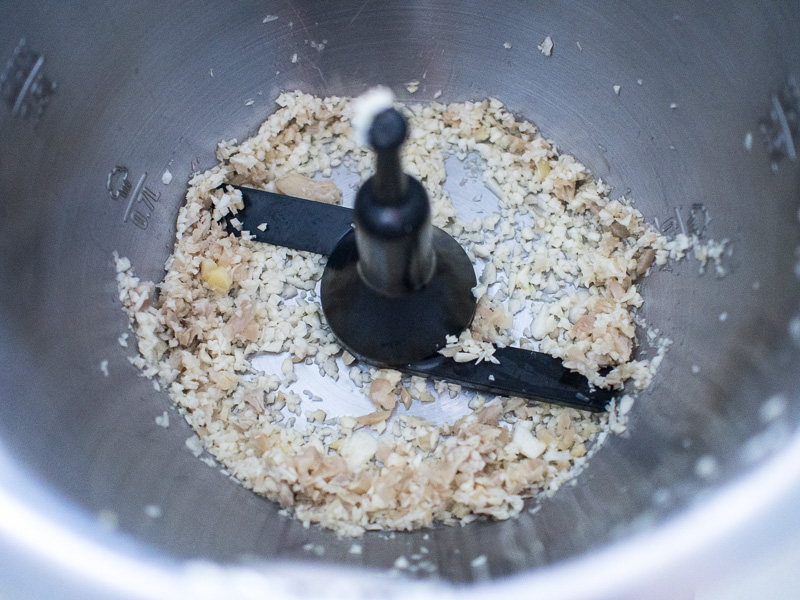
  2. Chop red onion and garlic cloves using superblade on speed 8 for 20 sec. Transfer into a plate, rinse the bowl and blade and wipe dry.
  3. Add all the dry chickpea batter ingredients into the bowl. Mix for 5 seconds on speed 8.
  4. Add the vegetable stock and cook using speed 5 at 100 C for 5 minutes
  5. The mixture should be thick.
  6. Add the chopped veggies to the batter. Mix at speed 8 for 10 -15 seconds until mixed through
  7. Transfer batter onto greased pyrex pan. Even it out with spatula.
  8. Bake for 25 minutes and then cover with aluminium foil and bake for another 25 minutes or until the centre is not jiggly and the edges are lightly brown. Depending on the type of your vegetables you use you might need more or less time for the batter to cook. Just prick the centre with a fork to test done-ness.
  9. Stand for 10-15 minutes to set.
  10. Sprinkle with a bit of black salt for an eggy flavour boost.
  11. Serve warm with some freshly ground pepper, [url href=”https://www.passionatelykeren.com.au/make-vegan-parmesan/” target=”_blank”]vegan parmesan[/url], and your favourite hot sauce.
Manual Method
  1. Preheat oven to 180 C.
  2. Heat oil in a pan over medium heat, cook onion and garlic until fragrant, about 3 minutes.
  3. Add vegetable stock. Bring to a boil.
  4. Add the chickpea flour, arrowroot powder and the remaining dry ingredients
  5. Cook for about 5 minutes until the mixture becomes thick. Stir in the chopped veggies and mix.
  6. Transfer batter onto greased Pyrex pan and flatten the surface with spatula.
  7. Bake for 25 minutes.
  8. Cover with aluminium foil and bake for another 25 minutes or until the center is not jiggly and the edges are lightly brown. Depending on the type of your vegetables you use you might need more or less time for the batter to cook.
  9. Prick the centre with a fork to test done-ness. Stand for 10-15 minutes to set.
  10. Serve warm with some freshly ground pepper, [url href=”https://www.passionatelykeren.com.au/make-vegan-parmesan/” target=”_blank”]vegan parmesan[/url], a sprinkle of black salt and your favourite hot sauce.
Notes
Freeze leftovers for up to 4 weeks.[br]Sprinkle with some black salt before serving for an ‘eggy boost’.

Did you make this recipe?

Please let me know how it turned out for you! Leave a comment below and/or share a picture and tag me @passionatelykeren on Instagram .

Love and greens,

Keren

Sumo Citrus Spiced Rice Pudding (vegan and sugar-free)

Sumo Citrus Rice Pudding-2

This weekend I whipped up a super easy, super delicious and nutritious recipe and entered it into a competition. It’s my healthy, refined sugar-free and dairy-free take on the normal rice pudding. It is very simple and easy to make. Just need to cook your rice in a pan, make your smoothie and then stir your smoothie into the rice. Let it simmer until thick and creamy and voila! You have your rice pudding. Serve with a sprinkle of ground cinnamon and tell your partner it was such a hard work. It may score you a shoulder massage or two :P.

Why I love it:

What I love about most about this rice pudding is the fact that it’s rich and creamy but also light and refreshing at the same time. It has a gentle citrus tang and it smells like Christmas morning.

Made using walnut citrus smoothie it contains lot’s of omega-3 from walnut (great for the brain) and the goodness of one whole orange which is rich in fibre and Vitamin C and is a good source of minerals such as Thiamin, Folate and Potassium.

Sumo Citrus Rice Pudding-3

Make this. I promise you will love it.


Sumo Citrus Spiced Rice Pudding
Recipe Type: Dessert
Author: Keren
Prep time:
Cook time:
Total time:
Serves: 4
Creamy, nutty and fragrant rice pudding that is mildly sweet, citrusy and every bit delicious. It’s a rich and decadent dessert, easy to make, dairyfree and refined-sugar free.
Ingredients
  • 1 large Sumo Citrus
  • 1 cup arborio rice
  • a pinch of salt
  • 2 cups of filtered water
  • Walnut Sumo Citrus Smoothie
  • Sumo Citrus flesh
  • 2 cups of filtered water
  • ½ cup of walnut
  • ½ cup rice malt syrup
  • ½ tsp allspice powder
  • 2 tsp vanilla extract
  • 1 tsp ground cinnamon
Instructions
  1. Grate the zest of Sumo Citrus. Set aside. Remove the flesh for smoothie and reserve 2 strips of peel.
  2. Make Walnut Sumo Citrus Smoothie: In a blender, add all the smoothie ingredients. Blend for 1-2 minutes until smooth. Set aside.
  3. Combine 2 strips orange peel, 2 cups water, a pinch of salt in a heavy-based saucepan and bring to a boil.
  4. Add the rice and return to a boil, then reduce the heat to simmer and cook, stirring occasionally, until the liquid is absorbed, about 10-15 minutes.
  5. While the rice is cooking, slowly add the smoothie. Simmer over medium-low heat, stirring, until the liquid is mostly absorbed, about 15-20 minutes.
  6. Remove the peel and stir in zest. Serve immediately with a sprinkle of ground cinnamon.

If you want to help me win the competition, you can vote up my recipe and get me in the top 5. Let me know if you voted in the comment section so I can personally thank you. Thank you!

Vote For Little Green Habits!

Did you make this recipe?

Please let me know how it turned out for you! Leave a comment below and/or share a picture on Instagram with the hashtag #littlegreenhabits.

Love and greens, 

Keren x

Easy Homemade Cashew Milk Recipe

If you’ve never had cashew milk, you need to do yourself a favour and find some, or make some.

Why I love it:

It is absolutely delicious, creamy and refreshing and is great on its own, as a smoothie base or served alongside your favourite cookies. What makes cashew milk different from other nut milks is that it requires no straining after blending. That means you don’t need a nut bag, and you don’t need to figure out what to do with the pulp. Less messing about and less waste. All you have to do is pour it into a glass and enjoy. I love adding some vanilla extract, cinnamon or other spices such as ground ginger, nutmeg or cardamom to give delicious flavour to my cashew milk.

Cashew milk is also full of nutrients and minerals, including magnesium, phosphorus, iron, potassium and zinc as well as protein and healthy fats.

Notes and Tips:

I soak my cashews before I blend them. Soaking helps with the blending process and also helps release some beneficial enzymes.

Add vanilla extract, cinnamon or other spices such as ground ginger, nutmeg or cardamom.


Homemade Cashew Milk
Recipe Type: Breakfast
Author: Keren
Prep time:
Total time:
Serves: 5
Simple, no strain nut milk that is creamy, delicious, and nutritious.
Ingredients
  • 1 cup raw cashews
  • 4 cups water
  • 2 tablespoons maple syrup or rice malt syrup
  • 2 teaspoons vanilla extract
  • Dash of sea salt
  • Pinch of cinnamon (optional)
Instructions
  1. Soak the cashews in water for at least 4 hours. Alternatively you can soak them overnight in the refrigerator.
  2. Drain the cashews and rinse until the water runs clear.
  3. Add the cashews and two cups water to a blender.
  4. Start on a low setting and increase the speed until the cashews are totally pulverised. This could take 2 minutes in a high-powered blender or longer in a regular blender.
  5. Blend in 2 cups more water,* and your sweetener of choice, vanilla extract, sea salt or cinnamon (optional). If your blender can’t totally break down the cashews, strain the milk through a fine mesh strainer or cheese cloth.
  6. Store the milk in a covered container in the refrigerator. It should keep for 3 to 4 days.

Did you make this recipe?

Please let me know how it turned out for you! Leave a comment below and/or share a picture on Instagram with the hashtag #littlegreenhabits.

Love and greens, 

Keren x

Vegan Spring Onion Buns

spring onion bun

One of my favourite Chinese breads is the Spring Onion bun. It’s slightly sweet, tender and savoury all at the same time. If you’ve had any oriental (i.e. Chinese or Japanese) bread, you’ll find that they are sweeter and more delicate and tender in texture than your normal bread. They taste like a soft hamburger bun or brioche.

Unfortunately most of these breads are made with eggs or butter so I can’t have them.

And since I don’t want to deprive myself of these comfort foods,  I made my own vegan-friendly version of spring onion buns :)

I use the Cuisine Companion to make them which makes it feels almost like I’m cheating because the machine does all the kneading for me, but, if you want to go manual, it can certainly be done quite easily too.

The first step is to proof the yeast (i.e. ‘waking it up’ in warm sugary water) to make sure that the yeast is still active. It usually takes about 5-8 minutes. After this the process is quite simple – just add the yeast mixture to the dry mixture and knead until it’s elastic and no longer sticky. It would take about 15 minutes by hand or 3 minutes if you use a mixer with dough attachment.

Then you need to let the dough sit in a warm spot until it doubles in size.

Then the fun begins…. You cut the dough into 4 sections, use a rolling pin (or your hands) to flatten them to 1 cm thickness and spread the sliced onion all over the surface of the dough, make a log roll and cut them up in equal portions. Finally into the oven they go while you wait impatiently for them to cook…


Spring Onion Buns
Recipe Type: Snack
Cuisine: Vegan
Author: Keren
Prep time:
Cook time:
Total time:
Serves: 8
Easy savoury and sweet bun for morning or afternoon snack
Ingredients
  • 4 cup bread flour (white or wholemeal)
  • 1 packet (5g) of Instant yeast
  • 1 tbsp sugar
  • 1 cup water
  • 1/2 tsp salt
  • 2 tsp egg replacer mixed in 4 tbsp water
  • 1 tsp baking powder
  • 1 tbsp non-dairy butter or Nuttelex
  • 1/2 cup of spring onion, sliced thinly
  • 1/4 cup of non-dairy milk
Instructions
  1. Preheat oven to 180C. Line pan with baking paper.
  2. Mix sugar and water in a bowl or in a small pot. Microwave for 30 seconds or heat on the stove until just warm (not hot to touch).
  3. Sift flour and baking powder into the cuisine companion bowl. Add yeast mixture and press Pastry Program 1.
  4. For manual method: Sift flour and baking powder into a bowl. Add yeast mixture. Knead gently until just smooth. Leave in warm temperature covered with kitchen towel until almost double in size, about 30-60 min (depending on your weather condition)
  5. Roll out dough to a rectangle using a lightly floured rolling pin. Brush with Nuttilex.
  6. Sprinkle over onion, leaving a 1cm border on 1 long side. Starting at opposite end, roll up dough.
  7. Cut into 8 even slices. Brush with non-dairy milk.
  8. Bake for 25 minutes or until golden and cooked through. Stand in pan for 5 minutes. Serve warm.
  9. These breads are good for freezing too. Just pop in the microwave for 30-40 second to heat up when you’re hungry.

vegan spring onion bun

Did you make this recipe?

Please let me know how it turned out for you! Leave a comment below and/or share a picture on Instagram with the hashtag #littlegreenhabits.

Love and greens, 

Keren

Simple Green Smoothie

Do you notice how green drinks are hitting the mainstream cafes and juice bars now? Maybe it’s just me but when I go out, I see green juice everywhere. All the major juice bars seem to have it on their menu now. It’s so exciting and encouraging to see that green drinks are becoming more mainstream. Things are changing and I think it’s awesome.

I started having green smoothie about two years ago. Since then I’ve been having it almost everyday for breakfast. I did lots of trials with different recipe to find the perfect combination of fruit and vegetables and have since found a base recipe that works for me. There’s so many green smoothie recipes available online and offline that it can be overwhelming if you’re just starting out.

I used to put so much stuff (protein powder, superfood supplements, etc) to make it taste good but I have since simplified the recipe to make it easier for me to make (it’s not fun having to take out 10 different things out of the pantry every morning). So this is actually an updated recipe of my old green smoothie recipe which has twice the amount of ingredients. I’ve cut it down such that it can tastes great without having to put tons of fruit in it. Not that there’s anything wrong with fruit but if’s going to be a vegetable smoothie, I figure it should have more vegetables than fruit.

Currently, my favourite smoothie base consists of Frozen Kale, Spinach, Banana, and Avocado. I then add to it more veggies, fruits, herbs, nuts and seeds depending on what I have and what I feel like.

You can get a bit creative with it, adding different kind of fruits and vegetables, seeds, nuts, protein powder, superfood mix, etc etc. Here’s my basic breakfast Green Smoothie recipe which I have made over 200 times and shared with people. My hope is that you will give this recipe a try and start making your own green blend.

Simple Green Smoothie
Recipe Type: Drinks
Author: Keren
Prep time:
Total time:
Serves: 2
Imagine being addicted to something so healthy as this. I am. Not because it’s healthy but because it tastes great and it makes me feel great.
Ingredients
  • 2 big handful (~ 3 cups) of baby spinach
  • 2 big handful (~ 3 cups) of kale leaves (washed and freeze overnight)
  • 2 medium size ripe banana
  • 1 avocado
  • 1 cup chopped cucumber
  • 6 sprigs of parsley
  • 10-15 mint leaves (the more, the better)
  • 2 cups of non-dairy milk
  • 1/2 cup water
  • 1 cup of ice
  • Optional – 1 tbsp of each of your favourite superfoods, soaked nuts or seeds
Instructions
  1. Add ingredients in a blender starting from the heaviest item (so it catches the blade of the blender, it helps the blending process). Blend until smooth.
  2. Pour into a glass and serve.
  3. Can be refrigerated in a glass container for up to 3 days or store in the freezer for about a week

So, what do you think about green smoothie? Are you a green smoothie drinker? If so what’s your favourite green ingredients?

Lots of love,

Keren

Low Carb Stir Fry Cauliflower Rice

One day I was feeling a bit adventurous and created this recipe. I ran out of rice and I was craving something white, warm, comforting and filling. I had a huge cauliflower which I recently bought so I thought, why not make cauliflower rice.

Cauliflower rice

It is low carb, low calorie, nutritious and most importantly, delicious! I think I had twice the usual amount of cauliflower I normally have (or rice for that matter) because it was so yummy. Success!

Cauliflower rice-4

I used my Tefal Cuisine Companion to make this so it was pretty effortless. You can of course make it the normal (manual) way. It will take a bit more time but it will taste just as good.

The first thing you need to do is to process the cauliflower florets into fine crumbs, using the Cuisine Companion or a normal food processor. I wouldn’t recommend using a blender for this. If you don’t have a food processor, just use a cheese grater.

.

Cauliflower rice-6

I used lots of chopped garlic, ginger and cumin to flavour the ‘rice’. You can probably use spring onions or red onions as well for this. I’m a big ginger fan so I used 2 knobs of ginger to give it a bit of a ‘punch’. If you’re not a fan of ginger you might want to cut it down to one.

Cauliflower rice-7

Once you have all the ingredients ready, you can just ‘stir fry’ the cauliflower like you would with rice. It’s obviously a lot softer and mushier than rice so don’t expect the texture to be quite the same. It does taste like a cross between mashed potatoes and rice.

Cauliflower rice-3

Low Carb Stir Fry Cauliflower Rice
Recipe Type: Main
Cuisine: Gluten Free
Author: Little Green Habits
Prep time:
Cook time:
Total time:
Serves: 2-4
A unique and healthy twist on the traditional asian stir fried rice
Ingredients
  • 4 garlic cloves
  • 1 large knob of ginger (a knob would be one of the “arms” sticking out of the main body of ginger)
  • 1 whole cauliflower, cut into florets (around 5 cups)
  • 2 tbsp cumin
  • 1 tbsp coconut oil
  • 1/2 tsp salt
Instructions
  1. Using Superblade attachment in Cuisine Companion. Process cauliflower florets into crumb at speed 11 for 15 sec. Transfer into a big bowl.
  2. Switch to Chopping blade in Cuisine Companion, chop ginger and garlic at speed 11 for 30 sec.
  3. Switch to Stirring blade. Add cumin and coconut oil into the chopped ginger and garlic. Cook at 130C for 5 minutes at speed 4.
  4. Add cauliflower crumbs and peas. Reduce the speed to 2 and cook for a further 15 minutes.
  5. Serve immediately.
Notes
For cooking on the stove, use medium high heat and just follow the step in the recipe and stir constantly just as you would when you make stir fry.


Fragrant Superhero Fried Rice

When I received a call that my recipe was selected to be part of the Superfoods Kitchen Cookbook, I was over the moon…

BIO_SUPERFOODS_COOKBOOK

I can’t help feeling proud to have my recipe being featured in this cookbook. Around 200 recipe entries were submitted and reviewed, a number of those were tested and judged by the judging panel of nutritionists and naturopaths for taste and nutritional value and then around 70 recipes made it to the cookbook. I chose quite a difficult category to “veganise” (dinner category) and my most favourite naughty meal to “healthivise” (fried rice). I thought, everyone can make a healthy and delicious salad but I wanted to show how plant-based dishes can be the star of a meal, not just as a side dish, and how comfort food can be made healthy. I really didn’t think I would make the cut but I did so here we are.

The Superfoods Kitchen cookbook, although it is not strictly a plant-based cookbook, it features lots of vegan recipes and recipes which can be easily ‘veganised’. It has over 70 great recipes from savoury to sweets and it caters for all dietary requirements including gluten free, dairy free, nut free and of course, vegan. 

Now on to this fried rice recipe that made it through to the final.

Fragrant Superhero Fried Rice

fragrant superhero friedrice-5

I called it fragrant superhero fried rice because when ever I think of the word superfood, it reminds me of the word Superman . So I thought, if Superman was vegan and eats fried rice, what would it look like? So I created the recipe with that in mind. I thought, this fried rice will give all the energy and nutrients a superhero needs to fight the villains and save the day. It’s clean and fresh tasting, simple and easy to make, 100% vegan and delicious, if I may say so myself.

fragrant superhero friedrice-6

The recipe features the amazing Brussel sprouts  for anti-cancer, bean curd for a hit of protein, coriander for digestion (and the fragrant aroma), carrots and bean sprouts for fiber, minerals and tasty crunch! It is also highly adjustable and almost foolproof. Use whatever vegetables you have in the fridge, the more the merrier.

Tips: Add the vegetables in order of their weight (heaviest first and lightest last) for even cooking. As long as you stir constantly, maintain the heat (high) and season well, you’ll end up with something tasty.

So here it is. Go and save the day :)

fragrant superhero friedrice

Superhero Fried Rice
Recipe Type: Main
Cuisine: Vegan, glutenfree
Author: Keren
Prep time:
Cook time:
Total time:
Serves: 4
Fragrant and delicious supercharged fried rice to fuel the superhero in you.
Ingredients
  • Vegetables
  • 2 cups of baby Brussels Sprouts trimmed and cut into quarters
  • 1 cup of cooked Brown Rice
  • 1 cup of diced Extra Firm Bean Curd
  • 1 big handful of Bean Sprouts
  • 1 large Carrot, diced
  • Spices
  • 1 large Shallots, sliced
  • 1 knob of Ginger (about 2cm), grated
  • 2 Green Onions, sliced
  • 6 garlic Cloves, sliced
  • 1 small Red Chilli, thinly sliced (optional)
  • 1 cup chopped Coriander
  • Seasonings
  • 3 tbsp of Coconut Oil
  • 2 tbsp of Light soy sauce
  • 1 tbsp Vegetarian Oyster sauce
  • 3 drops of Sesame oil
  • ¼ cup Bioglan Chia seeds + 1 tablespoon set aside
  • A sprinkle of ground white pepper
Instructions
  1. Heat 1 tbsp oil in wok; add chopped onions, grated ginger, garlic and stir-fry until onions turn a nice brown color, about 5 minutes; remove from wok and set aside.
  2. Add 2 tbsp oil to wok, swirling to coat surfaces; add sliced bean curd and stir-fry for 2 minutes until brown.
  3. Add brussels sprouts, carrots, and cooked onion; stir-fry for 3 minutes.
  4. Add brown rice, green onions, and bean sprouts, tossing to mix well; stir-fry for 3 minutes. If the rice is sticking on the bottom of the wok, add a few tablespoon of water (up to ¼ cup) to release it.
  5. Add all the sauces (2 tbsp light soy sauce, 1 tbsp oyster sauce and 3 drops of sesame sauce) and ¼ cup of chia seeds to rice mixture
  6. Fold in; add ground pepper and chopped chilli if preferred, stir-fry for 2 minutes more; taste.
  7. Adjust the flavour by adding more sauce or season to taste.
  8. Fold in chopped coriander to finish. Sprinkle with 1 tbsp chia seeds to garnish.
  9. Set out additional soy sauce on the table, if desired.


IMG_0004

If you make this, I’d love to hear from you. Leave a comment below or find me on Instagram and share your creation. Don’t forget to tag me @passionatelykeren so I won’t miss your post.

Keren x

Easy Fluffy Vegan Pancakes

This is my go to my pancake recipe. They are simple to make, fluffy, contain no eggs or dairy, so completely vegan-friendly.

Vegan Pancake 3

You can use plain flour, wholemeal flour or half plain and half wholemeal flour. Plain flour produces the fluffiest pancake where are wholemeal flour pancakes are a tad dense. I tend to use plain or half plain and half wholemeal, but use whatever suits your preference.

Vegan Pancake 7

Making pancakes is very easy, you just mix the dry ingredients (flour, baking powder and salt) with the wet ingredients (oil, non-dairy milk, and sugar water).  The key here is not to overmix the batter or the pancake will become tough. Mix until just combined.

Oh, by the way, I use sugar in my batter which is completely optional but it does give it a slight sweetness to the pancake which I love. I don’t like my pancakes drenched with syrup so I make them slightly sweeter than normal.

Vegan Pancake 8

Cook on an non-stick pan (or grease the pan with a bit of oil or oil spray), on medium to low heat. Wait until a few bubbles starts to appear, flip and cook the other side.

Vegan Pancake 9

And if you’re like me and into productivity tips – here’s something that I do to that helps me save time mucking around with ingredients. I make my own pancake mix. I basically triple and quadruple the dry ingredients (including sugar) and put them in a container (I use old flour container) so I can just mix it with the wet ingredients.

Vegan Pancake mix

Serve with fresh fruit, maple syrup, ice cream, etc, etc!

Easy Fluffy Vegan Pancakes
Recipe Type: Breakfast
Cuisine: Vegan
Author: Little Green Habits
Prep time:
Cook time:
Total time:
Serves: 8 small pancakes
Easy vegan pancake recipe for fluffy pancakes every time
Ingredients
  • 1 cup plain flour (or ½ plain and ½ wholemeal flour)
  • 1 1/2 tbsp baking powder
  • 1/2 tsp salt
  • 1 cup of soy, almond, coconut, or your favourite non-dairy milk
  • 2 tablespoon melted coconut oil
  • 3 tablespoon of sugar water (1 tablespoon raw sugar mixed in 3 tbsp of water)
Instructions
  1. Mix all the dry ingredients (flour, salt and baking powder) together in a bowl.
  2. Mix all the wet ingredients (milk, oil and sugar water) in a separate bowl.
  3. Add the wet ingredients into the dry ingredients and mix until combined. Careful not to overmix the batter or the pancakes will be tough (a few lumps are ok).
  4. Pour pancake batter onto a non-stick pan to form a circle and cook for about 2 minutes on medium to low heat on one side until bubbles start to appear. Flip and cook for another 2 minutes or so until the pancakes are done.
  5. Tips: You can add a handful of fresh berries, chopped bananas, chocolate, coconut flakes, nuts, or even cinnamon into the batter. Anything you want really.
Notes
I used sugar in my batter which is completely optional. I don’t like my pancakes drenched with syrup so this add some sweetness in the pancakes themselves.

Vegan Pancake4

Variation: Coconut Flour Vegan Pancake with Chia Seeds

You can add up to 1/4 cup coconut flour to increase the fiber content without jeopardising the texture too much (i.e., 1/4 cup coconut flour and 3/4 plain flour). It will be quite dense and you might need to be a bit careful with flipping the pancake as they are quite delicate.

You will also need to add about 1/2 cup more liquid to the mixture to make it a smooth batter. I added two tablespoons of chia seeds (mixed with 6 tablespoons of water) to my batter to help it rise and to improve the pancakes’ nutritional content.

How To Make Kale Chips

Sitting on my top list of healthy treats is this crunchy, salty and moorish snack – Kale chips. Kale chips are so big right now, but man, they’re so expensive to buy. It can cost anywhere from $5-$10 a packet and yet, they are so easy to make…once you get the hang of it.

Kale chips (3 of 4)

It never ceases to amaze me how many different variety of vegetables are out there. Even though I make a conscious effort to always try new vegetables, I always find stuff I never tried before (not knowingly anyway).

First of all, in case you’ve been living under a rock in the past few years and never tasted Kale at all, what is Kale?

Kale chips (1 of 1)-2


Kale is a type of leafy green vegetable (also comes with purple leaves)

  • It’s a superfood
  • It has more iron than beef and more calcium than milk per calorie
  • It is high in fibre, vitamin K, vitamin C, calcium, iron, and beta carotene
  • It has anti-inflammatory and anti-cancer properties

To environmentalists, Kale is the new ‘beef” as it is highly sustainable and can grow in most climates. If we all eat Kale in place of meat, we would significantly reduce our carbon footprint and global warming caused by meat production for human consumption.

OK, forget about nutrition, environment or animal welfare – let’s talk taste.

Well, when eaten raw, kale can actually tastes quite strong and too earthy to a lot of people. When baked however, it tastes kind of like feathery thin potato chips. It is super crunchy and can be quite addictive if I may say so myself. It’s almost tastes too good to be healthy for you.

Although it takes a bit of preparation (rinsing, de-steming, drying), making Kale chips is very rewarding. I’ve suffered through many batches of burned or soggy kale chips over the years but I’ve learned some valuable lessons along the way and I’d love to pass my few tips along to you.

How to make perfect Kale Chips every time

  1. Play with your baking time. It may take less or more time to cook depending on the size of your leaves or the heat distribution of your oven. Every oven is different — mine is a fan force electric oven which tends to be hotter that most gas ovens. One piece of advice – Go low and go slow.

Before baking

Kale chips (1 of 1)


After baking… see how they shrink in size?

Kale chips (1 of 4)

  1. Make sure the leaves are dry prior to baking otherwise they might go soggy and;
  2. Try to have all the pieces approximately the same size for even cooking.
  3. That’s it! Let’s do it!


Kale chips (4 of 4) 


How To Make Kale Chips
Recipe Type: Snacks
Cuisine: Glutenfree, sugarfree, soyfree
Author: littlegreenhabits
Prep time:
Cook time:
Total time:
Serves: 2-3
Kale Chips
Ingredients
  • 1 bunch of Kale – washed
  • Olive oil
  • Sea salt and favourite dry herbs (i.e., cayenne, paprika) for seasoning
Instructions
  1. Wash and dry kale thoroughly. Use a salad spinner to drain most of the water and then dab dry using paper or kitchen towel. If the leaves are wet they will go soggy so make sure they’re dry.
  2. Remove the leaves from the thick stems and tear into bite size pieces.
  3. Toss in olive oil and seasoning (I used olive oil spray in cans).
  4. Place leaves on a baking tray lined with baking paper or foil.
  5. Bake in 150C oven for 15-20 minutes until crispy but not burnt – slightly brown on the outer edges but still mostly green. Turn the baking tray around halfway through for even cooking.
  6. Munch On!

Easy Broccoli Soup

This soup is perfect for a post weekend detox. One bowl, a handful of ingredients and voila, a hearty and delicious bowl of soup that is super nutritious and delicious. And guess what, it’s oil-free too.

Easy Broccoli Soup - 4

Easy Broccoli Soup - 1Cuisine Companion

Easy Broccoli Soup


Easy Broccoli Soup

Ingredients

  • 1 large broccoli (about 650g), roughly chopped.
  • 1 liter vegetable stock
  • 4 cloves of garlic, chopped
  • Freshly ground sea salt and pepper to taste
  • Pepitas, Vegan Parmesan and Kinda Bacon flakes (optional but they’ll make your soup tastier by an exponential factor)

Equipment: Tefal Cuisine Companion (see note)

Method

  1. Put all ingredients in the bowl (use the chopping blade)
  2. If using the Tefal Cuisine Companion, press automatic program soup (P1 100C 30 min).
  3. Do some shopping while the machine does its thing.
  4. Serve.

Note: You can also make this on the stove by putting all ingredients in a big pot. Cook on medium heat for 30 minutes or until the broccoli is tender and then blend the mixture using a hand blender.

Thick and scrumptious… just like a good soup should be.

Easy Broccoli Soup - 1