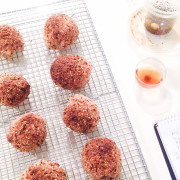
Healthy Vegan Anzac Biscuits (Sugar-free and Gluten-free)

OLYMPUS DIGITAL CAMERA

If you’ve been looking for an easy, healthy and tasty recipe for Anzac biscuits, then let me introduce you to my gluten-free, and refined sugar-free version.

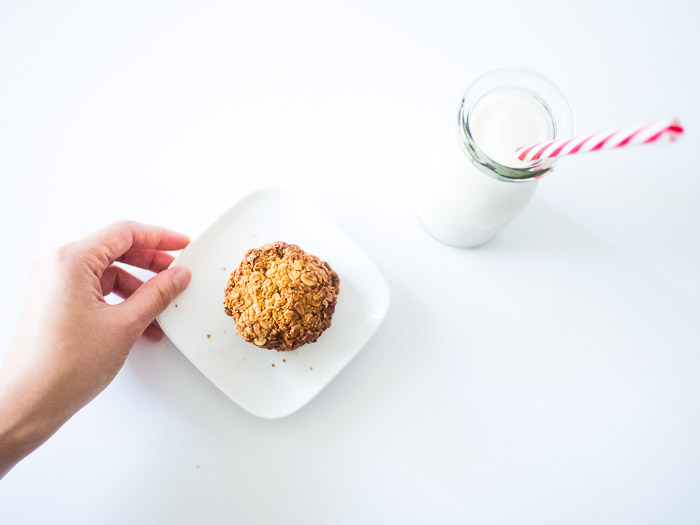
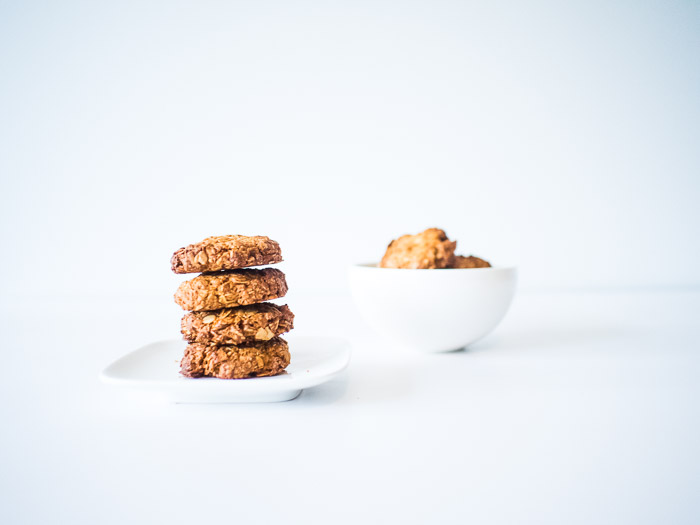
Anzac biscuits are traditionally made with rolled oats, sugar, golden syrup, butter, white flour and coconut. These healthy vegan Anzac biscuits, on the other hand, are made using coconut oil, nut butter and maple syrup and I must admit it’s pretty hard to stop at one.

OLYMPUS DIGITAL CAMERA


Why you will love these

These cookies are loaded with oats. Oats are low in calories (one cup gives you only 130 calories). They provide high levels of fibre and have a high satiety index which makes you feel full for longer.[1] Studies have also shown that oats can help lower your cholesterol levels,[2] reduce the risk of type 2 diabetes[3] and increase your appetite-control hormone,[4] which helps you lose weight.

I used a mixture of coconut oil and peanut butter, but if you want, you can replace these with macadamia oil, olive oil and your favourite nut butter such as almond or cashew butter.


Healthy Nutty Anzac Biscuits
Recipe Type: Baked Goods
Cuisine: Gluten free, sugar free, vegan
Author: Keren
Prep time:
Cook time:
Total time:
Serves: 20 cookies
A delicious healthy treat for the family
Ingredients
  • 2 cups gluten-free rolled oats
  • 1/2 cup desiccated coconut or coconut flakes
  • 1/2 cup flaked or chopped almonds
  • 3-4 tablespoons maple syrup or rice malt syrup
  • 2 tablespoons peanut butter
  • 2 tablespoons coconut oil (melted)
  • 2-3 tablespoon of hot water
  • 1 teaspoon vanilla extract
  • 1 teaspoon bicarbonate of soda (baking soda)
  • a pinch of salt
Instructions
  1. Add all the dry ingredients (oats, coconut, almonds and salt) into a bowl or a food processor (I use the Tefal Cuisine Companion).
  2. Add the wet ingredients (oil, peanut butter, maple syrup, water and vanilla extract) into the dry ingredients.
  3. Turn on the food processor – I use Cuisine Companion (dough attachment P7) and mix for about 15 seconds or until the mixture sticks together.
  4. Take a spoonful of mixture and form into a small ball. Place onto a baking sheet lined with baking paper. Repeat with the remaining mixture.
  5. Flatten the balls using the back of the spoon with enough room around them so they don’t crowd into each other.
  6. Bake in a low 150 C (300 F) preheated oven for 20 -30 minutes or until golden brown. Cool completely before eating.
  7. Store in an airtight container for about a week.
Notes
If you don’t have a food processor or cuisine companion you can just throw everything in a bowl and use your hands to mix everything together. It will take about 10 minutes to mix everything through but the result will be so worth it.


References:

[1] European Journal of Clinical Nutrition, September 1995; 49(9): 675-90

[2] American Journal of Clinical Nutrition, August 2002; 76(2):351-8

[3] Experimental and Clinical Endocrinology & Diabetes, February 2008; 116(2):132-4

[4] Nutrition Research, October 2009; 29(10):705-9

Cuisine Companion Launch and How to Make Whole Wheat Oat Dinner Rolls

What’s the first thing you do when you have a cooking robot? Get it to knead you some bread, of course.

Screen Shot 2015-03-19 at 1.46.41 am

A few weeks ago I went to a VIP event as one of the founding members of the Tefal Cuisine Companion Cuisine Club (Hello Bizzylizcook and Vegetaraian :o) . At the VIP event I got to play with this wonder machine and made a delicious vegan risotto and apple crumble effortlessly.

Cuisine Companion

It’s such a versatile machine. It chops, whips, mix, kneads, cooks, steams, blends, stirs, emulsifies, whisks, sears, crushes, mills and heats food. In the beginning I was afraid that it might be a bit complicated to use but it turns out to be quite easy and straightforward with an intuitive user interface and six automatic functions.

That first weekend I decided to test-drive my demonstration model, making one of my favourite breads, Maple Oat Bread. I use a combination of whole-wheat flour and oats which help lower the gluten content of the bread and increases its nutritional value. Though I’m trying to eat less bread, I’ve never been a fan of complete deprivation, so rather than stop eating it altogether I’d rather try making it healthier and better for me (and maybe eat a bit less of it). So when I discovered you can turn oats into flour and make bread with it, you could imagine my excitement.

Screen Shot 2015-03-19 at 1.45.53 am

Why I love it:

This bread is quite easy to make so you can certainly make it by hand if you want. However, the Cuisine Companion makes it even easier as you don’t have to knead it. The machine does all the work, including maintaining an optimum proofing temperature. Once I had put all the ingredients in, the only thing I had to do was to wait and then shape the dough into bread rolls. Too easy.

What’s good about it:

In my book, oat is superfood. Here’s 5 reasons why you need to make oat bread, not that you need any.

5 Reasons Why You Need To Make Oat Bread

  1. Oats are high in fibre and are a good source of antioxidants, vitamins and minerals
  2. Oats help you control your appetite [1]
  3. Oats help regulate blood pressure [2]
  4. Oats are rated no. 1 for breakfast, in satiety index [3]
  5. Oats may improve insulin sensitivity [4]

Screen Shot 2015-03-19 at 1.45.53 am

Whole Wheat Oat Dinner Rolls

Ingredients

  • 300ml warm water
  • 1 packet of dry yeast
  • 1 tbsp maple syrup (you can add up to 3 tbsp if you like it sweeter)
  • 1 cup of whole-wheat flour
  • 1 cup of rolled oats, plus a few tablespoons, divided

Methods

  1. Place the yeast and 300ml of warm water in the bowl fitted with the kneading/crushing blade. Launch the P1 pastry program. After 30 seconds, open the lid and add the flour, oat and salt. Note that this program will knead the dough for 2 minutes and then it will stop for 30 minutes while maintaining the temperature at 30C.
  2. After 40 mins, remove the dough using a spatula and knead for 5 mins or so by hand until it forms a loose ball.
  3. Place the remaining oats on a small bowl. Pick up the dough ball and gently roll it over the oats.
  4. Leave on a tray lined with baking paper. Leave to rest for 1 hr 30 mins.
  5. Preheat the oven to 200°C.
  6. Place a bowl of water on the lower rack in the oven (this will help achieve a nice crust). Bake for 25 mins. Lower the oven to 180°C and cook for an extra 15 to 20 minutes.

Disclosure: I received a complementary Cuisine Companion from Tefal both to play with and for editorial purposes.

You can find out more about the Tefal Cuisine Companion at https://www.cuisinecompanion.com.au/. It is now available at select Harvey Norman stores across Australia.

References:

[1] Nutrition Research, October 2009; 29(10):705-9

[2] Journal of Family Practice, April 2002; 51(4):369

[3] European Journal of Clinical Nutrition, September 1995; 49(9): 675-90

[4] European Journal of Clinical Nutrition, June 2007; 61(6):786-95

Avocado and Tomato on (sprouted bread) Toast

I can be quite elaborate in the kitchen. Not on weekdays, because I’m usually busy with work but weekends – I can spend hours in the kitchen, making a 3 course meal for dinner, testing new recipes, experimenting with different ideas, ingredients, etc. I’m a bit obsessive with trying new things. I’m not sure if it’s because I’m adventurous or if I suffer from slight ADHD. Probably both. Sometimes I feel like a failure when I can’t think off anything ‘new’ or exciting to try and make.

Avocado on toast 1

But lately I’ve been doing a lot of self reflection and just trying to be in the moment. To focus on what’s really important, knowing very well that I can’t do everything. Being a bit of type A personality this is very hard to accept but I’m slowly coming to terms with it. Now, instead of worrying what to have for breakfast, I focus more on making sure I make the most of my weekend with Buzz whom I only get see on the weekends and my furbaby Missa. As a result, I’m much more relax and less moody now, though Buzz might disagree with me on the ‘moody’ part. But really, it’s been pretty awesome. We now have more time in the morning because I don’t spend hours in the kitchen perfecting my healthyvegan-gluten-free-sugar-free-paleo-(fill the blank) waffle recipe. Now, most Saturday and Sunday morning we would go out for a run around the park or the beach one day and then workout at the gym the other day. When we get home I would make avocado and tomato on toasted sprouted or sourdough bread for our post workout meal/ breakfast. It’s our new weekend routine and we look forward to it every week.

Avocado and tomato on toast

Image credit – BessotedGrace.com

I now realised that not every meal needs to be gourmet or complicated to be enjoyed, relished and shared. A healthy and delicious meal can be as simple one, two, three. So yeah, I’m pretty proud of this breakthrough and happy to be sharing it with you.

Avocado and Tomato on (sprouted bread) Toast 

Ingredients

  • 1 ripe avocado
  • 2 vine-ripen tomatoes
  • 3 slices of sprouted bread
  • 2 tsp of virgin olive oil
  • sea salt and pepper

Method

  1. Cut avocado in half, remove the core and score the flesh in one direction. Make sure you go deep enough until you touch the skin without going through it.
  2. Slice the tomatoes thinly using a sharp knife.
  3. Toast you bread and stand to cool for a few minutes.
  4. Assemble to toast. Scoop the avocado flesh and place the slices onto the toasted bread.
  5. Add sliced tomatoes and season with freshly cracked pepper and some sea salt.
  6. Drizzle with some olive oil and serve.

Optional flavour and nutritional booster

  1. Garnish with fresh mint or parsley for added freshness
  2. Sprinkle with chia seeds or flax seed for superfood boost
  3. Spread a bit of vegemite on the toasted bread before assembling for an interesting flavour twist and extra vitamins

Vegan Mango Ice Cream

Welcome to summer! It’s hot, it’s humid, and you know want some tropical ice-cream. Well, how about a delicious vegan mango ice cream recipe that won’t break your new year’s resolution? This recipe uses no refined sugar, no egg, and no dairy but it tastes just like normal ice cream.

vegan mango ice cream

The reason I made this vegan mango ice cream was simply for economical reason. When I saw how expensive dairy-free ice creams are at the shop I was motivated to make my own. Yes it does take some time to make your own ice cream but the result is totally worth it.

Making ice cream is a 2 step process with a lot of cooling time in between so it’s best to make it the day before you want to eat the ice cream, unless you don’t mind eating mango cream… which is actually pretty nice and tasty too. The recipe calls for 1 tablespoon of vodka which keeps the ice cream from freezing completely, giving it a smooth texture and making it easier to scoop. Don’t worry, you won’t be able to taste the vodka.

Read more

Chat Thai Fried Sweet Potato Balls (vegan and gluten-free)

sweet potato ball2
Thai Fried Sweet Potato Balls (also known as Khanom Kai Nok Kra Ta) are one of my favourite Thai snacks. I first had them when dining at Chat Thai – a Thai restaurant in the City which serves great authentic Thai food and sweets. From then on, I have been madly in love with these addictive and delicious Thai street snacks.

They taste mildly sweet, slightly crispy on the outside, soft and chewy on the inside. Perfect for afternoon snack or footy night!

Read more

Sweet Potato and Date Bites (flourless, sugar-free, and vegan)

OLYMPUS DIGITAL CAMERA

Recently I experimented with flour-free, refined sugar-free baking.  Now that I’m pretty comfortable baking without eggs and dairy, I thought why not push the boundaries. I mean surely you can remove eggs, milk, butter, flour, and sugar and still make good muffins right?

And so I put on my apron and started throwing things in the bowl. I didn’t come out with muffins, but I came out with something which is equally delicious and dare I say it, even more morish. Behold these bite-size muffins which are mildly sweet, chewy and every little bit is delicious. They are completely flourless, egg-free, dairy-free and refined sugar-free. You’ll be surprised at how easy they are to make.

Read more

How to Make Roasted Chestnuts

Today I’m going to show you How To Make Roasted Chestnut.

Chestnut1-1024x1024

One of the fond memories I had of Japan was the sweet roasted chestnuts I bought from a street vendor at Nishiki Market, in KyotoIt was a really cold night and I remember the exact moment I walked past this chestnuts roaster and his huge wok full of sweet Japanese chestnut. I was so excited! I can still remember rushing back to the hotel and then having these beautiful Japanese sweet chestnuts for supper. They were the best chestnuts I’ve ever had!

Chestnut

Since then, I’ve been waiting for the chestnut season to come so I can re-live the experience here in Sydney.

And guess what…It is now chestnut season!

chestnut

Chestnut season in Australia runs from March to June and now is the perfect time to enjoy fresh chestnuts — just as the nights are getting colder and the winter weather is kicking in. Nothing like a hot cup of tea and a bowl of freshly roasted chestnuts to snack on while you sit in the couch, cuddled up in your favourite fleece blanket, watching your favourite DVD. Hmmm…

I’ve been making roasted chestnuts almost every weekend now and I just can’t get enough of them. When I did it the first time, I thought it would be complicated and hard to do, but it’s actually quite easy and a very rewarding process. Don’t settle for the canned, preserved, sweetened chestnuts. Make your own freshly roasted chestnuts. They are way better.

how to make roasted chestnut

Did You Know

Unlike other nuts and seeds, chestnuts are low in fat. They are relatively low in calories but are rich in minerals, vitamins and phyto-nutrients. They are also gluten-free, low GI, and rich in complex carbohydrates.

Chestnuts have a mildly sweet and nutty flavour with a slightly crumbly texture. They are so versatile. You can add them to any sweet and savoury dishes: salads, soups, stir fries, pasta, pesto, you name it. You can also make chestnut flour by grounding them up and use them in baking.

As for me, I think they are delicious on their own.


How to Make Roasted Chestnuts

Ingredients:

1. When it comes to roasting chestnuts, the secret is to pick even-sized chestnuts to make sure they are cooked evenly.

2. Look for firm nuts with undamaged shiny shells.  For roasting, select large-ish size chestnuts as the smaller ones are more suited for boiling.

Method:

1. Preheat oven to 180C. Rinse the chestnuts to remove any dirt.

2. Make a criss-cross slit across the round face or the top of the nutshell using a serrated knife (normal knife is too slippery). This allows steam to escape as the chestnut roasts so it doesn’t explode. Please be careful not to cut yourself.

3. Place chestnuts in a single layer in a roasting pan or baking tray. Roast chestnuts for 20 – 30 minutes or until the shell splits open.

5. When they are cooked, chestnuts will be fragrant and browned. To check if they’re cooked, just pull one out carefully and pierce it with a knife. If it is tender, the nuts are done.

6. Transfer chestnuts to a tea towel and let sit until cool enough to handle.

7. Peel your chestnut while they’re still warm and enjoy!

how to make roasted chestnut

Keren x

How to make Greek Pita bread

pita-016

This is my latest weekend obsession. Making pita bread.

If you haven’t had pita before, it is a traditional Mediterranean and Middle Eastern flat bread. It’s soft with a slightly chewy texture. It sometimes comes with ‘ air pocket’ in the middle so you can use it as a sandwich wrap or filled with whatever fillings you like. It is also surprisingly easy and fun to make.  After making several batches of pita bread I don’t know if I can ever go back to store-bought pita. It just doesn’t tastes as fresh.

pita-004

If you have an electric mixer with dough attachments then the process gets even more simple. You just let your mixer do the kneading work. I used my 7 year old $50 handmixer and it only took around 5-10 minutes to knead the flour mixture into a smooth and elastic dough. I didn’t break a sweat.

Just put the dough in a deep bowl, cover it with a hot damp cloth; rinse the cloth in hot water and squeeze out the excess water, careful not to burn yourself.  Just place the bowl inside the microwave and keep the door closed. The microwave retains the humidity and the warm temperature created by the cloth very well. You’d be surprised how humid and warm the environment inside the microwave is after 1.5 to 2 hours.

After the bread proofed, it’s just a matter of dividing the dough into small portions and rolling it into a flat, roundish shape.

pita-008


Bake them on a baking sheet or pizza stone for a mere 4-5 minutes. And then, munch munch… nothing tastes better like fresh bread coming out of the oven…
pita-018
pita-014

How do you like your Pita bread? Crispy or Soft?

 
How to make Greek Pita bread
Author: Justonemorespoon
Serves: 8
Greek Pita Bread (adapted from about.com ) Prep Time: 2 hours 15 minutes Cook Time: 6 minutes per bread Total Time: 2.5 – 3 hours
Ingredients
  • 1 sachet or 1 tablespoon instant dry yeast
  • 1 tablespoon of sugar
  • 1/2 cup of warm water
  • 4 cups of bread flour
  • 2 teaspoons of salt
  • 1 cup of warm water
  • 1 tablespoon of olive oil
Instructions
  1. In a large mixing bowl, add flour and make a well in the center. Add salt, sugar, yeast and water. Knead with hands for 10 minutes in the bowl (or 5 minutes if using a mixer. with dough attachment).
  2. Add olive oil and continue to knead until all the oil is absorbed. Shape into a ball in the bowl, cover, and place in a warm area to rise until doubled in volume, approximately 1 1/2 to 2 hours. Punch down the dough and knead for 5 minutes more.
  3. Preheat oven to 350°F (175°C), and lightly oil baking sheets.
  4. Take pieces of dough slightly larger than an egg and roll out on a floured surface to a thickness of 3/8 to 1/4 inch. (For larger or smaller pita bread pieces, take more or less dough). Prick the bread with a fork in several places (NOTE: If you want air pockets, omitthis step).
  5. Place on baking sheets and bake at 350°F (175°C) on the lowest oven rack for 2-3 minutes, then turn the pitas over and bake for another 2-3 minutes*. Remove from oven and place on a tray covered with a clean dishtowel, with another clean towel on top. When thoroughly cooled, pitas can be stored in plastic bags in the refrigerator, or frozen.
  6. Before using, brown in a lightly oiled frying pan for a few minutes until browned on both sides.
Notes
*The pricked pita dough will not puff up whereas the non-pricked one would – you need to roll the dough really thin if you want it to puff up. I actually prefer the thicker softer pricked pita but my boyfriend loves the thinner crunchier pita…It all depends on your preferences. Just experiment with the dough until you get it right. It’s so much fun![br][br]*I always make this bread when I have about 2.5 – 3 hours to kill. I used to make it between 3-6pm on a Saturday or Sunday when I have some free time.[br][br]*For winter, place the dough in the microwave to proof (i.e., when the dough rises or increases in size as the result of fermentation). Just place the bowl inside the microwave and keep the door closed. The microwave retains the humidity and the warm temperature created by the cloth very well. You’d be surprised how humid and warm the environment inside the microwave is after 1.5 to 2 hours.