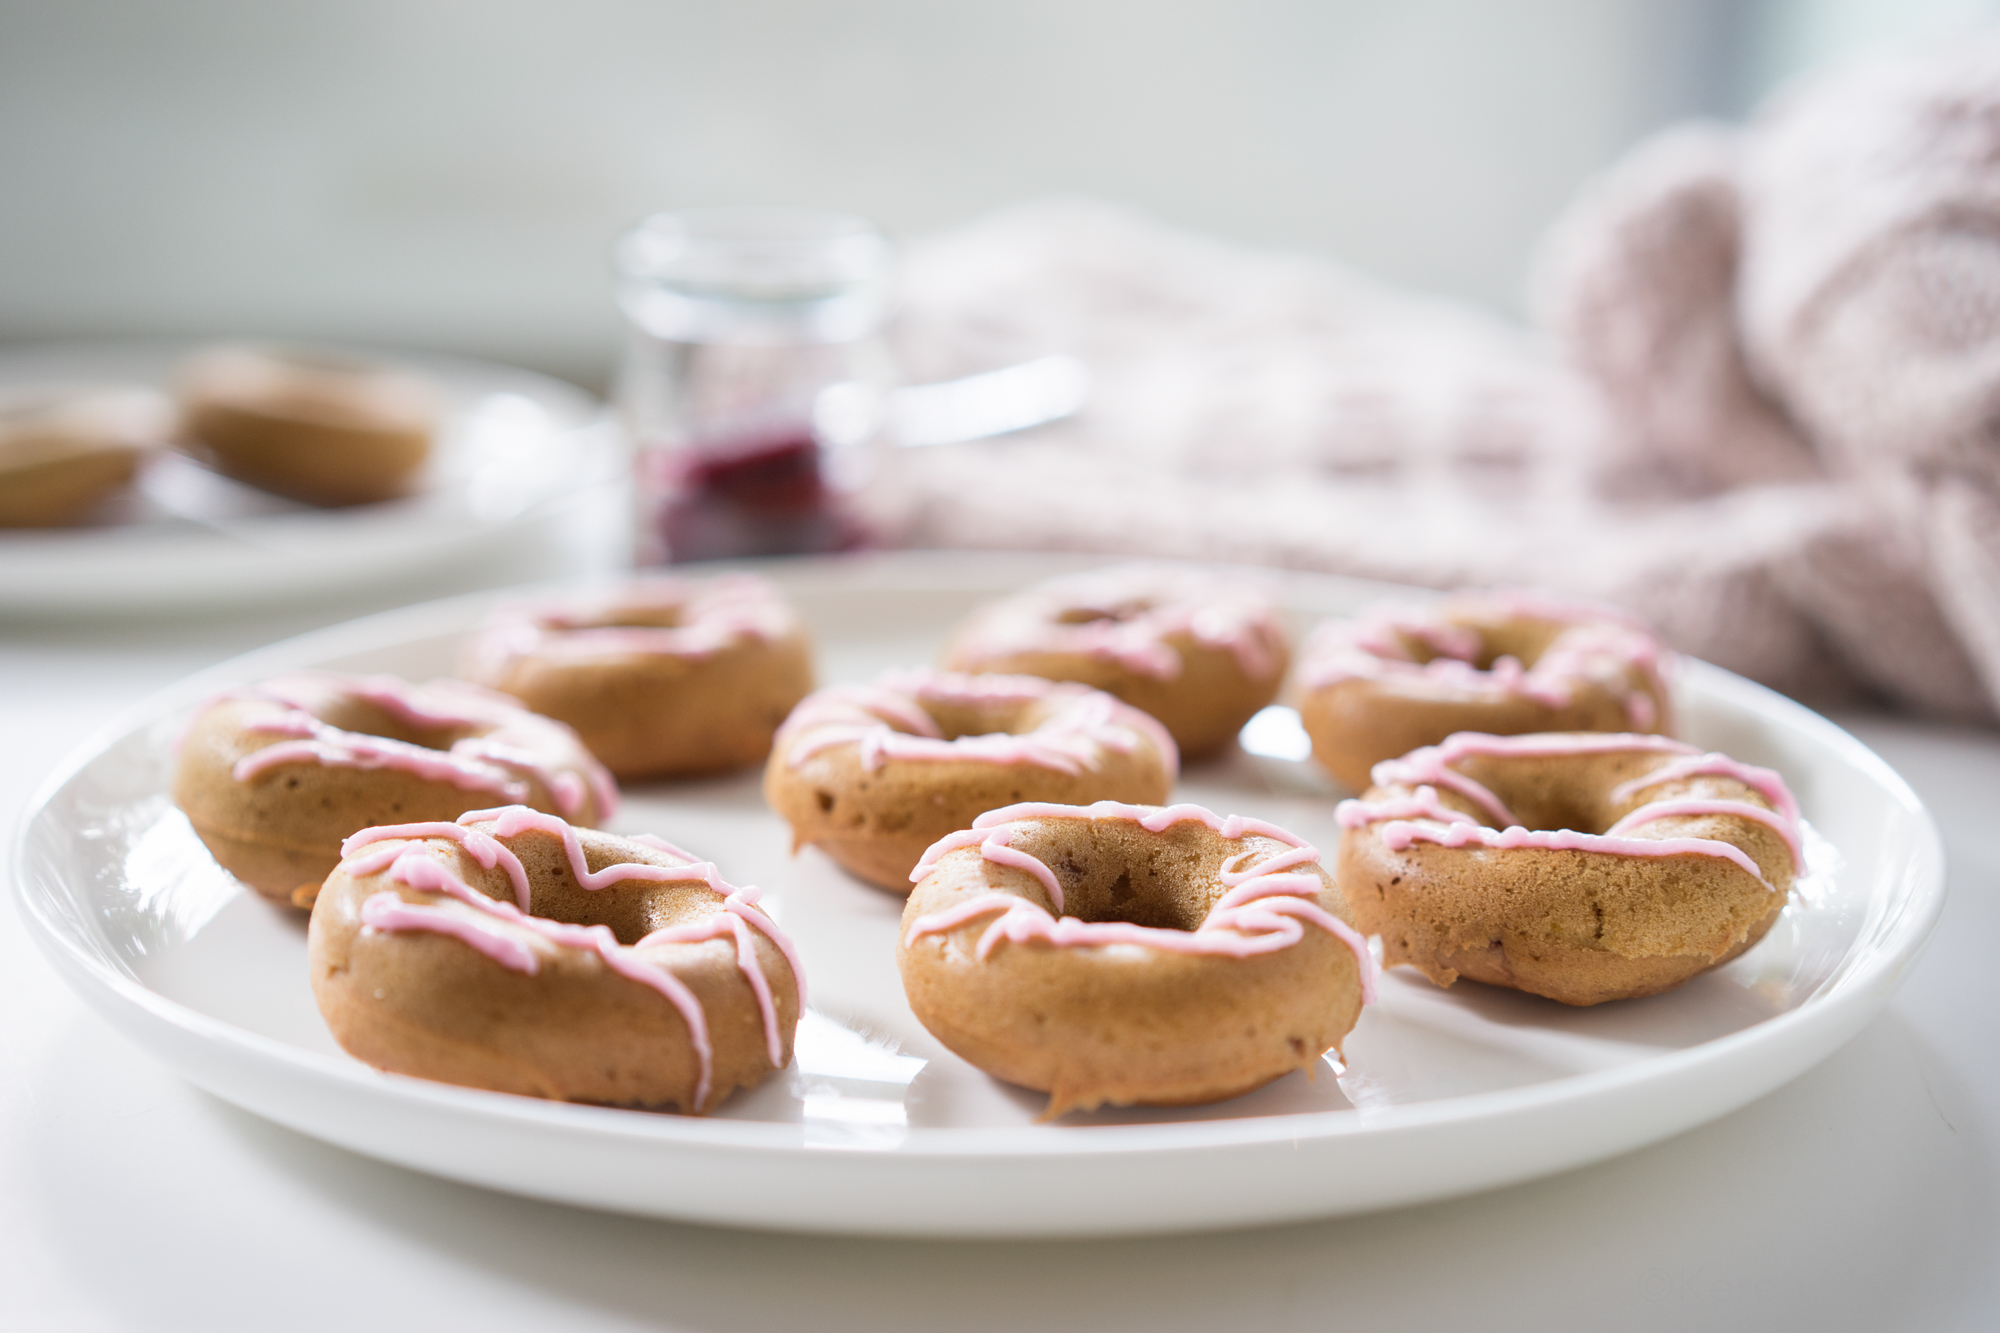
Ginger Bread Donuts

Hey guys… guess what. I made some ginger bread donuts for Christmas. And yes… I’m not the world’s best glazer, so excuse the messy glaze.

But they are delicious!

If you haven’t noticed already, baked donuts are my latest obsession. Any excuse to make them and experiment with different flavours.

If you know me well, I don’t normally glaze my donuts. I’m just not very good at glazing and I’m too impatient for the task. But since it’s Christmas, I’m making a special effort to glaze. Not with your typical sugary glaze though – I just couldn’t bring myself to dip these beauties into a bowl full of icing sugar. Can you guess what I use instead?

How about coconut yogurt mixture! Yep, these ginger bread donuts are covered in creamy, delicious coyo glazing. An unusual combination which amazingly…works! The richness and the slight tartness of the coconut yogurt glaze gives a nice balance the sweetness of the donuts. Yum!

Ginger Bread Donuts

A delicious Christmas treats for everyone. Oil-free, refined sugar free, and can be easily made gluten-free.

Donut Batter

  • 2 cups plain flour (or gluten-free flour for gluten-free version)
  • 1 1/2 cups coconut cream
  • 1 cup soy milk
  • 1/2 cups coconut sugar
  • 1/2 tsp ginger
  • 1/2 tsp cloves
  • 2 tsp cinnamon
  • 1/2 tsp salt
  • 1 tsp baking powder
  • 1/2 tsp bicarb soda
  • 2 tbsp ACV

Coyo Glazing

  • 1/2 cup coconut yogurt
  • 1 tsp vanilla extract
  • 2 tsp maple syrup
  1. Preheat the oven to 180 C.
  2. In a large bowl, combine the dry ingredients with a whisk to mix thoroughly. Combine the wet ingredients in a small bowl.
  3. Mix wet ingredients to dry ingredient and then pipe mixture onto mini donut pan. Make sure to fill the pan only to 2/3 full.
  4. Bake for 10-12 min until a toothpick comes out clean. Allow to cool for couple of minutes, then transfer the donuts onto a cooling rack.
  5. Make the coyo glazing my mixing all the ingredients.


DID YOU MAKE THIS RECIPE?

Please let me know how it turned out for you! Leave a comment below and/or share a picture on Instagram and tag me in the picture.

Keren x

Pina Colada Nice Cream

Summer is coming and I can’t wait to start making cold desserts again!

And now that I am a proud owner of the Vitamix, I can make all sorts of delicious thick nice cream without worrying that my blender will break. The recipe I’m sharing today is Pina Colada Nice Cream. It’s like a healthier, non-alcoholic version of frozen Pina Colada. And it’s super delicious.

pinacolada-nice-cream-1Even though I absolutely adore my Vitamix, I still have a soft spot for my Breville blender. It’s been so reliable that I’m rather sad of the fact that I have to retire it. But I’m not throwing it away completely. I’m keeping it for other non-food hobby projects that require a blender (like making skincare products or candle wax).

Anyway, here’s a quick and easy nice-cream recipe, which you can make without using an ice-cream maker. You just need a blender. You don’t even need a power blender!

pinacolada-nice-cream-11

And if your blender is struggling, just add some extra water a little at a time to ‘help’ your blender process the frozen fruits.

It’s mildly sweet, rich, creamy and minty. Everything I like in an ice cream. It’s really good! I hope you try it.

Pina Colada Nice Cream

Pina Colada nice cream

  • 1 1/2 cup diced pineapple (freeze overnight)
  • ½ cup coconut water (I use <a href="https://rawc.com.au">rawc</a>)
  • ½ cup coconut milk
  • 3 sprigs of mint (about 20 leaves)
  1. Add all the ingredients into a blender.
  2. Blend.
  3. Garnish with some fresh mint leaves and serve immediately

pinacolada-nice-cream-3

Did you make this recipe?

Please let me know how it turned out for you! Leave a comment below or share a picture on Instagram and tag me so I can see your creation.

Flourless Vegan Chocolate Cookies

A couple days ago I attempted to make a vegan ‘brain’ lemon jelly for Halloween. It was an epic fail. L I’m not sure if it was the mould I was using, or the ingredients themselves. I used lots and lots of lemon juice, which may have interfered with the gelling nature of agar-agar. It just didn’t set! So I made these instead – charcoal, heart-shaped flourless vegan chocolate cookies. In hindsight I’m glad I failed the brain jelly experiment because this is, frankly, much better.

The cookie texture was almost wafer-like, with crunchy bits from the seeds and the gooey chocolate surprise here and there. They’re flourless, gluten-free, refined-sugar free (if you’re using sugar-free chocolate), and the best thing about them is they do taste like cookies!

These are not your typical Halloween treats but they look the part and, hey, you don’t come to my blog and expect the usual cookie recipes, do you?

flourless-vegan-chocolate-cookies-9-2

The secret ingredients + tips to making the perfect cookies

Instead of using flour we’ll be using our secret ingredient – black beans. You will need a whole can of black beans for this recipe but you can also use dried beans. If you’re using dried beans, you’ll need to make sure you cook them until they’re soft enough that you can squish a bean with your fingers without much effort.

Note that because I wanted to make my cookies as dark as possible for Halloween, I used Dutch pressed cocoa, black tahini and black sesame seeds. You can use normal cocoa powder, white tahini and sesame seeds if you wish. Or you could replace the tahini with peanut butter and use nuts or dried fruit instead of the sesame seeds. Get creative. You won’t break the recipe, I promise.

flourless-vegan-chocolate-cookies-21

I used a five-centimetre heart shaped cake cutter with a pressed lid, but you can also use the back of the spoon to flatten the dough. The thinner the cookies (less than 5mm), the crispier they will be. I recommend baking a test batch before committing to a particular thickness. I like mine a little bit soft so I made my cookies slightly thicker.

Another thing to consider is that these cookies won’t spread during baking so you can place them fairly close to each other and fit more on the one pan.

So are you ready to make healthy, protein-rich, flourless vegan chocolate cookies that are cool enough for Halloween, and taste great too?

You know you are!

flourless-vegan-chocolate-cookies-15-2


Flourless Vegan Chocolate Cookies

  • 1 can (400g of blackbean (or 1 ½ cup cooked beans), drain and rinse)
  • 1/3 cup Dutch pressed cocoa powder
  • 1/3 cup dark chocolate (finely chopped (I use Chocolate Counter))
  • 1/2 cup coconut sugar
  • 2 Tbsp. coconut butter or coconut oil
  • 2 Tbsp. black sesame seeds
  • 2 Tbsp. chia seeds
  • 1 Tbsp. black tahini
  • 3 Tbsp. water
  • 1 tsp. vanilla extract
1/3 cup chopped dark chocolate
  • ¼ tsp. sea salt (plus extra for sprinkling)
  1. Preheat oven to 180°. Line a baking sheet with non-stick baking paper.
  2. Mix chia seeds and 3 Tbsp water in a bowl and set aside for 5 minutes.
  3. Place beans, coconut butter, cocoa powder, sugar and salt in a food processor and blend until well combined. Transfer to a bowl.
  4. Add chopped chocolate and mix to combine.
  5. Spoon cookie batter onto the lined baking sheet (or cake presser). Flatten top of cookies slightly using the back of the spoon (aim for less than 5mm thickness). Note that they will not spread when baking.
  6. Sprinkle with extra sea salt. Bake for 15 minutes. Let cool on cooling rack and enjoy!

Did you make this recipe?

Please let me know how it turned out for you! Leave a comment below or share a picture on Instagram and tag me so I can see your creation.

Keren x

(Vegan) Blueberry Donuts – Halloween Edition

These (Vegan) Blueberry Donuts were actually a two-fold experiment: the first stage was to test if I could make blueberry donuts with fresh blueberries, and the second was to experiment with stop-motion technique to give the resulting video a bit of ‘magic’. Stop-motion is a technique which uses a lot of still frames with the object moving in small increments, creating the illusion of movement when the series of frames is played as a continuous sequence, like an animation.

So this recipe’s video incorporates a bit of wizardry (like summoning ingredients and baking with a blink of an eye), and I loved it, because, after all, who doesn’t love a touch of magic in the kitchen?

vegan blueberry donuts

Tips on making these vegan blueberry donuts

These donuts are based on my Lifechanging Donuts recipe. To make this version you just need to add 1/2 cup of blueberries to the batter.

Important note: to make sure the blueberries don’t stick to the bottom of the mould (I recommend using a silicon mould), be sure to cover the base of the silicon pan with the batter first (without blueberries) and then follow with some more batter with two or three blueberries. This will prevent the berries from sticking to the bottom of the mould which makes the donuts impossible to remove without breaking.

Alternatively, you can add the blueberries right at the end, when the mould has been filled with the batter (see picture below), so the blueberries are on surface, however, I personally like to top the mould with just a bit extra batter to cover the blueberries and create a smoother surface.

vegan blueberry donuts

Anyway, I had so much fun making these blueberry donuts and the associated video. The video production was a bit more technical than I expected: you have to think ten steps ahead, and make sure everything is just perfect, because you don’t want to start all over again. The editing process was quite lengthy (about three hours), but I really enjoyed it, and I can’t wait to explore the stop-motion video making realm. If you like the video, don’t forget to subscribe to my new YouTube channel. I’d really appreaciate it.

vegan blueberry donuts

Did you make this recipe?

Please let me know how it turned out for you! Leave a comment below or share a picture on Instagram and tag me so I can see your creation.

Keren x

Baked Beetroot Donuts

Baked Beetroot Donuts

Seriously, who would have thought that beetroot makes delicious donuts? But they do! I was inspired by my friend Jo to create something with beetroot in it and the first thought that leapt in my mind was – beetroot donuts! “Can you pull it off, Keren?” asked my inner voice. Hell, yeah! Challenge accepted.

baked-beetroot-donuts-1

Too easy! I can’t believe how well these donuts turned out. Not only are these some of the easiest donuts to make, they’re also some of the quickest. All you need to do is blend the beet with the wet ingredients, and mix in with the dry ingredients, and voila – you have a delicious, incredibly cute pink-coloured batter.

baked-beetroot-donuts-16

I wish they retained that pink hue a bit more but they turned a bit brown after baking. However, you can top them with some pink beetroot frosting, using only coconut butter, sugar and a little of beetroot juice. Don’t they look adorable? As you can see, I’m shocking at decorative frosting (as is evident from my squiggly, worm-y  stripes), but the good thing is that the donuts are delicious on their own!

baked-beetroot-donuts-11

Honestly, I hope you try this Baked Beetroot Donut recipe!

  • It’s healthy
  • Delicious
  • Dairyfree
  • Eggfree
  • Baked, not fried

And it takes less than 10 minutes to put together, and around 10 more minutes in the oven.

So if you ever have some leftover beetroot and you’re craving some healthy sweets, make these Baked Beetroot Donuts. You won’t regret it.

Baked Beetroot Donuts (Vegan)

Dry Ingredients

  • 1 cup plain flour (or gluten free flour for 
gluten-free option)
  • 3 tbsp. coconut sugar
  • 1 tsp. baking soda
  • ¼ tsp salt

Wet Ingredients

  • 100 g baby beetroot (peeled and cooked, I use vacuumed beets from LoveBeets but you could also use canned beets.)
  • ¼ cup melted coconut oil
  • ¼ cup soy milk (room temperature)
  • ½ tsp. vanilla extract
  • 1 tbsp. chia seed mixed with 3 tbsp water (let sit for 5 min)
  • ½ tsp. vanilla extract
  • 1 tbsp. apple cider vinegar
  • Zest of 1 lemon
  1. Preheat the oven to 180 C.
  2. Add all wet ingredients into a blender and blend until well combined.
  3. In a large bowl, combine the dry ingredients with a whisk to mix thoroughly. Stir in the blended wet ingredients and mix until just combined.
  4. Scoop 1 tbsp onto mini donut pan. Smooth the surface with the back of the spoon. Make sure to fill the pan 1/2 full or you will have mushroom-shaped donuts instead.
  5. Bake for 10-12 min until a toothpick comes out clean. Allow to cool for 5 minutes, then remove the donuts from the pan.

Variation : add 1/3 cup of desiccated coconut and 2 tablespoons of soymilk
These donuts freeze well so you can make a double batch and freeze them, if you can wait that long. They last about a month in the freezer.
Frost with pink beetroot frosting. Mix 2 tablespoons of coconut butter, 1 tablespoon of caster sugar or your favourite sweetener and a few drops of beetroot juice to get your desired pink hue

baked-beetroot-donuts-8

Did you make this recipe?

Please let me know how it turned out for you! Leave a comment below and/or share a picture on Instagram and tag me in the picture.


Keren x

The Life Changing Donuts

Today, we’re gonna transform some lives. With real good donuts. Behold, the Life Changing Donuts.

Lifechanging donut-5

How life changing are these donuts, really?

For me, it was like making a new friend: when you’re craving a donut-like experience and you’ve learned how easy it is to make a bunch of these babies, your life will never be the same again.

They’re baked not fried, egg-free, dairy-free, and 100% vegan. You can make them gluten-free by using gluten-free flour instead of normal plain flour and you could easily make them refined sugar-free, as well, if you opt to use coconut sugar or Natvia instead of plain sugar. They’re versatile, incredibly healthy and very tasty! The best thing about them is that they won’t make you feel guilty or sick after eating them. Don’t you just hate that remorseful feeling after a delightful but sinful meal, even though it’s a treat and you know you shouldn’t feel bad about it? You just can’t fool your body.

Lifechanging donut-2

By the way, these donuts aren’t just for girls. My boyfriend Nat likes them so much that I have to make a double batch just so there’s some left over for me! If you follow me on my social media accounts you’ll see I’ve made four batches already over the last two weeks! It’s actually quite fun making these donuts, so I don’t mind it at all.

You will need a silicone donut pan

One piece of equipment you’ll need to make these Life Changing Vegan Donuts to perfection is a silicone donut pan. I use a mini donut pan like the one below, which you can get from Amazon.

You can also get a normal size donut pan. You just might need to adjust the baking time to allow for a bigger donut, maybe 15-17 minutes instead of 1o-12 minutes.

Did I tell you that these life changing vegan donuts are healthy, but tasty?

Lifechanging donut
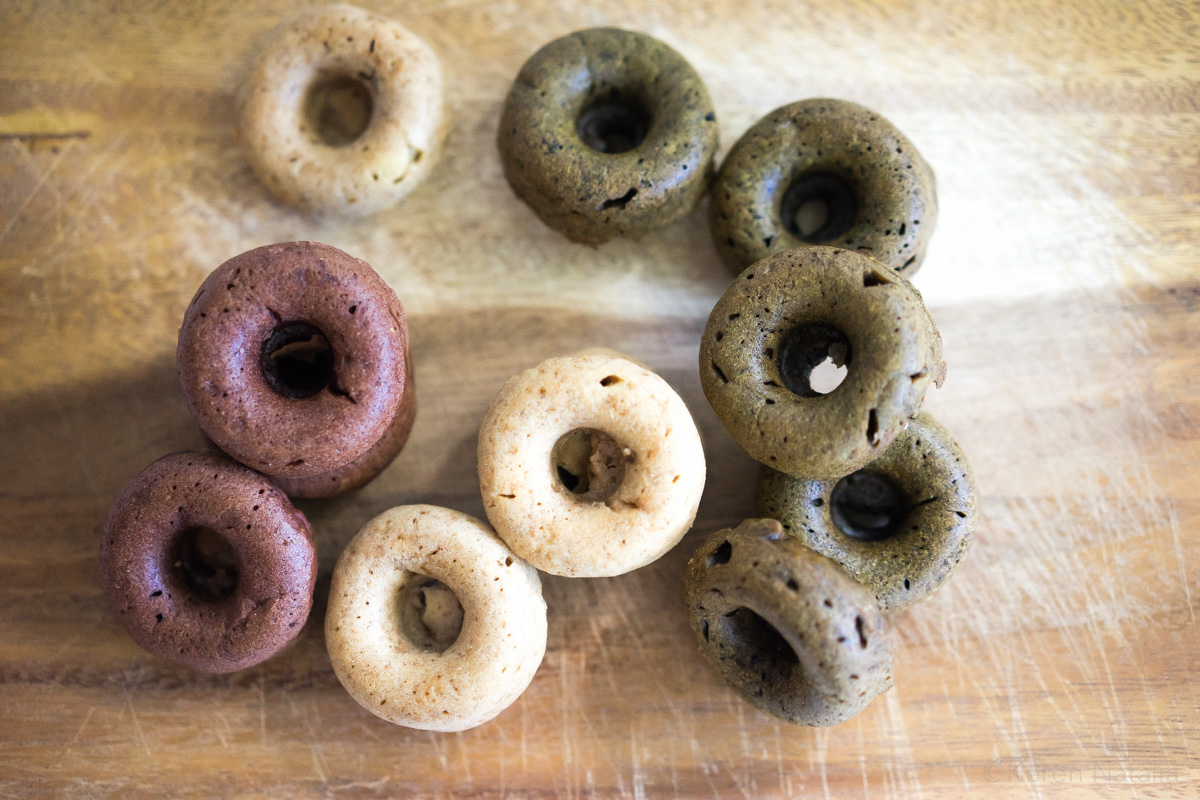
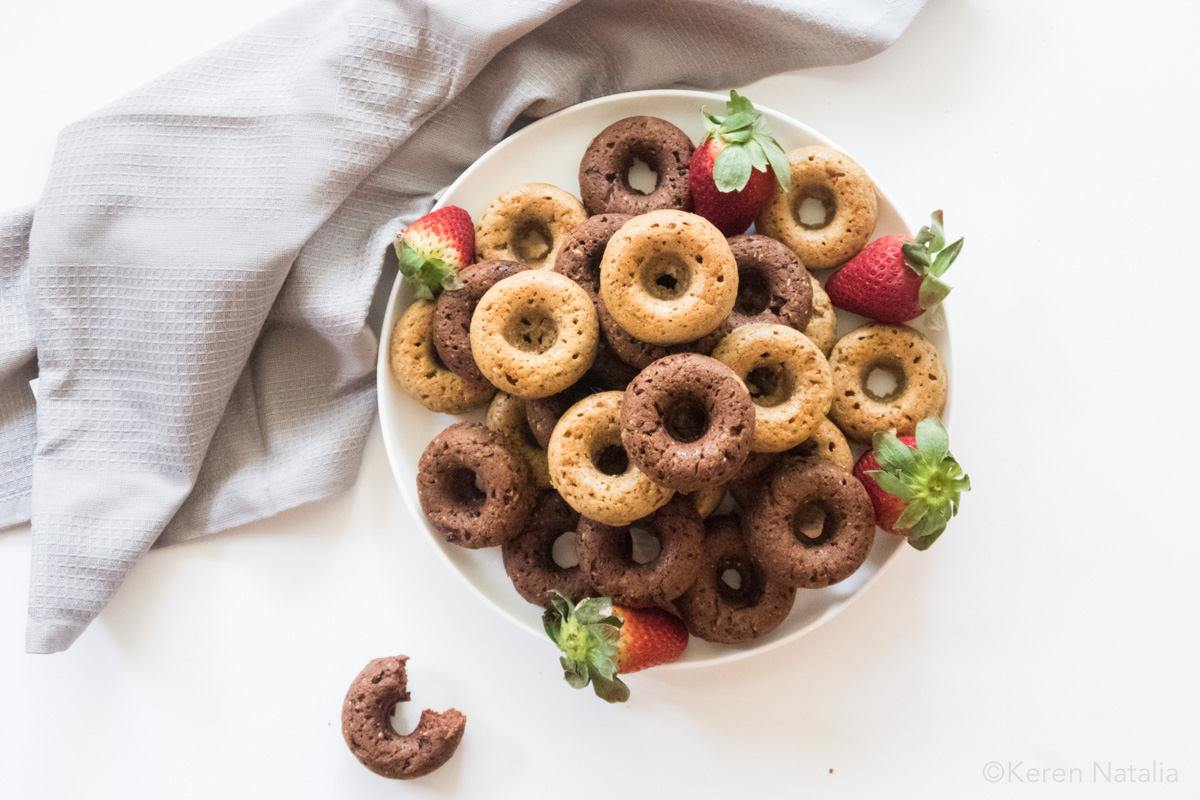
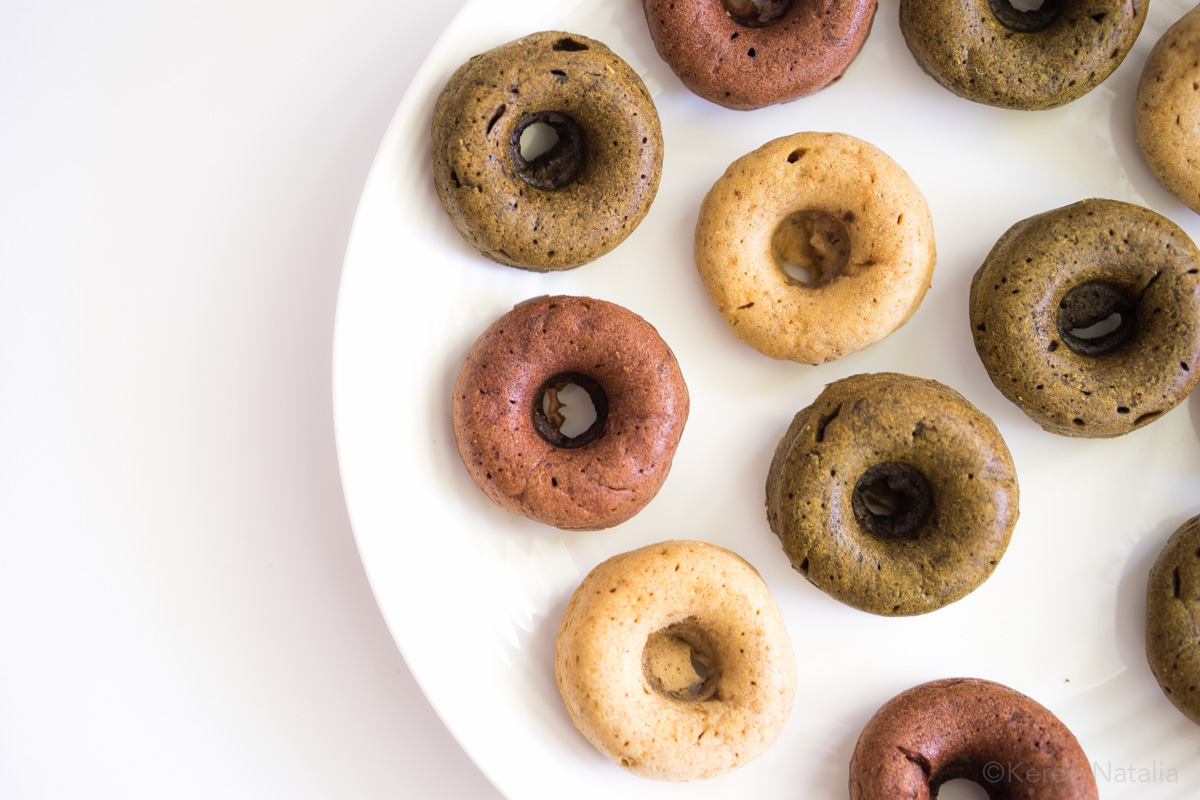
Honestly, these are one of the easiest things I’ve made in a while They’re up there with pancakes. You just mix the dry ingredients, then the wet ingredients, then combine the two, and finally bake. Too easy.

I’m doing a lot of testing and experiments to see how far I can push this recipe before it starts to well… fail. I managed to make an oil-free version of the donuts last night so I’m looking forward to sharing that one with you. In the meantime, here’s the recipe for the first version of the Life Changing Donuts.

Lifechanging Donuts (1)


Life Changing Donuts

Dry Ingredients:

  • 1 cup plain flour (or gluten free flour for 
gf-free option)
  • 1/4 cup sugar (coconut sugar or your favourite sweetener)
  • 1 tsp baking powder
  • 1/2 tsp bicarb soda
  • 1/4 tsp salt
  • 1/4 tsp allspice
 powder * (or your favourite flavours, see notes)
  • 1/4 tsp ground cinnamon

Wet Ingredients:

  • ¼ cup melted coconut oil
  • 1/2 cup soy milk
  • 1 tsp. apple cider vinegar
  • 1 tbsp. chia seed mixed with 3 tbsp water (let sit for 5 min)
  • 1/2 tsp. vanilla extract
  1. Preheat the oven to 180 C.
  2. In a large bowl, combine the dry ingredients with a whisk to mix thoroughly. Combine the wet ingredients in a small bowl.
  3. Mix wet ingredients to dry ingredient and then scoop 1 tbsp onto mini donut pan. Smooth the surface with the back of the spoon. Make sure to fill the pan 1/2 full or you will have mushroom-shaped donuts instead. Trust me, they have a lot of lift in them.
  4. Bake for 10-12 min until a toothpick comes out clean. Allow to cool for 5 minutes, then remove the donuts from the pan.

Flavour Ideas:
Matcha – add 1 tablespoon of matcha powder
Chocolate – add 2 tablespoon of cacao powder or Dutchpressed chocolate
Coffee – add 1 tablespoon of freeze dried coffee or a shot of espresso

These donuts freeze well so you can make a double batch and freeze them, if you can wait that long. They last about one month in the freezer.

Breakfast, Snack


Did you make this recipe?

Please let me know how it turned out for you! Leave a comment below and/or share a picture on Instagram and tag me in the picture.

Keren x


Vegan Protein Power Balls

I love a good protein ball! And judging from the number of balls I see on the internet, a lot of people love them too. I think protein balls are taking over the food world. They’re slowly invading the counter space at the city cafes, the health food stores, the Instagram, and soon… your very own kitchen, if not already. At least I hope so, with this recipe.

Protein Powerball-9

But before you make them, be warned! There vegan protein power balls can be quite addictive so you want to be careful not to eat all of them in one go! They can also give you a burst of energy and alertness so it’s best not to have them at night. My boyfriend said that they trigger vivid dreams when he consumes them at night. I won’t get to excited about this potential lucid dreaming side effect as I’ve never experienced this myself.

Protein Powerball-18

Why I love these vegan protein power balls

First of all, there’s no cooking or baking involved. It’s a pretty straight forward mix and roll operation. You can adjust the mix before you roll and because you don’t need to cook them, you can eat them as you roll (not advisable for those with a ball addiction :P). They’re rich in fibre, protein, healthy fats, slightly sweet and very moreish. Perfect for snacking in between meals or as an afternoon pick me up.

Protein Powerball-12

Vegan Protein Power Balls
Recipe Type: Snack
Author: Keren
Prep time:
Total time:
Serves: 25 balls
Ingredients
  • 1 1/4 cup of your favourite nut flour (I use 1 cup ground almond and 1/4 cup coconut flour)
  • 3 Tbsp coconut oil
  • 1 heaped scoop protein powder (my favourite is Bioglan rice protein powder and Sunwarrior raw protein powder)
  • 2 tsp maca powder
  • 12 dates (about 1/2 cup)
  • 1/4 hot water
  • 2 Tbsp cacao powder
  • A generous pinch of salt
  • For Coating
  • 2 Tbsp of cacao powder, matcha powder, or dessicated coconut
Instructions
  1. Place all ingredients in a food processor and process until smooth
  2. Take 1 heaped tablespoon of mixture and roll into balls
  3. Dust or roll the balls onto a couple of tablespoon of cacao powder
Notes
Make a double batch in the weekend and freeze them to save time.[br]You could use oat flour instead of nut flour. You can make oat flour by blending rolled oat in a blender for a few minutes until it resembles fine crumbs

Did you make this recipe?

Please let me know how they turned out for you! Leave a comment below and/or share a picture on Instagram and tag me in the picture :)


Keren x

The secret to fluffy, pillowy vegan pancakes

Today I will share with you the secrets to perfectly round fluffy, pillowy vegan pancakes that will rock your world.

Blueberry pancake-6

The world (or your mum) may have once convinced you that you can’t make a soft, fluffy baked goods without eggs. But that world is changing now. Welcome to the age of egg-free cooking and baking. We’ve got pancakes, baby.

Soft fluffy vegan pancake

  1. Do not overmix the batter. Use a spoon or a fork to mix it all through, they don’t need to be smooth and God forbid, do not use an electric mixer!
  2. Do not use the batter straightaway. Let the batter rest for about ten minutes to allow the gluten to settle and the baking powder and vinegar to react. Usually this is about the time you need to get your pan out, oil it and preheat it for cooking.
  3. Use medium low heat. Not hot, not low but medium low, meaning slightly on the low side but not too low. Each stove is different and so you will need to play a bit with your stove to figure out the right setting.
  4. Do not use too much oil. You want a very thin layer of oil. You can try using an oil spray or use a paper towel to spread the oil on the pan. You can also use a non-stick pan.
  5. Do not overcrowd the pan. Make one or two pancakes at a time (unless you have a very large pan). If making more than one make sure you leave enough room between each pancakes as the batter may spread a little before they start to puff up.

Bonus Pro Tip: Use an oiled measuring cup to scoop out the batter. This will ensure your pancakes are all the same size and the oil prevents batter from sticking to the cup.

Fluffly Vegan Blueberry Pancake

Let the chicken have their eggs as our pancakes do not need them to puff, fluff and be as the soft, pillowy goodness that they are meant to be.

Now let’s pancake.

Blueberry pancake-3


Blueberry vegan pancakes
Recipe Type: Breakfast
Author: Keren
Prep time:
Cook time:
Total time:
Serves: 4-6
Soft, fluffy pancakes with
Ingredients
  • Dry ingredients
  • 1 cup flour
  • 1 1/2 tbsp baking powder
  • ¼ tsp salt
  • Wet ingredients
  • 1 cup soy milk (or your favourite nut milk), I use Nutrisoy brand
  • 1 tsp apple cider vinegar
  • 1 tbsp sugar, mixed in 3 tbsp water
  • 2 tbsp vegetable oil (plus extra to oil the pan)
  • Half a cup of blueberries
Instructions
  1. In a large mixing bowl, sift together all the dry ingredients. Make a well in the center.
  2. Mix all the wet ingredients together.
  3. Add the wet ingredients into the dry ingredients and mix until just combined. Careful not to overmix the batter (a few lumps are ok).
  4. Let the batter rest while you preheat the pan over medium-low heat.
  5. Lightly coat the pan in oil and preheat your pan for about 5 minutes. You could also use a non-stick pan.
  6. Pour about 1/3 cup of batter of pancake batter on the pan to form a circle. Drop 5-6 fresh blueberries into the pan. Cook for about 3 minutes until bubbles start to appear. Flip and cook for another 3 minutes or so until the pancakes is golden
  7. Keep pancakes covered to keep warm until ready to serve. Top up with more blueberries or maple syrup. Enjoy!
Notes
You can replace blueberries with chopped bananas, chocolate, coconut flakes, nuts, anything you want really.


Blueberry pancake-4


Tempe Scramble

One of the things I love to make for breakfast is tempe scramble. It’s perfect for weekend brunch or even for lunch. Actually, it doesn’t really matter what time of the day you have it. Indonesians often eat lunch for breakfast, dinner for breakfast and dessert for at any time of the day so you won’t be breaking any cultural traditions. I know this because I grew up in Indonesia and I’ve had mee-goreng, fried rice and toasted chocolate sprinkle sandwiches for breakfast. People still do.

Tempe is fermented soybeans originally from Indonesia. Yes, the correct spelling is without the ‘h’. It’s pronounced tém-pé, without the ‘h’ sound at the end. Here in Australia (and I guess a lot of Western countries) everyone spells it incorrectly. I’ve started doing that too, just so people know what I’m talking about. But tempe, not tempeh, is the correct spelling, and I will start spelling it correctly now since I’m Indonesian and I should know better.

Tempe Scramble-5-2

I’m surprised a lot of people have not tried tempeh, which is a shame because tempeh is even better than tofu in terms of its nutritional value and wholesomeness. I speculate a lot of people are afraid to try it or they’ve had a bad experience before. Maybe it wasn’t cooked right, or maybe the tempe they used wasn’t fresh. Fresh tempe smells and tastes delicious. The fermentation process that makes tempe (transforming the soybean into a cake or patty form) gives it a firm texture and an earthy mild flavour. It also has the same fermented aroma as cheese. Try to find raw organic tempe if you can. They can be fresh or frozen, but make sure they’re not pre-cooked or flavoured. You can also make them yourself. It takes a fair bit of time and it can be daunting at first but it’s actually quite simple, once you know the tricks of the trade. I sometimes make my own tempe but these days I don’t have a lot of time so I just buy them. I use the Nutrisoy brand and I can say they make great, authentic tempe! You can find them at Indonesian or Malaysian grocery stores.

Tempe Scramble-7

Why I love this tempe scramble

Tempe is great source of plantbased protein, Vitamin B12, iron and probiotics. Tempe scramble is one of the easiest things you can make using tempe. If you have a food processor, you can make it even quicker by chopping all your ingredients (separately of course) using the food processor and all you need to do is cook! Regardless of how you cut up the ingredients, it’s a great meal for when you want to make something fast and it creates an aromatic, slightly crunchy scramble with a somewhat meaty and chewy texture. Serve the tempe scramble with a slice of toasted sourdough bread or some steamed vegetables and you have a deliciously filling meal.

Tempe Scramble
Recipe Type: Breakfast
Prep time:
Cook time:
Total time:
Serves: 2
An aromatic, slightly crunchy eggless scramble made with a somewhat meaty and chewy texture. Rich in plantbased protein, nutritious and delicious
Ingredients
  • 250 raw fresh tempe, minced or grated
  • 1 onion, sliced
  • 3 garlic cloves, sliced
  • 1 tablespoon of olive oil
  • 1 tablespoon soy sauce
  • 1 tablespoon nutritional yeast
  • a pinch of cayenne pepper
  • salt and pepper
Instructions
  1. Using a non-stick frying pan, heat olive oil over medium heat. Add onion and garlic. Cook for about two minutes or until soft.
  2. Add tempe into the pan. Stir for a minute.
  3. Add soy sauce, nutritional yeast and cayenne pepper. Stir for a few more minutes until golden brown.
  4. Add a pinch of salt and pepper. Taste and adjust seasoning.
  5. Serve with toasted sourdough bread or some steamed vegetables.
Notes
Add spinach with kale or any other greens you like: diced asparagus, spring beans, or even peas and corns.[br]Add some shredded dairy-free cheese for a cheesy twist.[br]Add a tablespoon of chia or linseed (or your favourite superfood) for nutritional boost.[br]Use this to fill wrap or sandwich, layered with sliced avocado and tomato.

Did you make this recipe?

Please let me know how it turned out for you! Leave a comment below and don’t forget to share a picture on Instagram and tag me. I’d love to see your creation.

With love,

Keren

Tempe Scramble-3

Chandra Koftas

This recipe has a special place in my heart as Isa Chandra personally recreated the dish when she came to Sydney a few years ago to attend the Sydney Vegan Festival. It was delicious. The original recipe actually comes with a creamy cashew sauce but I like to make these koftas as is, without the sauce, and use them to fill a veggie wrap or have as finger food.

Kofta traditionally refers to a meatball or meatloaf, and is popular in Indian cuisine. It usually consists of ground meat mixed with spices, but these koftas are vegan by using chickpeas and zucchinis!

Chandra Kofta-3-2
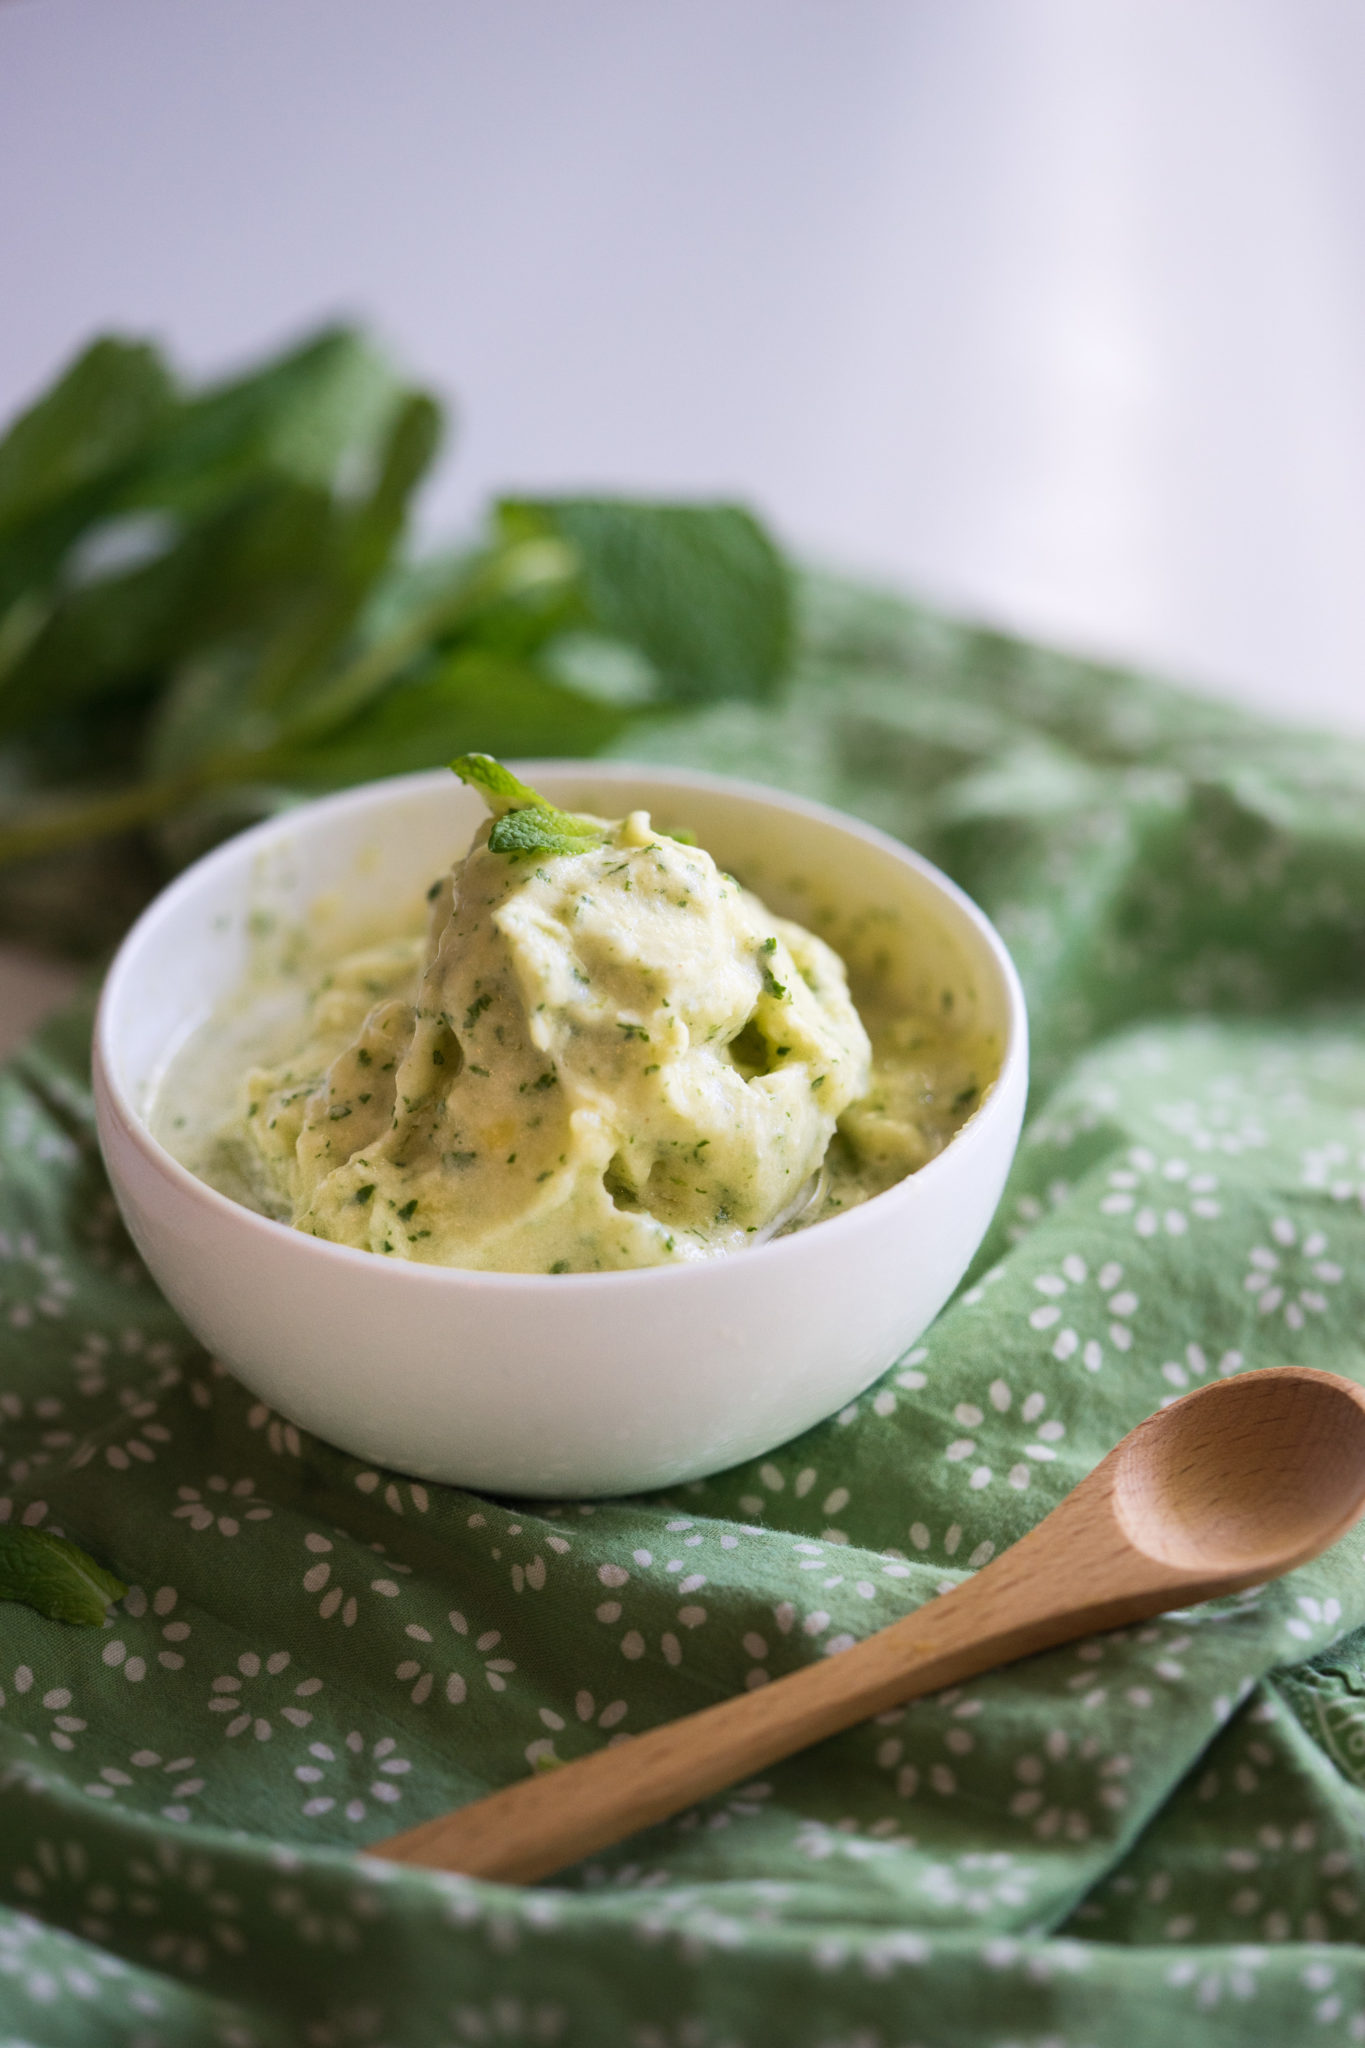
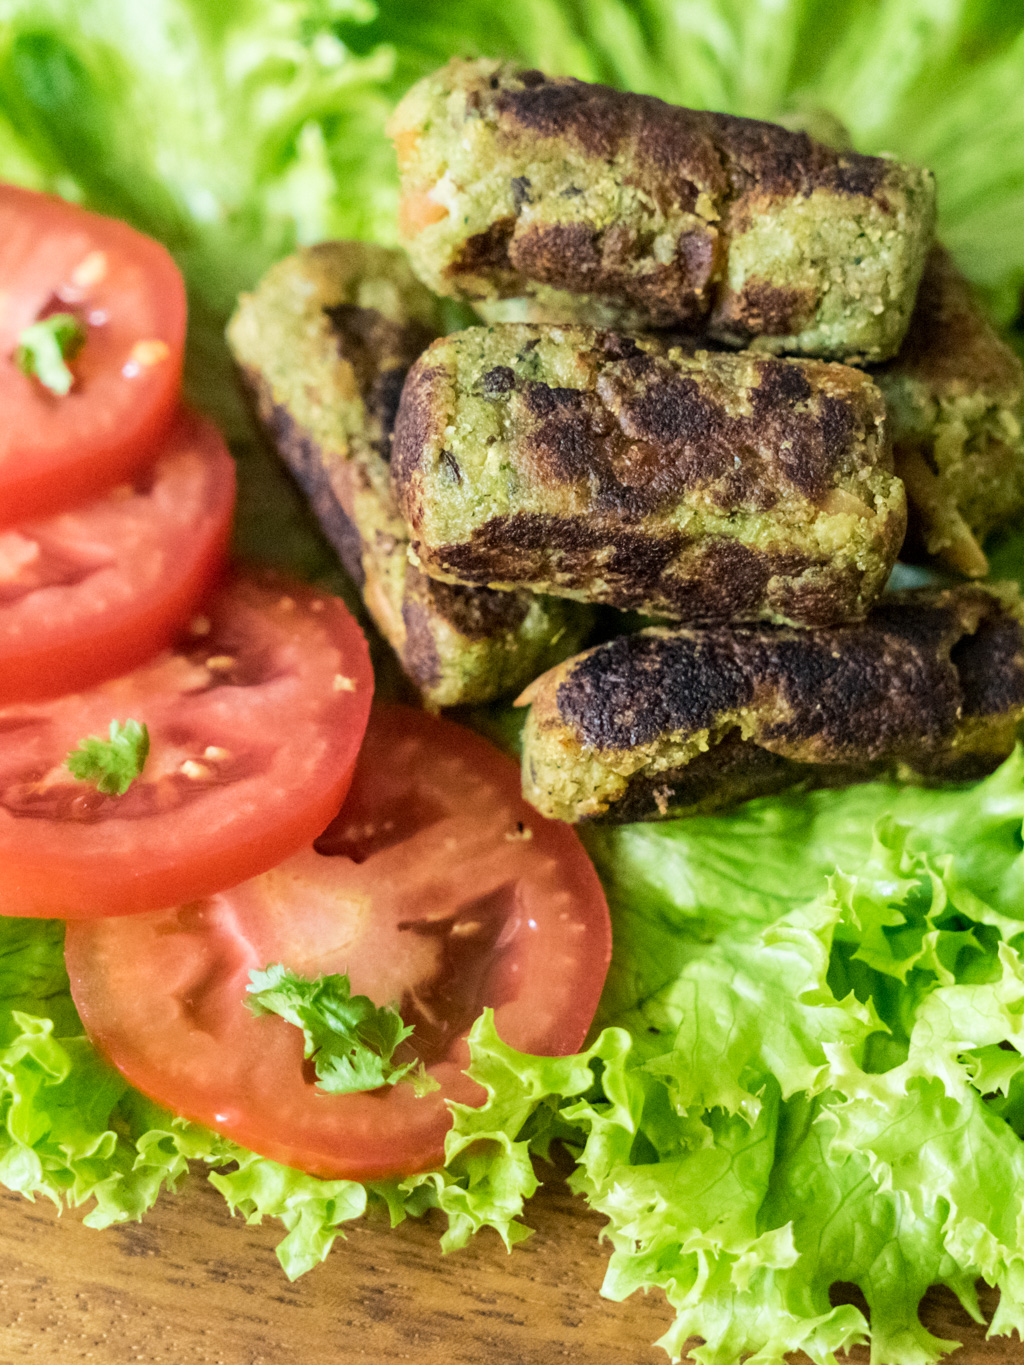
Why I Love These Chandra Koftas

These koftas are a feast of flavours and texture. Bite into the crispy skin and you’ll find a soft dumpling with ‘surprise’ bits of toasted almond and zucchini on the inside. These koftas are substantial but light at the same time.


Chandra Koftas
Author: Keren
Prep time:
Cook time:
Total time:
Serves: 20
Recipe adapted from Isa’s Does It Cookbook
Ingredients
  • 1 can chickpeas, rinsed and drained
  • 1 cup slivered almonds
  • 3 teaspoons cumin seeds
  • 500g zucchini, shredded
  • 1/2 cup finely chopped fresh coriander
  • 2 tablespoon minced fresh ginger
  • 5 cloves garlic, minced
  • 1 teaspoon salt
  • ½ tsp of freshly ground black pepper
  • 2 ½ cups Panko breadcrumbs
  • Spray oil
  • Fresh coriander, for garnish (optional)
Instructions
  1. Prepare the kofta mixture
  2. In a medium bowl, mash the chickpeas until they are mushy but not quite pureed.
  3. Preheat a large, heavy pan over a medium heat. Toast the almonds for about 7 minutes, tossing frequently, until they are golden and browned in some spots. Transfer immediately to the bowl containing the chickpeas. Next, toast the cumin seeds for 3 minutes or so, until fragrant and a shade or two darker. Transfer those to the bowl as well.
  4. Add the zucchini, coriander, ginger, garlic, salt, and black pepper, and mix well.
  5. Now add the breadcrumbs and use your hands to mix and mush until it holds together. Cover with plastic wrap (or a plate) and place in the fridge for at least 30 minutes.
  6. Preheat oven to 180C. Line a baking tray with baking paper to keep the formed koftas from sticking. Scoop up about ¼ cup of the mixture. Roll between your hands to pack it well, and then roll into a spherical shape. Set on the baking paper and continue to form all koftas (I got about 20 koftas).
  7. Spray the koftas with cooking oil spray and bake for about 20 minutes or until brown. Roll them around halfway to get them browned on all side.
  8. Garnish with coriander and serve with some rice.

Please let me know how it turned out for you! Leave a comment below and don’t forget to share a picture on Instagram and tag me. I’d love to see your creation.

Chandra Kofta-1