Vegan Passionfruit Ice Cream Cups
Today I’m sharing my latest kitchen creation – Vegan Passionfruit Ice Cream Cups. Make this when you need some icy treats, yesterday. 
And yes it’s currently very cold in Sydney and I have no business making ice treats. However, I’m one of those weirdos who love eating ice cream when it’s freezing colds. Why not? The ice cream melts slower and it reminds me of summertime :)

The recipe for this dessert is very simple. You don’t need to cook or churn the batter, just blend and chill. Also, the great thing about making them in little cups is that they defrost a lot quicker and you can just bite straight into them rather than messing around with a scooper. You don’t even need to make the base but it gives a lovely flavour and texture to the ice-cream.
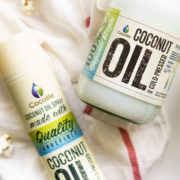
Note: Since the recipe uses coconut cream, you’ll need to do a bit of preparation the night before. Leave one or two cans (use two cans) of coconut milk in the fridge at least overnight. The cooling process will allow for the ‘cream’ to float to the top, which is what we need. You can use the liquid part for smoothies or mix it with coffee to make a nice cold coffee drink.

In this recipe I’m using Norbu – a sweetener made of monk fruit extract. It’s tastes just like sugar but with 96% less calories and none of the bitterness of other sweeteners. I’ve been experimenting with it and I’ve used it in this desert. I love it.
Monk fruit or known by Chinese as ‘luo han guo’ has been around for century and is commonly used by Chinese as medicinal herb for treating cough and sore throat. I still remember my mum making me a cup of this luo han guo tea, whenever I have a sore throat. You can other sweetener if you like such as maple syrup, agave nectar, stevia or even sugar. If you’re using stevia, make sure that you adjust the amount to achieve the sweetness of 2 tablespoons sugar, which is what we need.

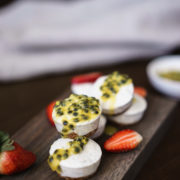
Vegan Passionfruit Ice Cream Cups

Bite-size, no churn ice cream recipe perfect for entertaining. Just blend and chill!
- Base
- 1/2 cup raw almond
- 5 pitted medjool dates
- 1 tbsp coconut flakes (or shredded coconut)
- 1 tbsp coconut oil
- a pinch of salt
- Filling:
- 1 cup coconut cream (the thick creamy bits from a can of coconut milk left in the fridge overnight)
- 2 tbsp of your favourite sweetener (I use Norbu)
- 1 1/2 tbsp lemon juice (about half a lemon)
- 2 tbsp Passionfruit pulp (plus extras for serving)
- Add all the ingredients for the crust into a food processor or a small power blender until a dough forms.
- Place about a teaspoon into a mini muffin silicon tray and press down with your fingers to flatten and cover the base. Place in the freezer while you make your ice cream filling.
- Blend all the ingredients until is well-combined and smooth. Pour over the base, cover with foil and place back into the freezer for at least 3 hours.
- Take out of the freezer and allow to slightly defrost for about 5-10 minutes before eating.
If you make this, I’d love to hear from you. Leave a comment below or find me on Instagram and share your creation. Don’t forget to tag me @passionatelykeren so I won’t miss your post.
Keren x


 You can be creative with the filling. I love to use fresh fruits like sliced banana and strawberries with a generous drizzle of chocolate spread (I’m a big fan of